
Model
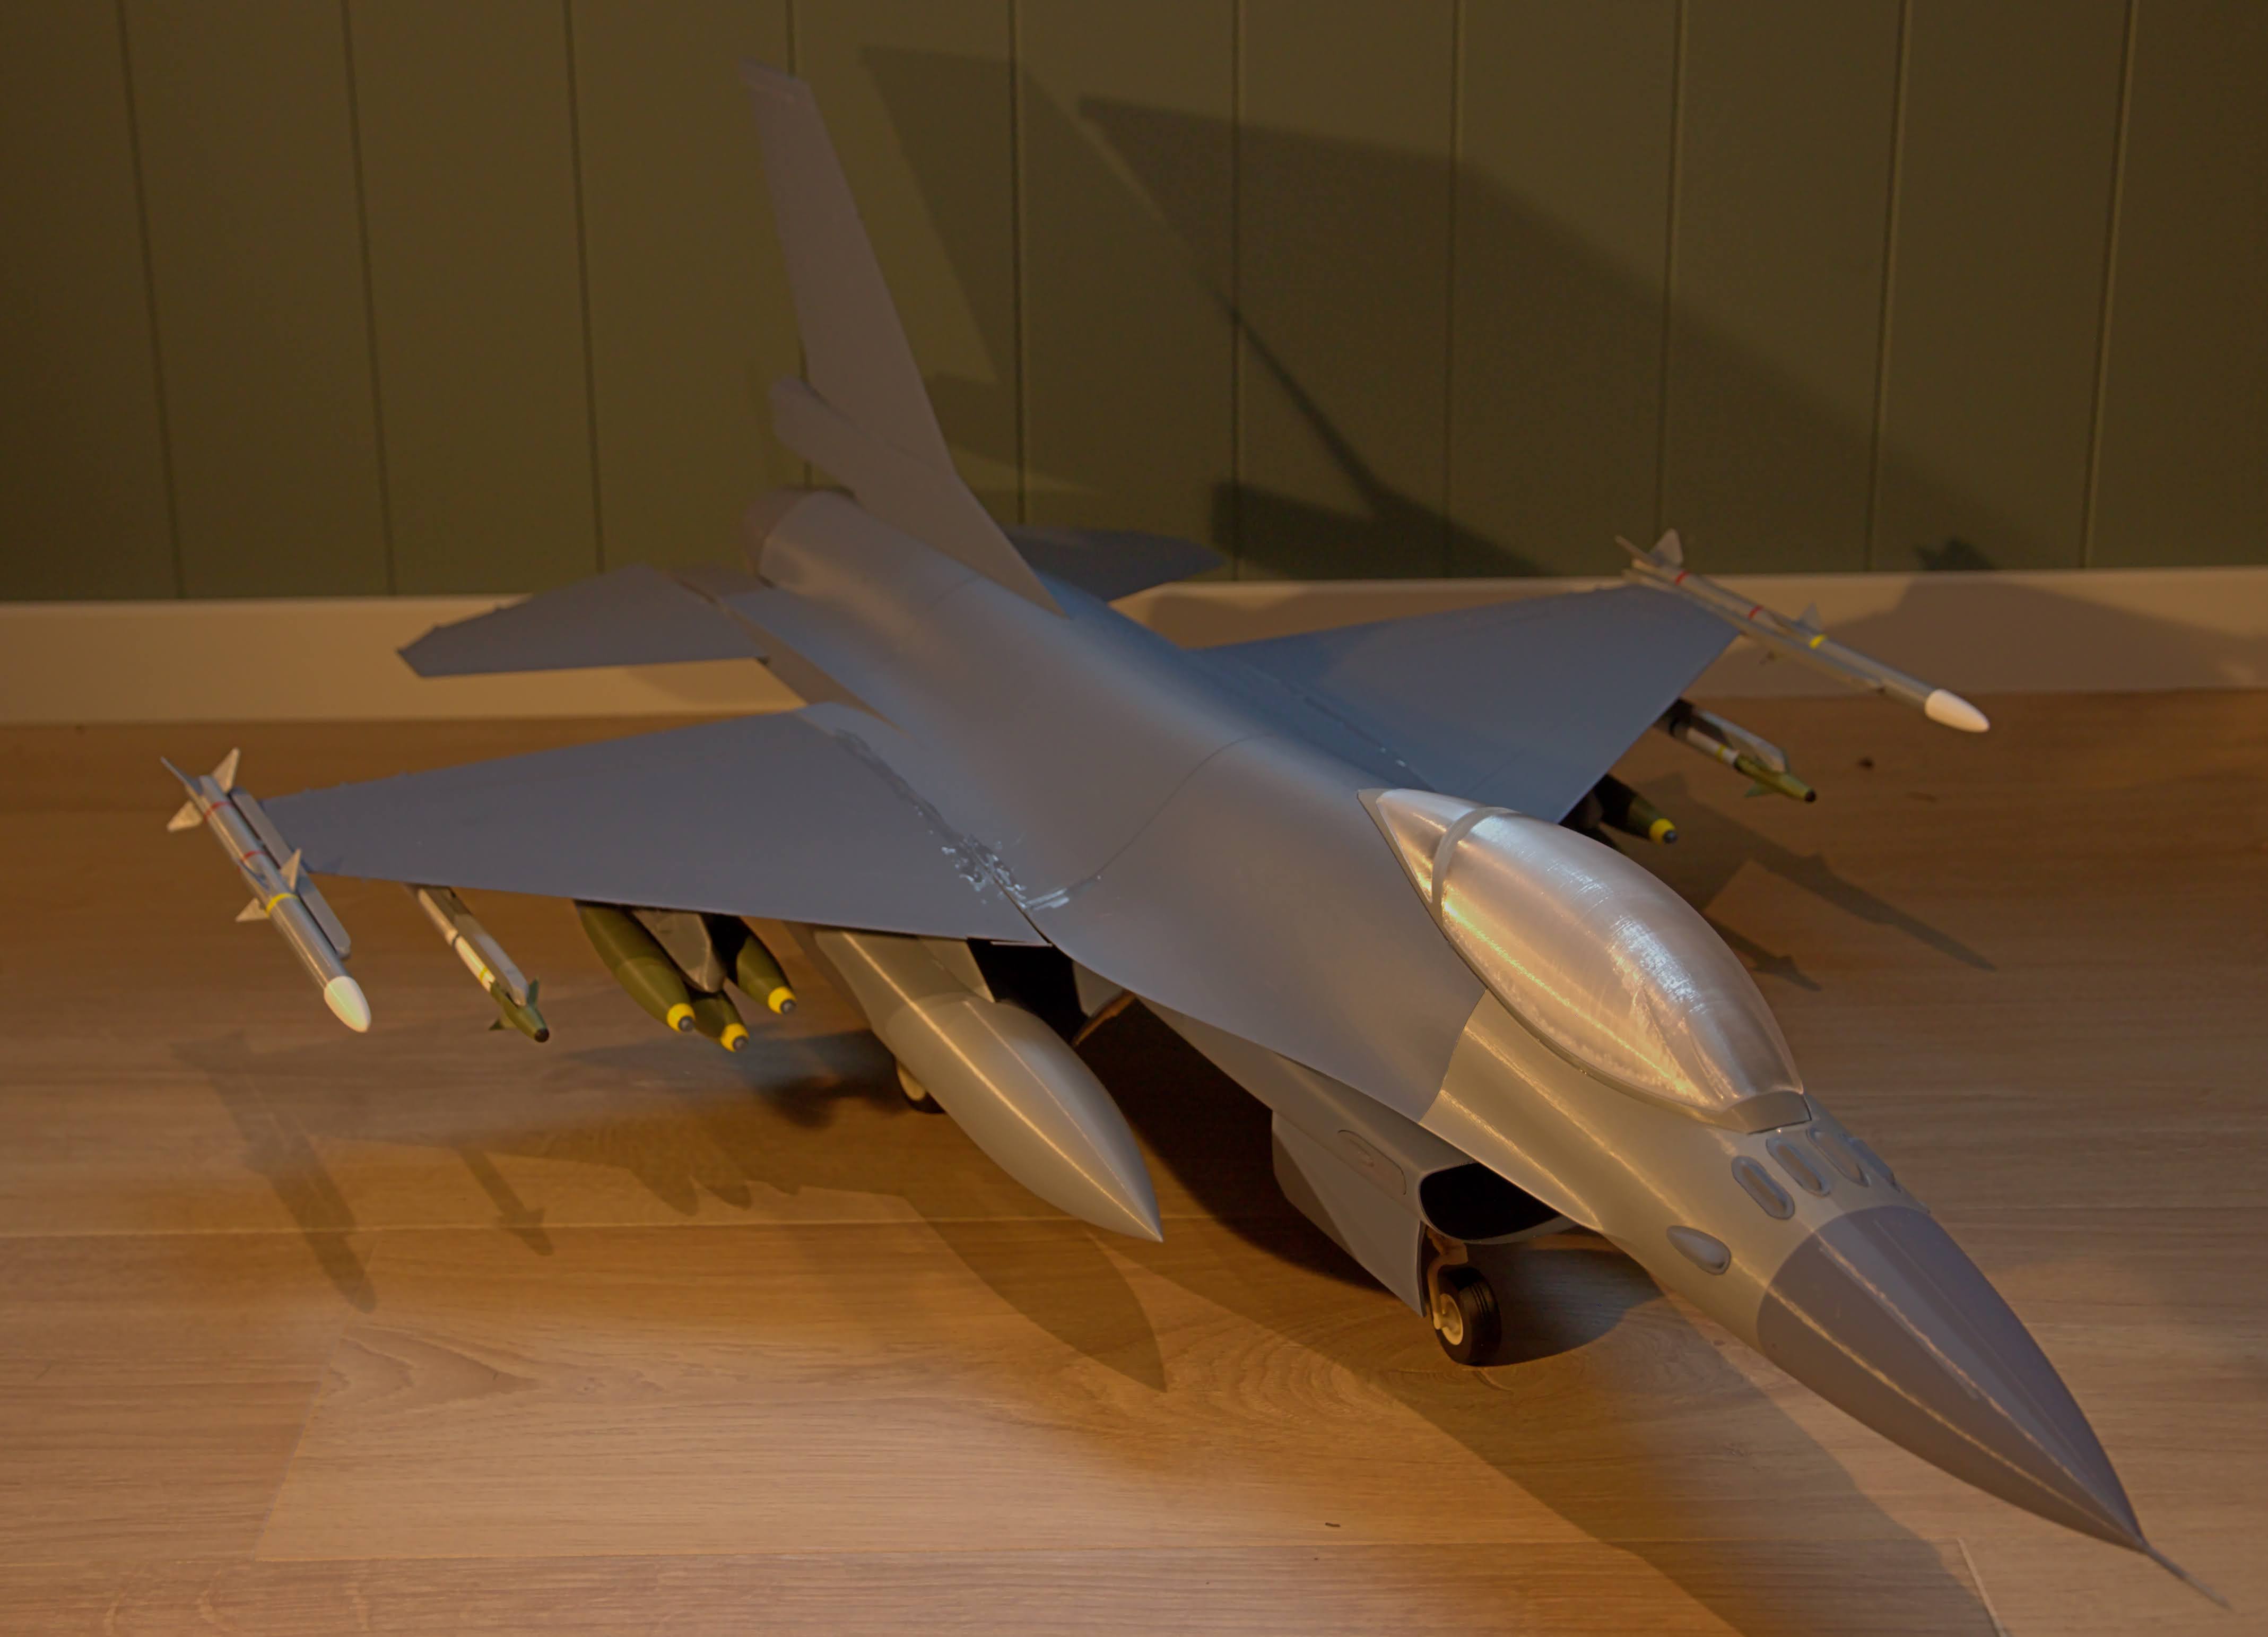
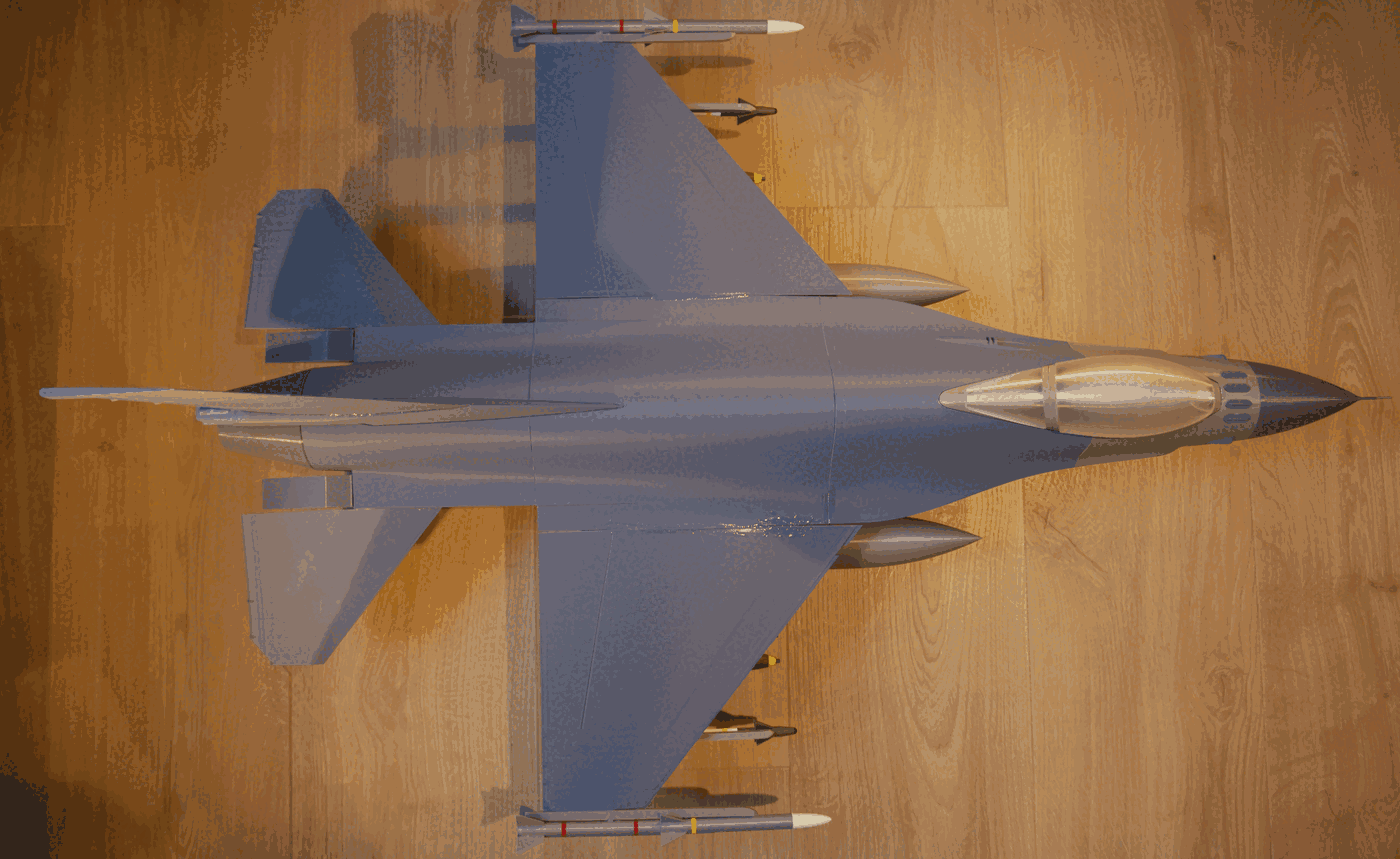
F-16 Fighting Falcon 1:16 scale model
#plane
#jet
#airplane
#scalemodel
#jetfighter
#fighterjet
#fighterplane
#f16
#fightingfalcon
#f16viper
Description
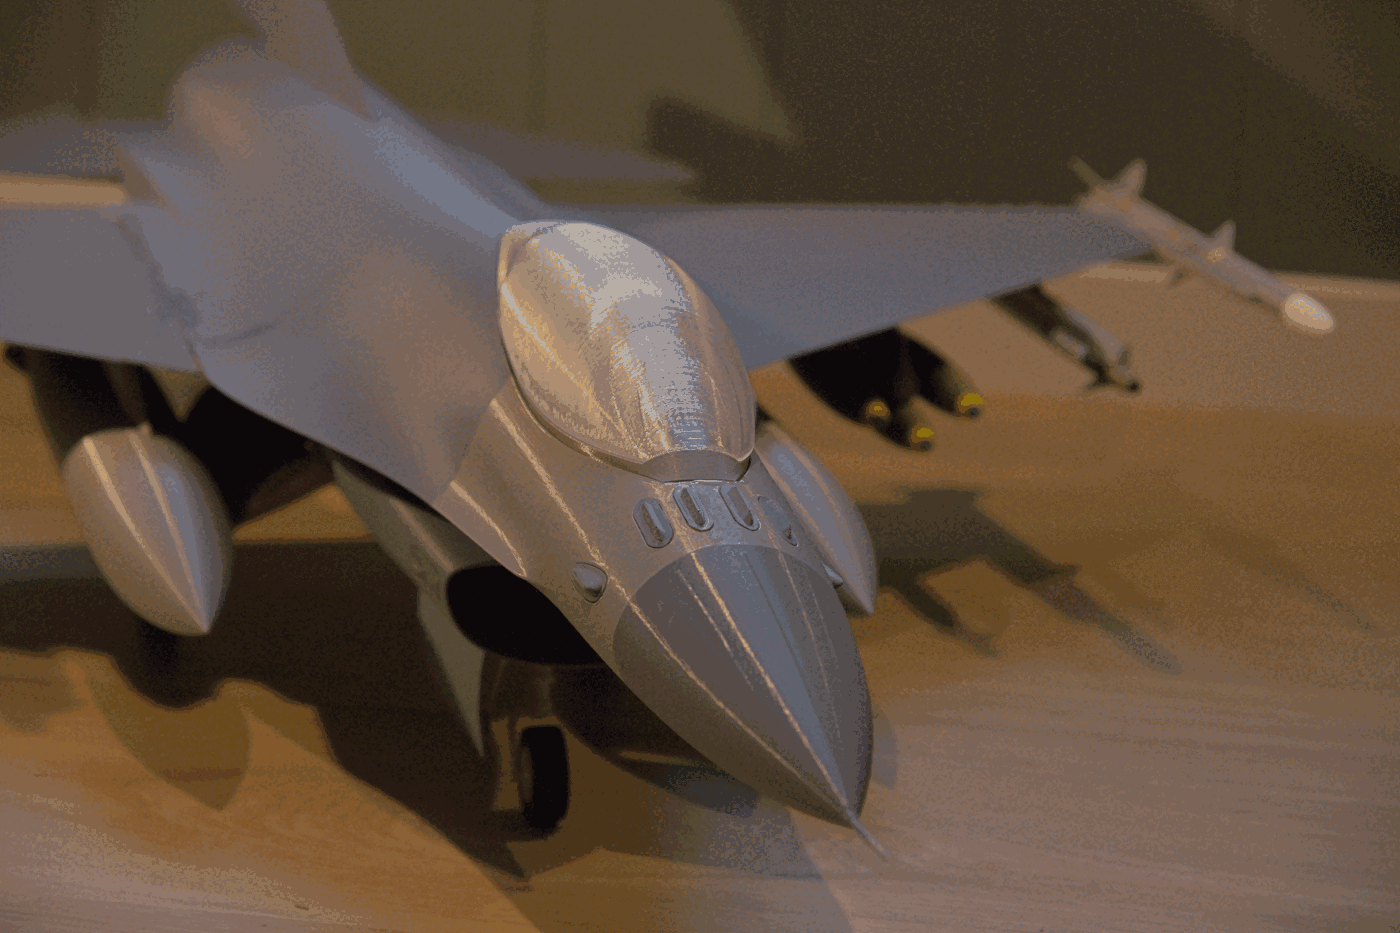
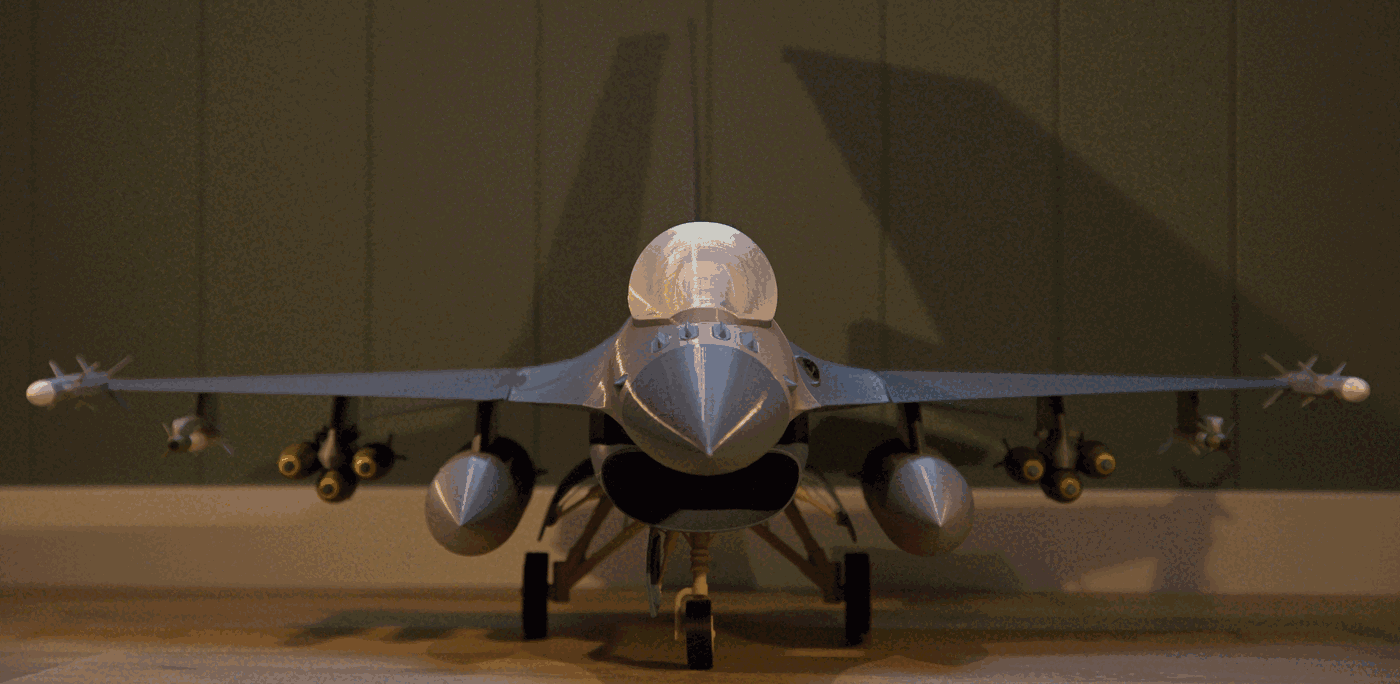
F-16 Fighting Falcon This is a 1:16 scale model of the F-16 Fighting Falcon, including weapons, thats made to be printed. The model is split into parts thats easy to print and glue together. All parts fits the build plate of MK4, and most of them can be printed without supports.
The model is an adaptation of this model found on Onshape . A lot of work has been put into making it printable. Here is a link to the end result
There are two versions: One with wheels out and one without wheels.
You may mix and match loadout as you like. More weapons might come later. Or make you own :)
I have also included uncut files it you would like to cut it diffrently than what I did.
The model is 918 mm from nose to tail and hase a wingspan of 579 mm (without weapons).
What you need - A little over 1 kg of filament for the main airframe in desired (gray) colors.
- Olive or army green for the bombs, including gray and yellow.
- White, gray, yellow, brown / blue, olive / army green and black for the missiles.
- White / offwhite / light gray for the undercarrige, and black for the tires.
- Clear PETG for the cannopy.
- Glue. I used both 5 min epoxy, CA and hotglue for this project.
- Abrasiv paper for scratching the mating surfaces before gluing.
How to print First of all: Use brim. There are alot of big parts that are prone to warping. Some parts have low contact area. Wings are most prone to warping due to their narrow width and low contact area.
- 5% infill is suficcient. Maybe lower for the bodyparts.
- I used regular 0.2 mm settings for the big parts.
- For the small parts I used 0.15 mm settings.
- The static discharge antennas are quite small and might be hard to print.
- The canopy (glass) is best printed in vase mode with 0.8 mm external perimiter using clear PETG.
- Plates ready to be printed have been included. These do not include weapons.
- Insert color changes to get de desired look on the parts, or paint them after printing.
- The model is designed to be printed without the use of MMU or other multicolor setups. Manual color changes must be used for the weapons.
The model is in 1:16 scale. Mostly because this was a nice comprimise between not to big and still preserving most details. The model may be scaled both larger and smaller, but smaller would result in some details being to small to print and some tolerances might not fit. Bigger is better, but unless you have a large printer, the model would need to be cut into smaller pieces. If you like to modify the model I have included a link to the onshape document
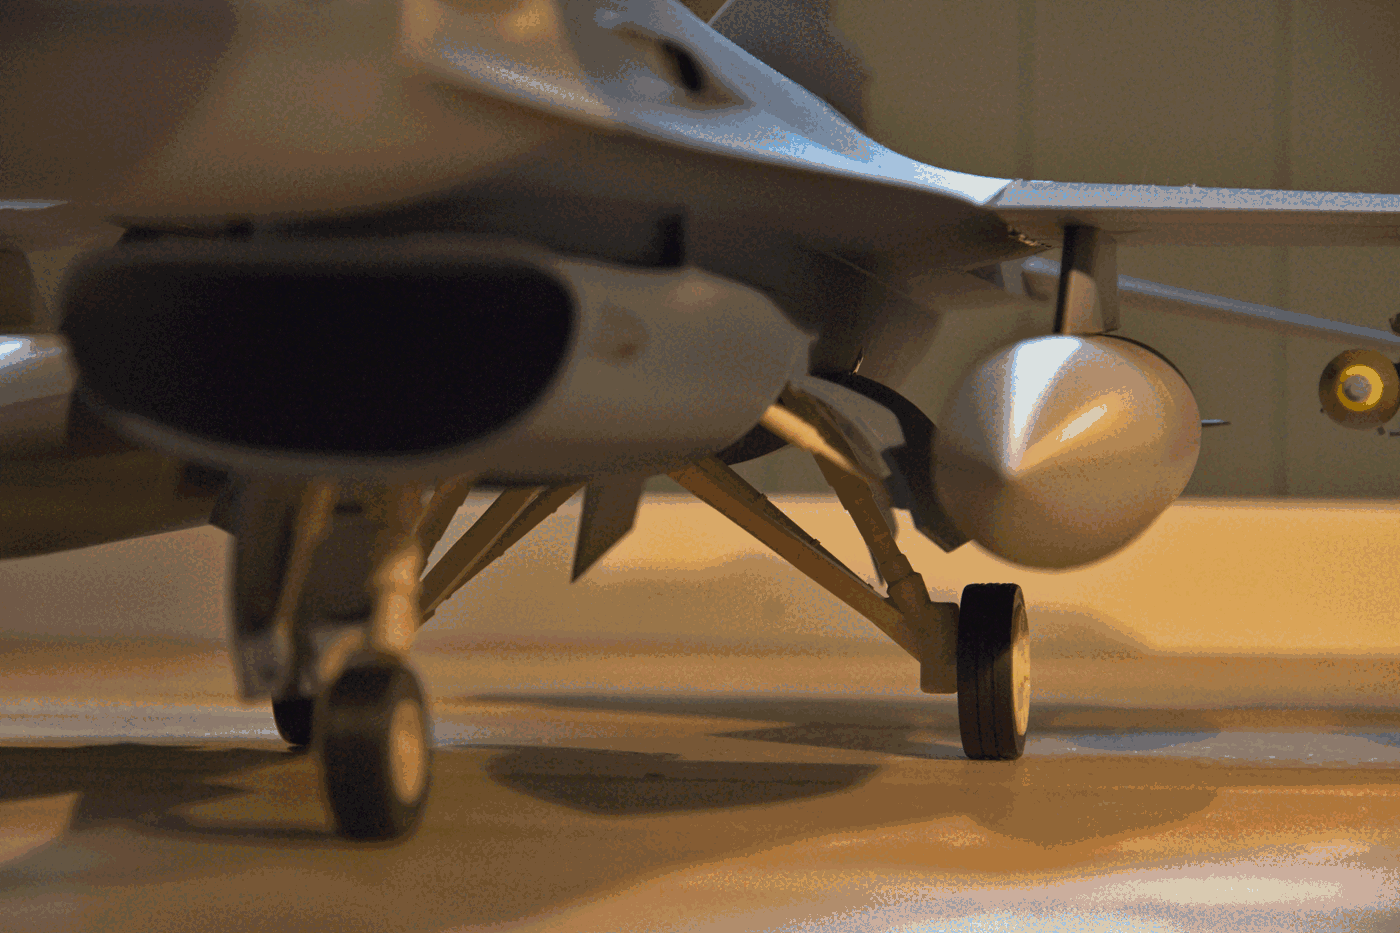
The following parts need or could benefit form supports: - CanopyFrame - the arch.
- FrontSuspension - the axel on top.
- Bpdy1 - front of cockpit area.
- Body2 - top of wheel bay (use regular supports from bottom of the wheel bay).
- Body4 - mouning surfaces for air brakes.
- AIM9Xp1 - fins.
Loadout There are several different loadout options.
- On the wingtips you can mount the AIM120 or AIM9X. They use the same pylons for mounting
- One step in form the tips, you may also mount AIM120 or AIM9X using the same pylon
- On the first bomb pylon, you can mount a triple ejector and three MK82. Or you can mount a missile pylon (BombPylonMissile) and than a AIM120 or AIM9X
- On the inner pylon you can mount the fueltanks using the FueltankPylons. Or use the InnerBombPylon for mounting bombs / missiles (as above)
I have made a separate weapons pack for additional weapons
Assembly - Lighly scratch all mating surfaces with a abrasiv paper. This is to give the glue soething to bite on to.
- Glue the IFF and threat warning antennas to body1
- Glue the lights to Body2.
- Using epoxy (might work with CA), glue alle the main body parts together and let the glue cure while under light pressure while staning vertically on its tail.
- Glue engine nozzle and nose to the body.
- Glue on the airbrakes.
- Glue the tail end in place.
- Glue the main wings to the body with the body laying flat. I used 5 min epoxy for this since the wings must be held inplace while the gule cures. CA with activator might work, but I'm not sure if its strong enough. Let the glue cure for a while before moving to the next step.
- Glue elevators to the body. Done the same way as the main wings and hold inplace while the glue cures.
- Assamble missiles and fueltanks.
- Glue weapons an fuletanks to their respective pylons. Its easier to do this before attaching the pylons to the wings. You may mix and match loadout how ever you like. If youre going to mount bombs. Glue BombTripleEjector to the BombPylon, then glue on the three bombs. If mounting a missile to the bomb pylon. Glue BombPylonMissile to the BombPylon and glue the missile to it
- Flip the main body on its head and glue the pylons with attached weapons and fueltanks to the wings.
- Glue tires to rims.
- Gule wheels to undercarrige.
- Glue undercarrige to the aircraft using a strong glue. 5 min epoxy is good since you might need to hold them in place while the gule cures.
- Glue wheel bay door pistons to the aircraft.
-
- Glue wheel bay doors, one by one to the aircraft. This is a little tricky since theres no obvious place to mount them. I used hot glue for this, since it cures fast and is easy to remove if done wrong.
- Glue the bottom fins in place.
- Turn the aircraft around and place it gently on its wheels.
- Glue the front and back canopy to the canopy frame.
- Glue the assembled canopy pieces to the cockpit area.
- Assemble the two tail fin pieces and glue it in place on the aircraft.
- Glue the static discharge antennas (15 pcs) on the wings, rudder and elevator. (if they printed well).
- Glue the tail probe to the rudder.
Updates 19.02.26: The gun was missing. Reuploaded the model "body2" with the gun and removed a duplicate hole for the wheel bay piston
License

Files
Model files
Download all files
f-16-1-16-antennanosel.stl
f-16-1-16-iffantennacenter.stl
f-16-1-16-iffantennar.stl
f-16-1-16-light.stl
f-16-1-16-staticdischarge.stl
f-16-1-16-tailprobe.stl
f-16-1-16-threatwarnantl.stl
f-16-1-16-threatwarnantr.stl
bodycutnowheels-body2.stl
bodycutnowheels-body3.stl
f-16-1-16-body1.stl
f-16-1-16-body2.stl
f-16-1-16-body3.stl
f-16-1-16-body4.stl
f-16-1-16-enginenozzle.stl
f-16-1-16-nose.stl
f-16-1-16-tailend.stl
f-16-1-16-canopyframe.stl
f-16-1-16-canopyfront.stl
f-16-1-16-canopyrear.stl
f-16-1-16-airbrakes-nose-and-nozzle.stl
f-16-1-16-antennas-and-lights.stl
f-16-1-16-body1.stl
f-16-1-16-body2.stl
f-16-1-16-body3.stl
f-16-1-16-body4.stl
f-16-1-16-canopyframe.stl
f-16-1-16-canopyfront.stl
f-16-1-16-canopyrear.stl
f-16-1-16-fins-and-elevator.stl
f-16-1-16-pylons.stl
f-16-1-16-rudder.stl
f-16-1-16-suspension-and-rims.stl
f-16-1-16-tires.stl
f-16-1-16-wheelbaydoors.stl
f-16-1-16-wings.stl
f-16-1-16-bombpylonl.stl
f-16-1-16-bombpylonmissile.stl
f-16-1-16-bombpylonr.stl
f-16-1-16-bombtripleejector.stl
f-16-1-16-fueltankpylonl.stl
f-16-1-16-fueltankpylonr.stl
f-16-1-16-innerbombpylonl.stl
f-16-1-16-innerbombpylonr.stl
f-16-1-16-tippylon.stl
f-16-1-16-wingpylonl.stl
f-16-1-16-wingpylonr.stl
f-16-1-16-aim120p1.stl
f-16-1-16-aim120p2.stl
f-16-1-16-aim9xp1.stl
f-16-1-16-aim9xp2.stl
f-16-1-16-aim9xp3.stl
f-16-1-16-fueltank1.stl
f-16-1-16-fueltank2.stl
f-16-1-16-m82.stl
f-16-1-16-frontsuspension.stl
f-16-1-16-frontwheelhub.stl
f-16-1-16-fwheeldoor.stl
f-16-1-16-fwheeldoorpiston.stl
f-16-1-16-rearpiston.stl
f-16-1-16-rearwheelhub.stl
f-16-1-16-rearwheelsuspensionl.stl
f-16-1-16-rearwheelsuspensionr.stl
f-16-1-16-rwheeldoorl.stl
f-16-1-16-rwheeldoorr.stl
f-16-1-16-tirefront.stl
f-16-1-16-tirerear.stl
f-16-1-16-airbrakel.stl
f-16-1-16-airbraker.stl
f-16-1-16-elevatorl.stl
f-16-1-16-elevatorr.stl
f-16-1-16-finl.stl
f-16-1-16-finr.stl
f-16-1-16-rudder.stl
f-16-1-16-ruddertop.stl
f-16-1-16-wingl.stl
f-16-1-16-wingr.stl