
Model
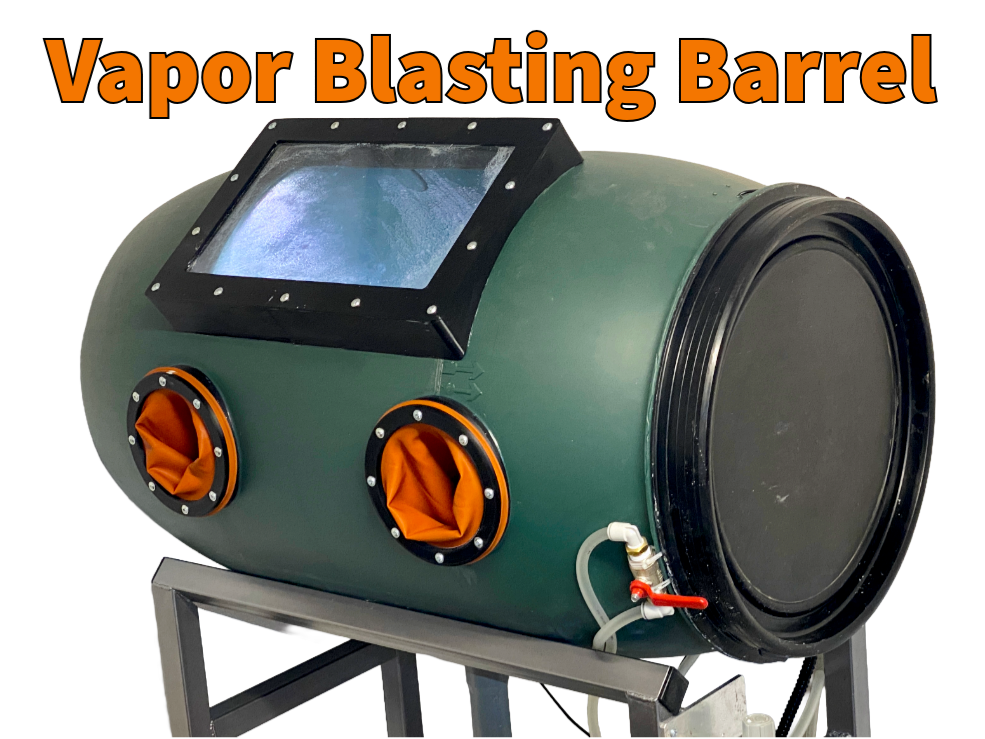


Vapor Blasting Barrel
Description
Vapor blasting is perfect for precise cleaning of aluminium parts without damaging the surface!
Designed to work with 220l / 58 gallon barrels with outer diameter +- 590 mm / 23 inches, I chose plastic for its corrosion resistance.
Parts needed:
220l / 58 gallon barrel (note - barrels without outer ridges make it easier to seal the flanges)
Submersible dirty water pump (400w is enough)
Air compressor (bigger = better, in my case 4 piston 50l / 13 gallon air tank with 528l/hod / 140 gal/hod rating was just on the limit, needs to maintain 5-6 bar / 75-85 psi)
Blasting nozzle - can be downloaded here, used the diameters from the description, link: https://makerworld.com/cs/models/387341-vapor-blast-gun-v3#profileId-287862
Sandblasting gloves (latex prefered, avoid rubber coated fabric, at least 600 mm length / 24 inches)
LED lighting - used budget LED lights for a fish tank i had laying around
Media bucket (needs to be round for easier water circulation, 30l / 8 gallon used)
Hoses (12.5 mm water hose - any gardening hose will do, 6-10 mm air hose)
Fittings - Y or T splitter is needed for the water pump, my pump had 3/4" outlet, 1/4" for the air nozzle
Glass or polycarbonate sheet 400x238x6mm
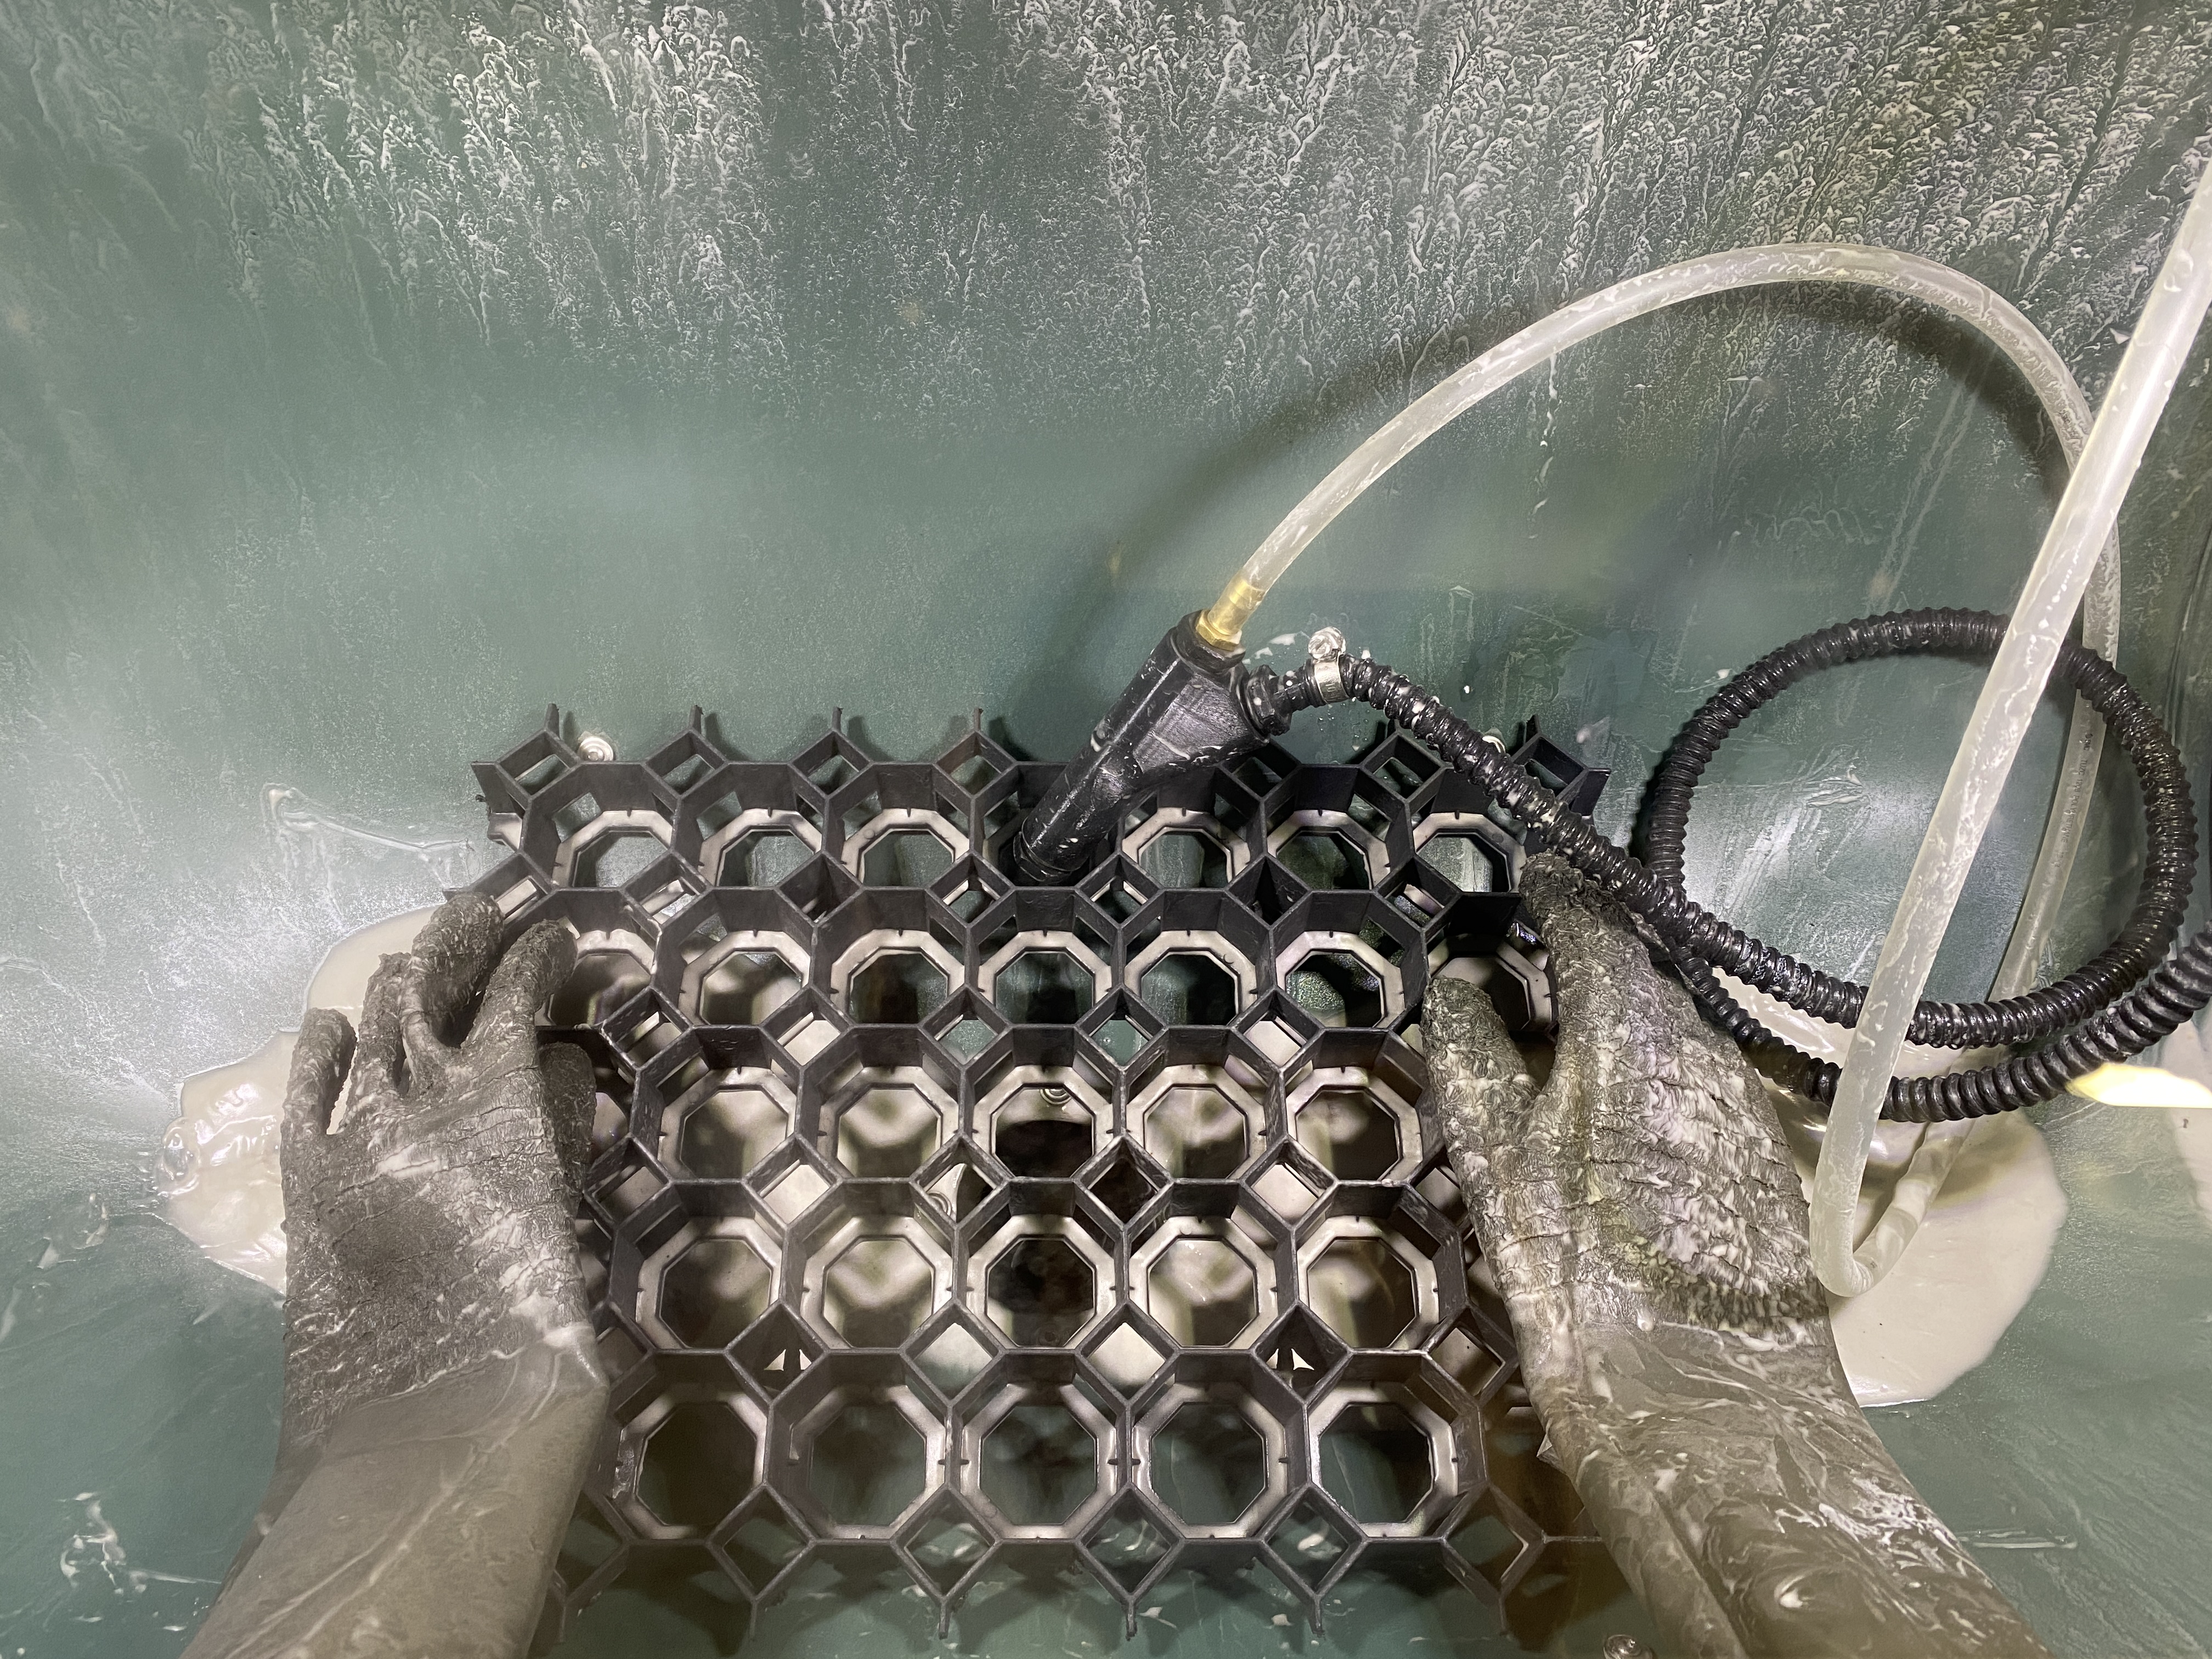
Plastic grate - for the inside, just so the parts don't lay directly on the bottom of the barrel and draining is improved (used sturdy plastic grass reinforcing grate)
50 mm drain pipe - used one with a rubber seal, is slips right over the funnel and can be removed easily when flushing the mmedia bucket
5 mm brass heat inserts - 32 pcs. needed for the printed parts
M5 screws - at least 32 pcs.
4.5 mm stainless roofing screw - at least 40 pcs, length 20 mm, used because of the sealed washer
Silicone sealant tube - transparent used
Air pressure regulator - optional - pressure should be around 5-6 bar / 75-85 psi as mentioned otherwise the blasting beads will break down faster.
Ball valve with a lever or a foot switch - for the air
Blasting media - 325 grit glass bead or 40-70 μm (bought B-159ss EU standard available locally)
Frame - can be freestyled, I used 7 meters of 40x40x1.5 mm square tube, outer dimensions height 1050 mm, width 800mm, depth 440mm, keep in mind I am 1840 mm tall so feel free to adjust the height for optimal ergonomics. Top tubes are angled 45 degrees for better larger contact surface with the barrel.
Frame in freedom units: 1.6"x1.6"x0.059" square tube height 41", width 31.5", depth 17.3" my height 6 ft
Printing:
NOTE! Files are in .STEP format, which is supported by Prusaslicer now, I prefer it due to resolution of curves over .STL! (.STEP Does not make your curves choppy with lines without upscaling facet resolution first)
EDIT 23.2.2026 - Added STL files
Printed in PETG, 20% infill, layer height 0.2 mm, 5 perimeters. I split the Window_frame in two in Prusaslicer and printed on Prusa XL. Can be split into 4 for printing on smaller printers.
Assembly guide:
Inserting brass inserts:
Use a soldering iron to insert the M5 brass inserts into according (bigger) holes in the flanges.
Making the frame:
Fabricate the frame for the barrel according to dimensions specified above. Aluminium or wood can be used depending on what you have acessible. Angle the top profiles 45 degrees as seen in the pictures.
Cutting holes in the barrel:
Align the window frame with the barrel and mark the inner hole with a permanent marker. Cut the hole out (I used an angle grinder, be careful to avoid melting and kickback). After the hole is cut align the frame back in place and secure it with tape. The small holes in the flange are for a 3.5mm drill bit. Drill through at least two holes and use the stainless roofing screws to fasten the frame in place before drilling the rest to prevent missaligment.
After the holes are ready, remove the frame and apply silicone to its mating surfaces. Then pop it back on the barrel and screw it down. Wipe the excess silicone which got pushed out.
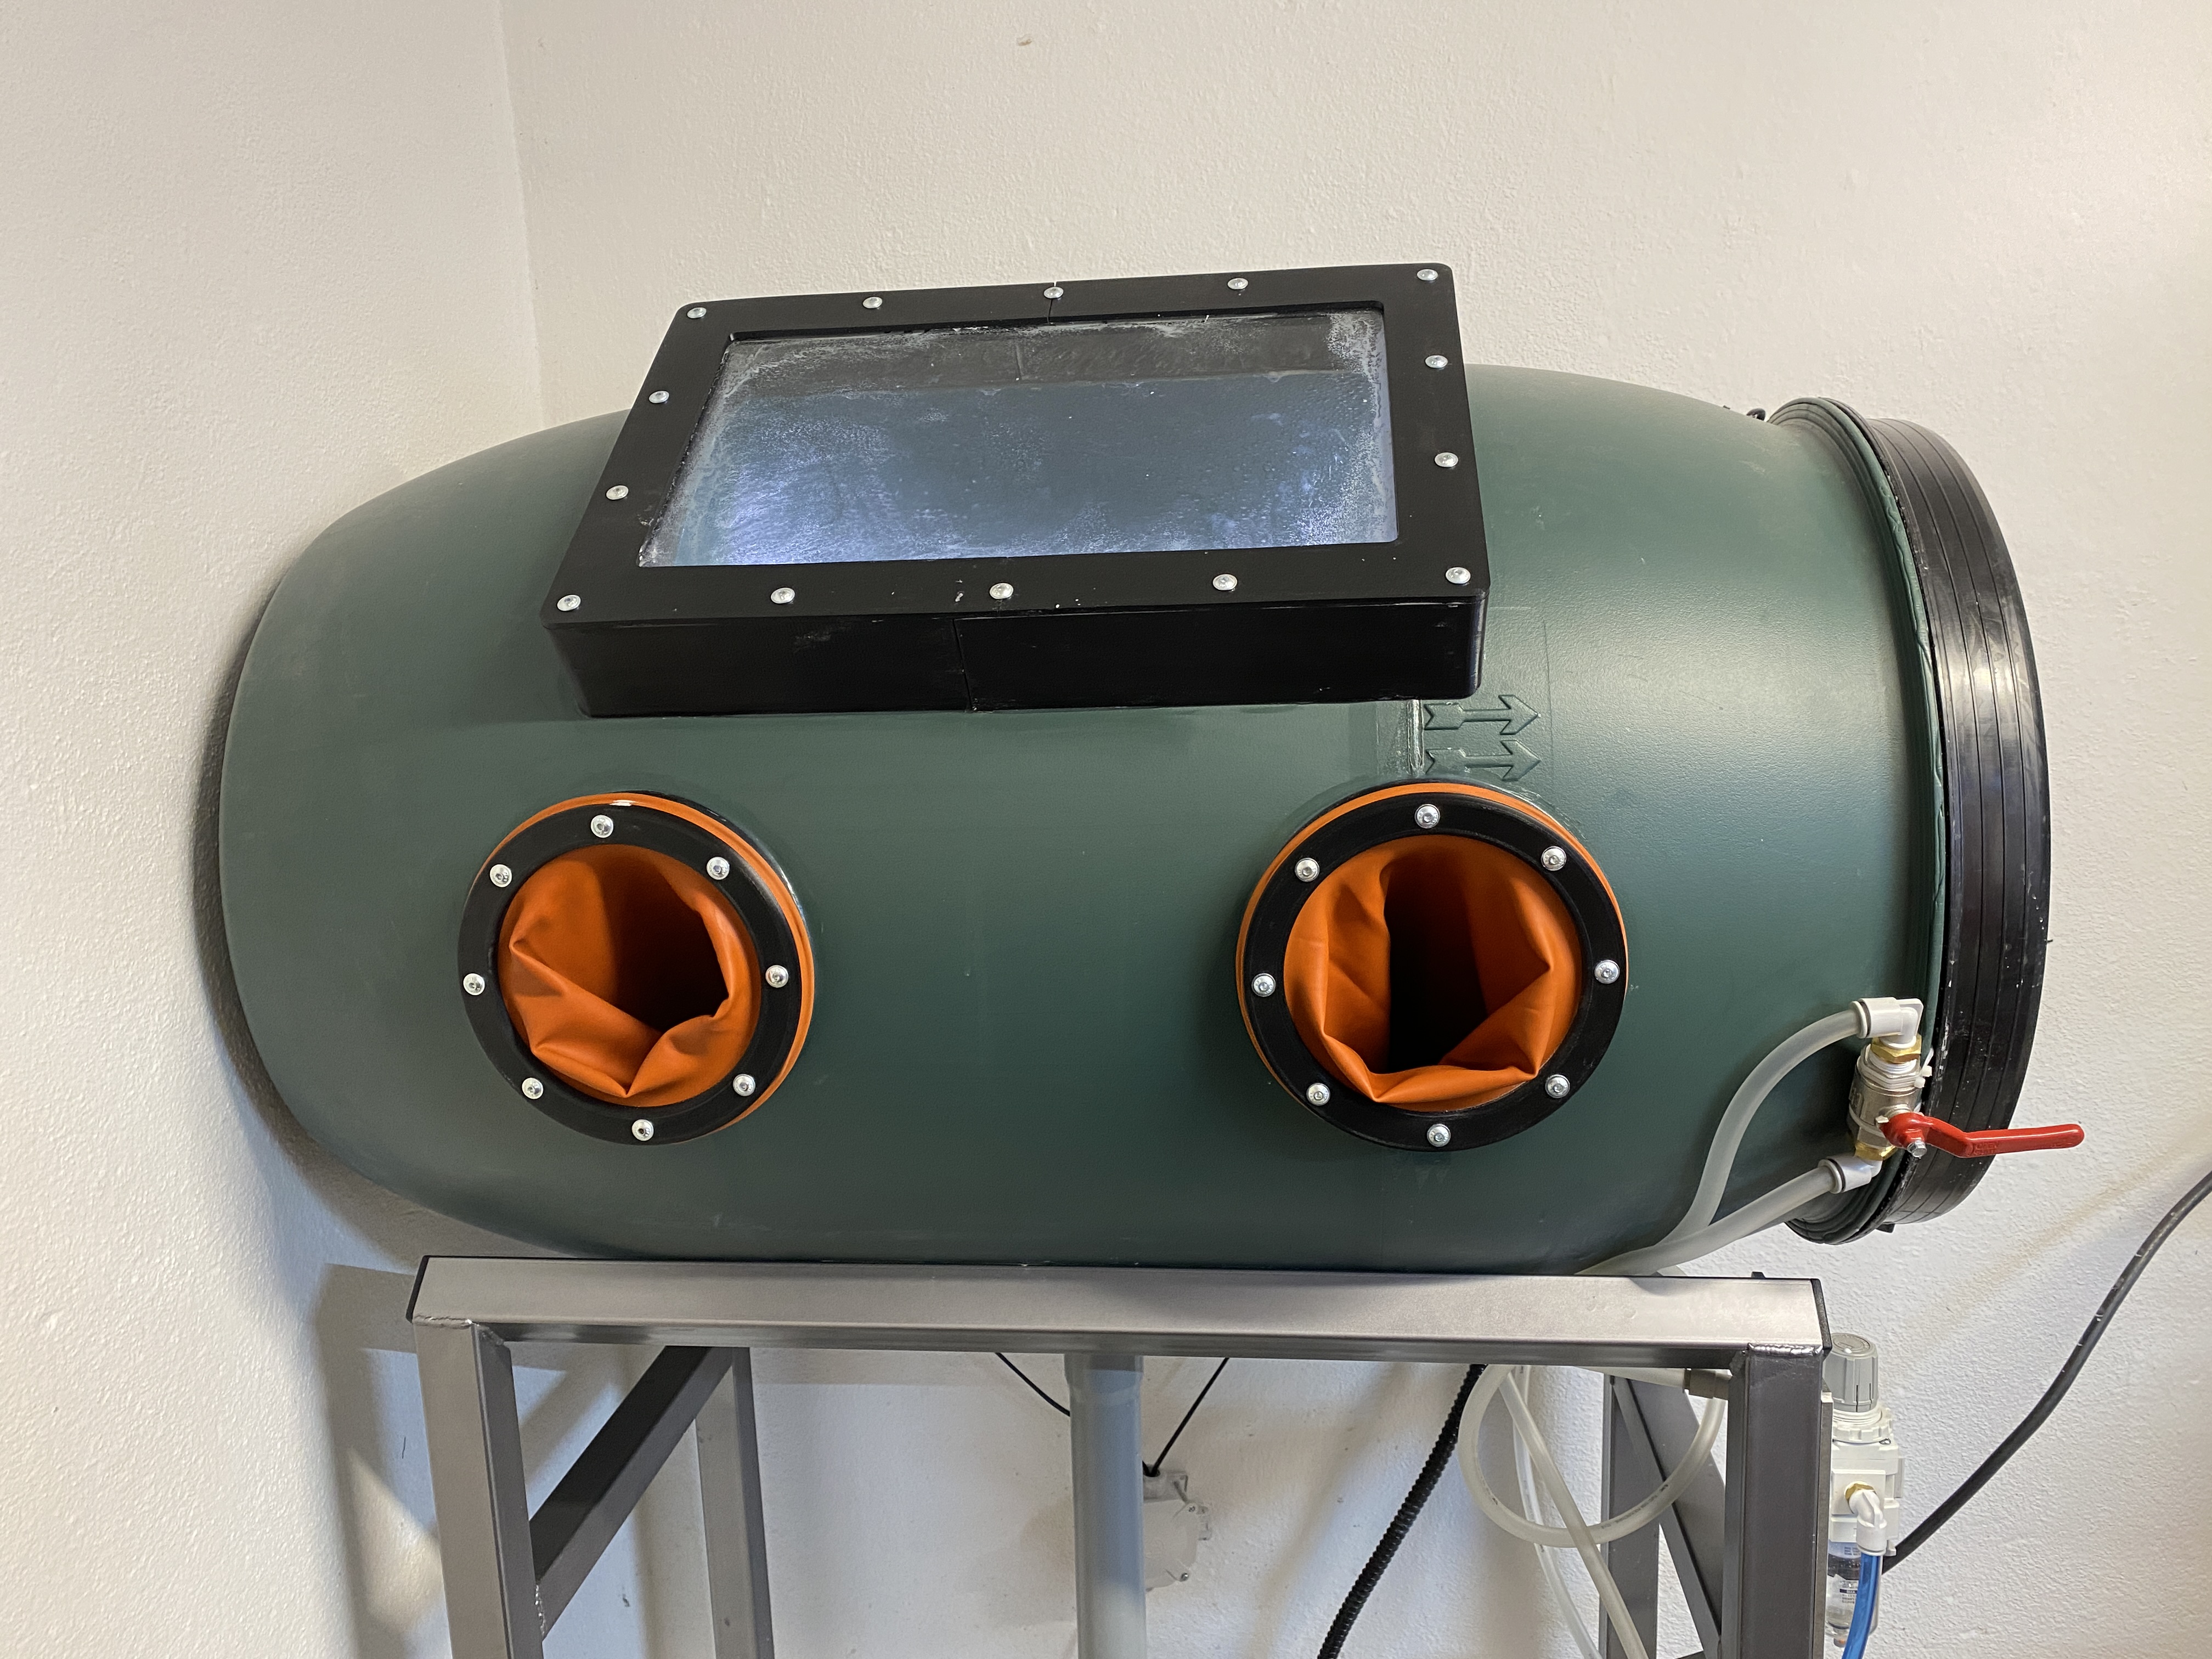
At this point you can set the barrel on the frame and adjust the window angle for the best viewing angle. Keep in mind that the Glove_frame-s should be about 500mm apart for your hands to be the right distance from each other and to avoid akward bending.
After deciding the position repeat the cutting and sealing window frame phase for the Glove_frame-s.
Now you can screw the barrel down to the frame.
Repeat the cutting and sealing one last time for the funnel on the bottom of the barrel.
Finishing:
Drill two holes for the hoses in the top back of the barrel R or L depending on right or left handed prefered use.
Install fittings on the water pump, connect the hoses and put it in the bucket under the barrel. The Y fitting splits the water flow into two, one end goes to the blasting gun and the other straight back into the bucket (position it to the outer bottom edge to make it swirl and mix thhe water with glass bead nicely). Route the hose through the hole in the barrel. Slide the drain pipe over the funnel.
Mount the air pressure regulator to the frame, then the air valve and route the hose through the other drilled hole into the barrel.
Connect the hoses to the blasting gun.
Cut the plastic grate to size and put it inside the barrel.
Stretch the gloves over the Glove_flange-s NOT Glove_frames! then poke holes through the glove using the flange holes as guide. Pop the M5 screws in, they should hold in place while you screw the flanges to the frames.
Install the glass into the window frame, I didn't use silicone. Install the window flange over it and tighten down using the M5 screws.
You should be about done at this point!
Check my instagram for blasting clips with this Barrel Blaster!
@lisa_240z
License

Files