
Model
4-Color AMS Majora’s Mask: High Detail, Easy Build
#mask
#multicolor
#videogame
#zelda
#majoras
#multicolour
#wallmounted
#legendofzelda
#majorasmask
#majora
#u1
#singleams
#snapmakeru1
Description
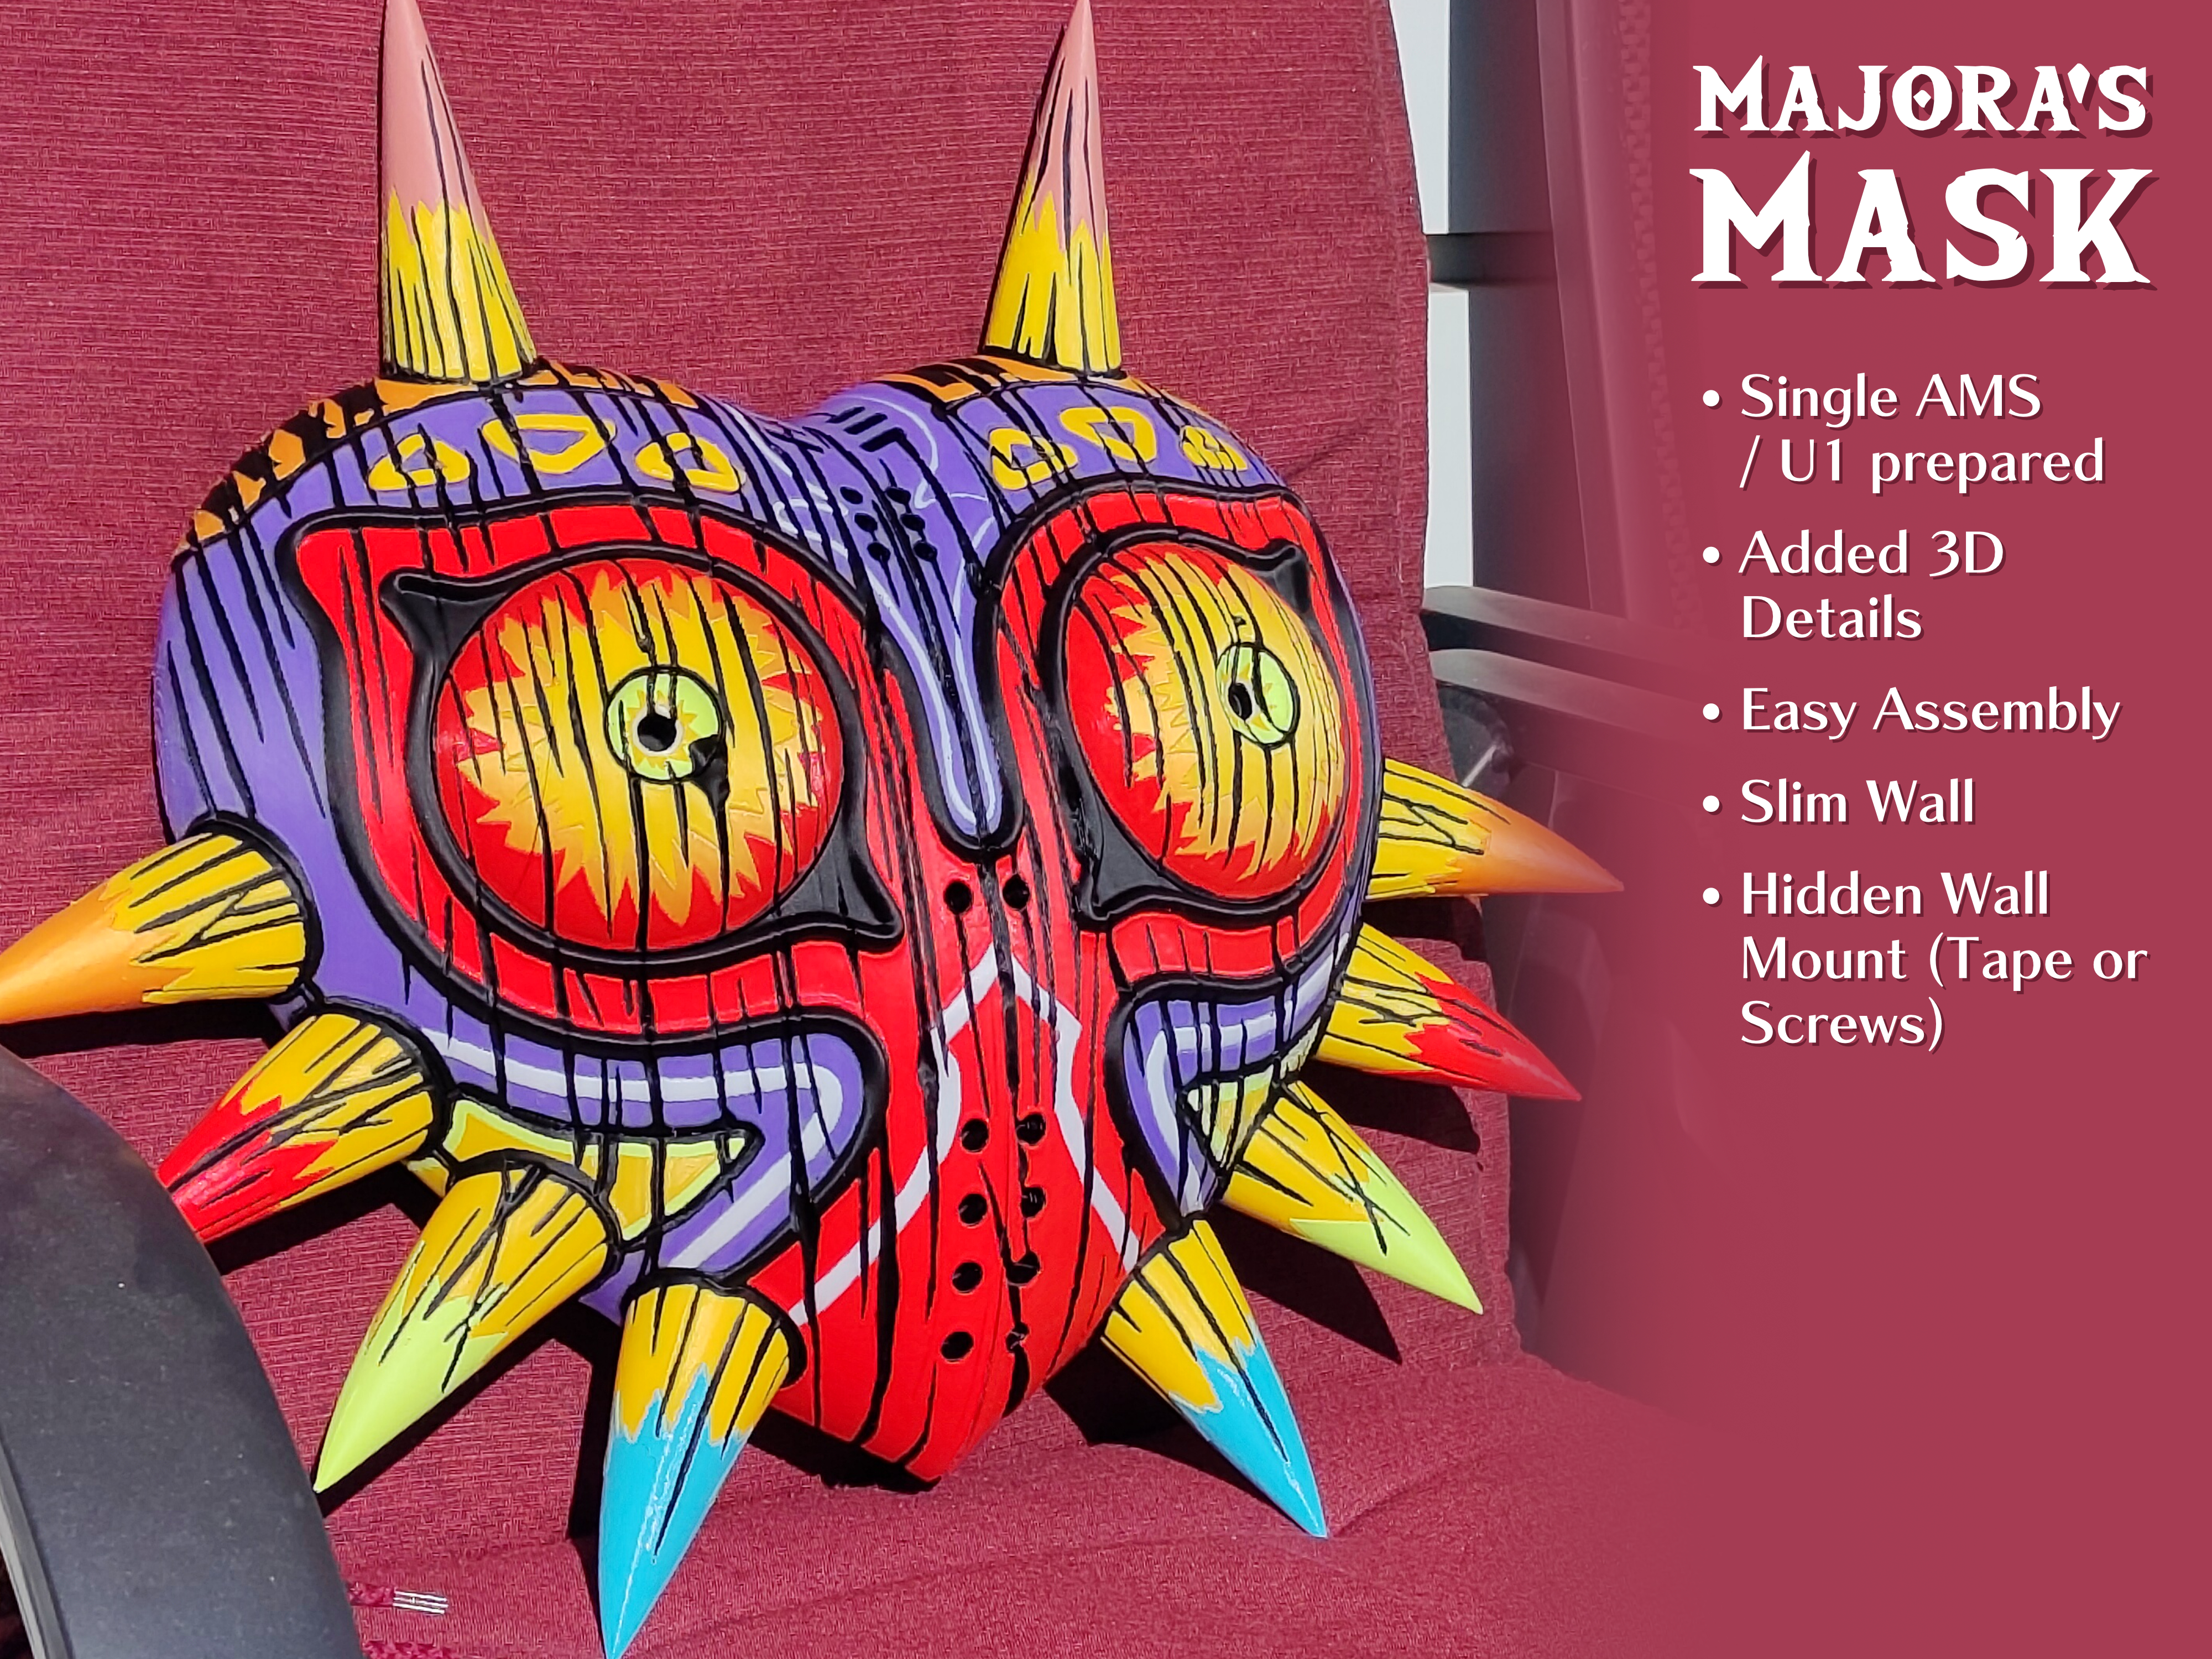
Ever since I got my Snapmaker U1 delivered, I have wanted to print the four-colour Majora's Mask model. However, I wasn't quite happy with the painting or the high wall thickness (a remnant of the model being intended as a keychain). One thing led to another, and I ended up spending a month adjusting the 3D model in Blender and painting the model by hand in OrcaSlicer.
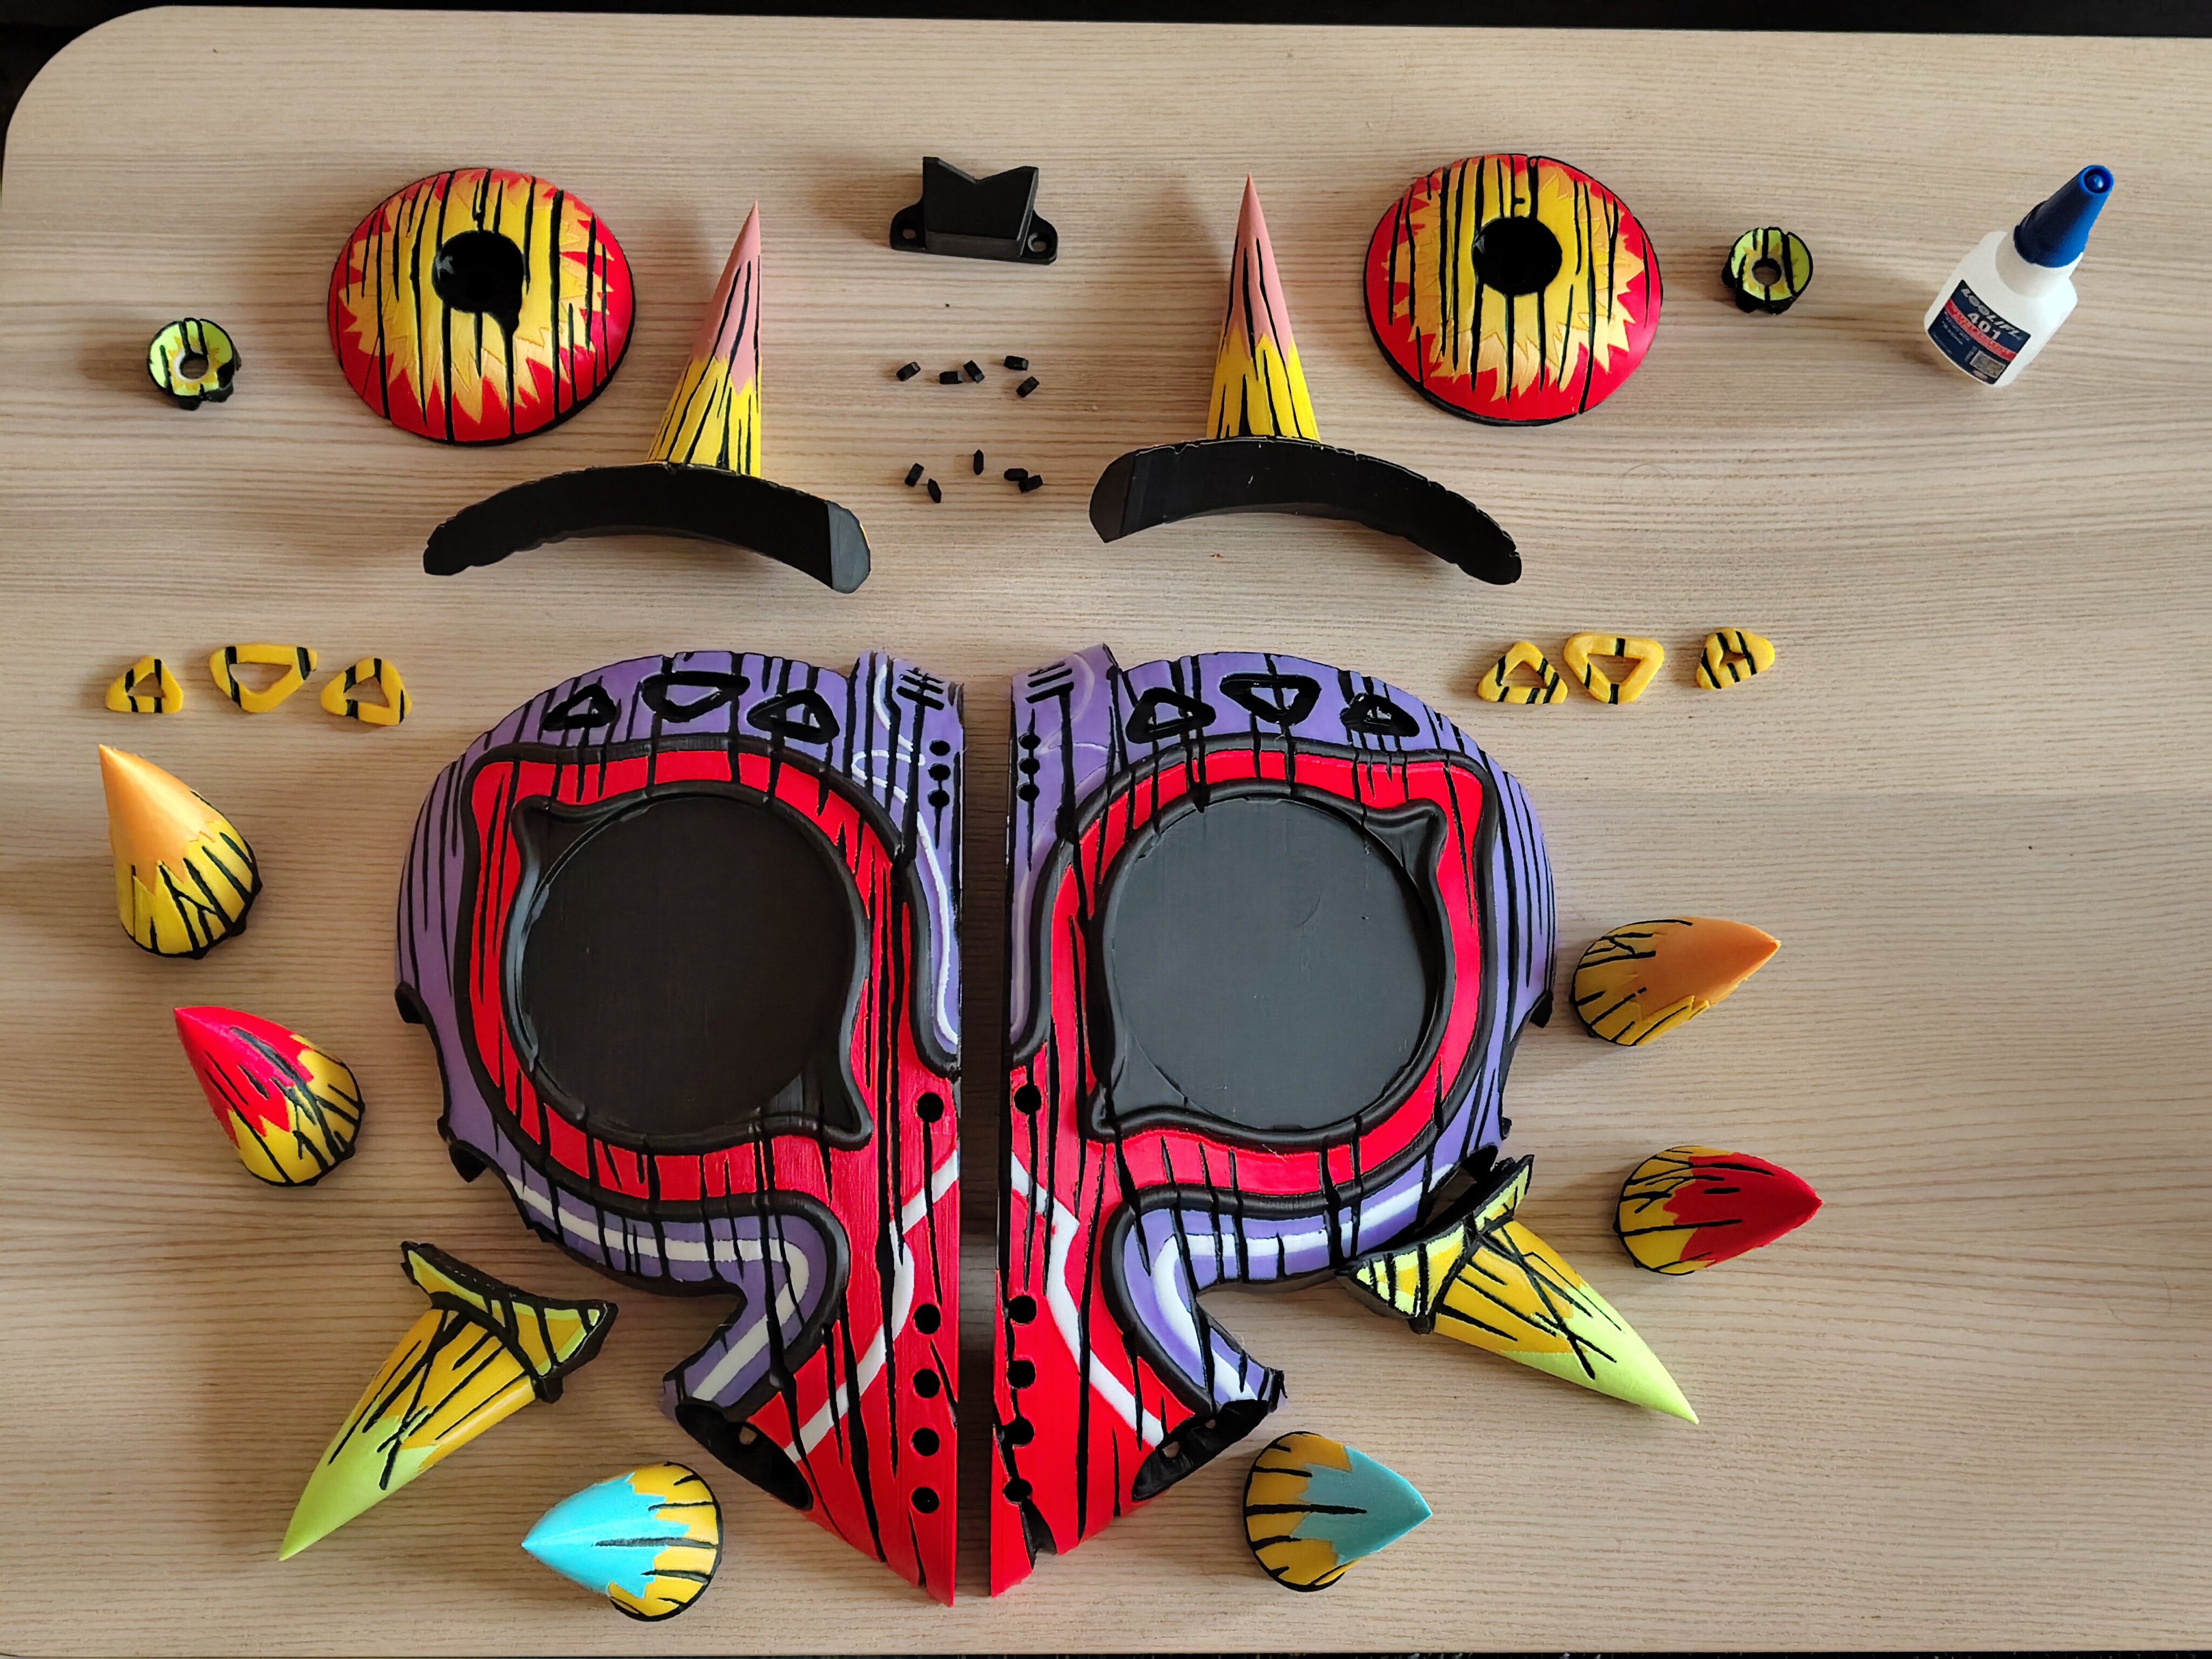
The model is printed on five plates and needs to be glued together afterwards. I tried my best to make assembly as easy as possible. If you don't count waiting for the glue to dry, it took me about 30 minutes to assemble everything.
You can find more detailed information and an assembly guide further down in the description. Happy printing!
Features - 4-Color AMS Compatible: Optimized for single AMS or toolchangers like the U1.
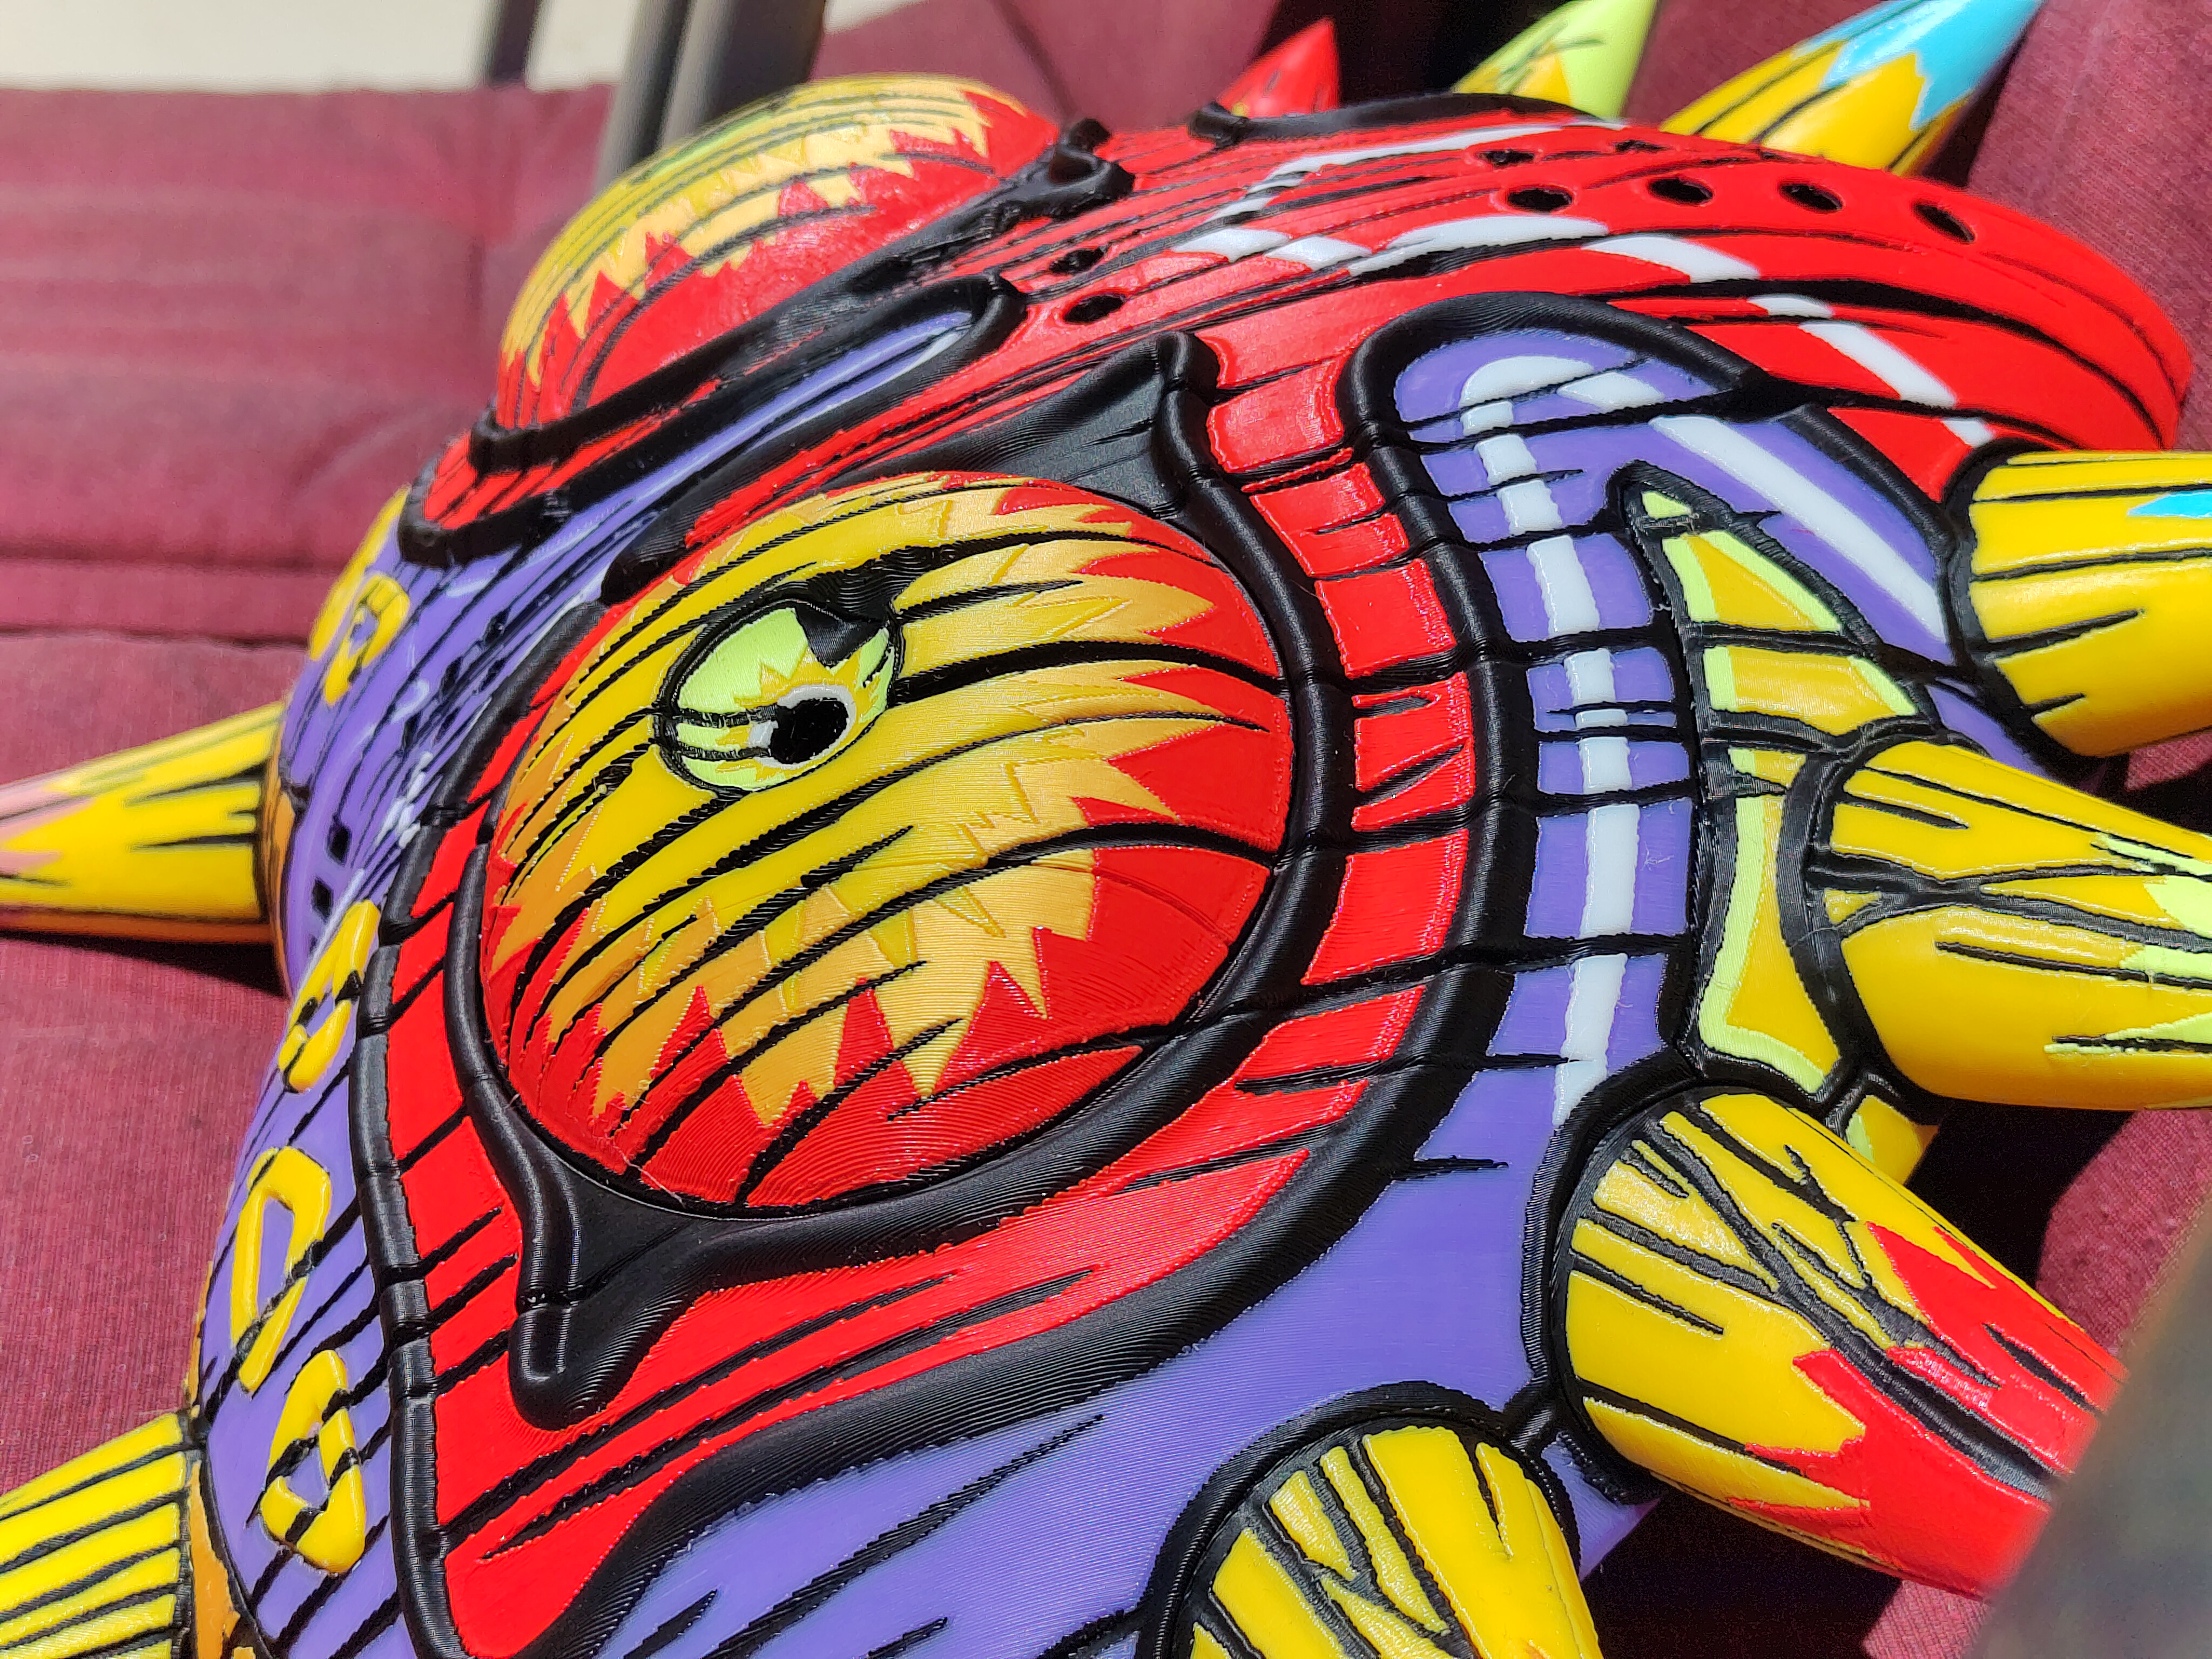
- Higher Detail: Added extra geometry for colored lines (white, black, etc.) for sharper visuals.
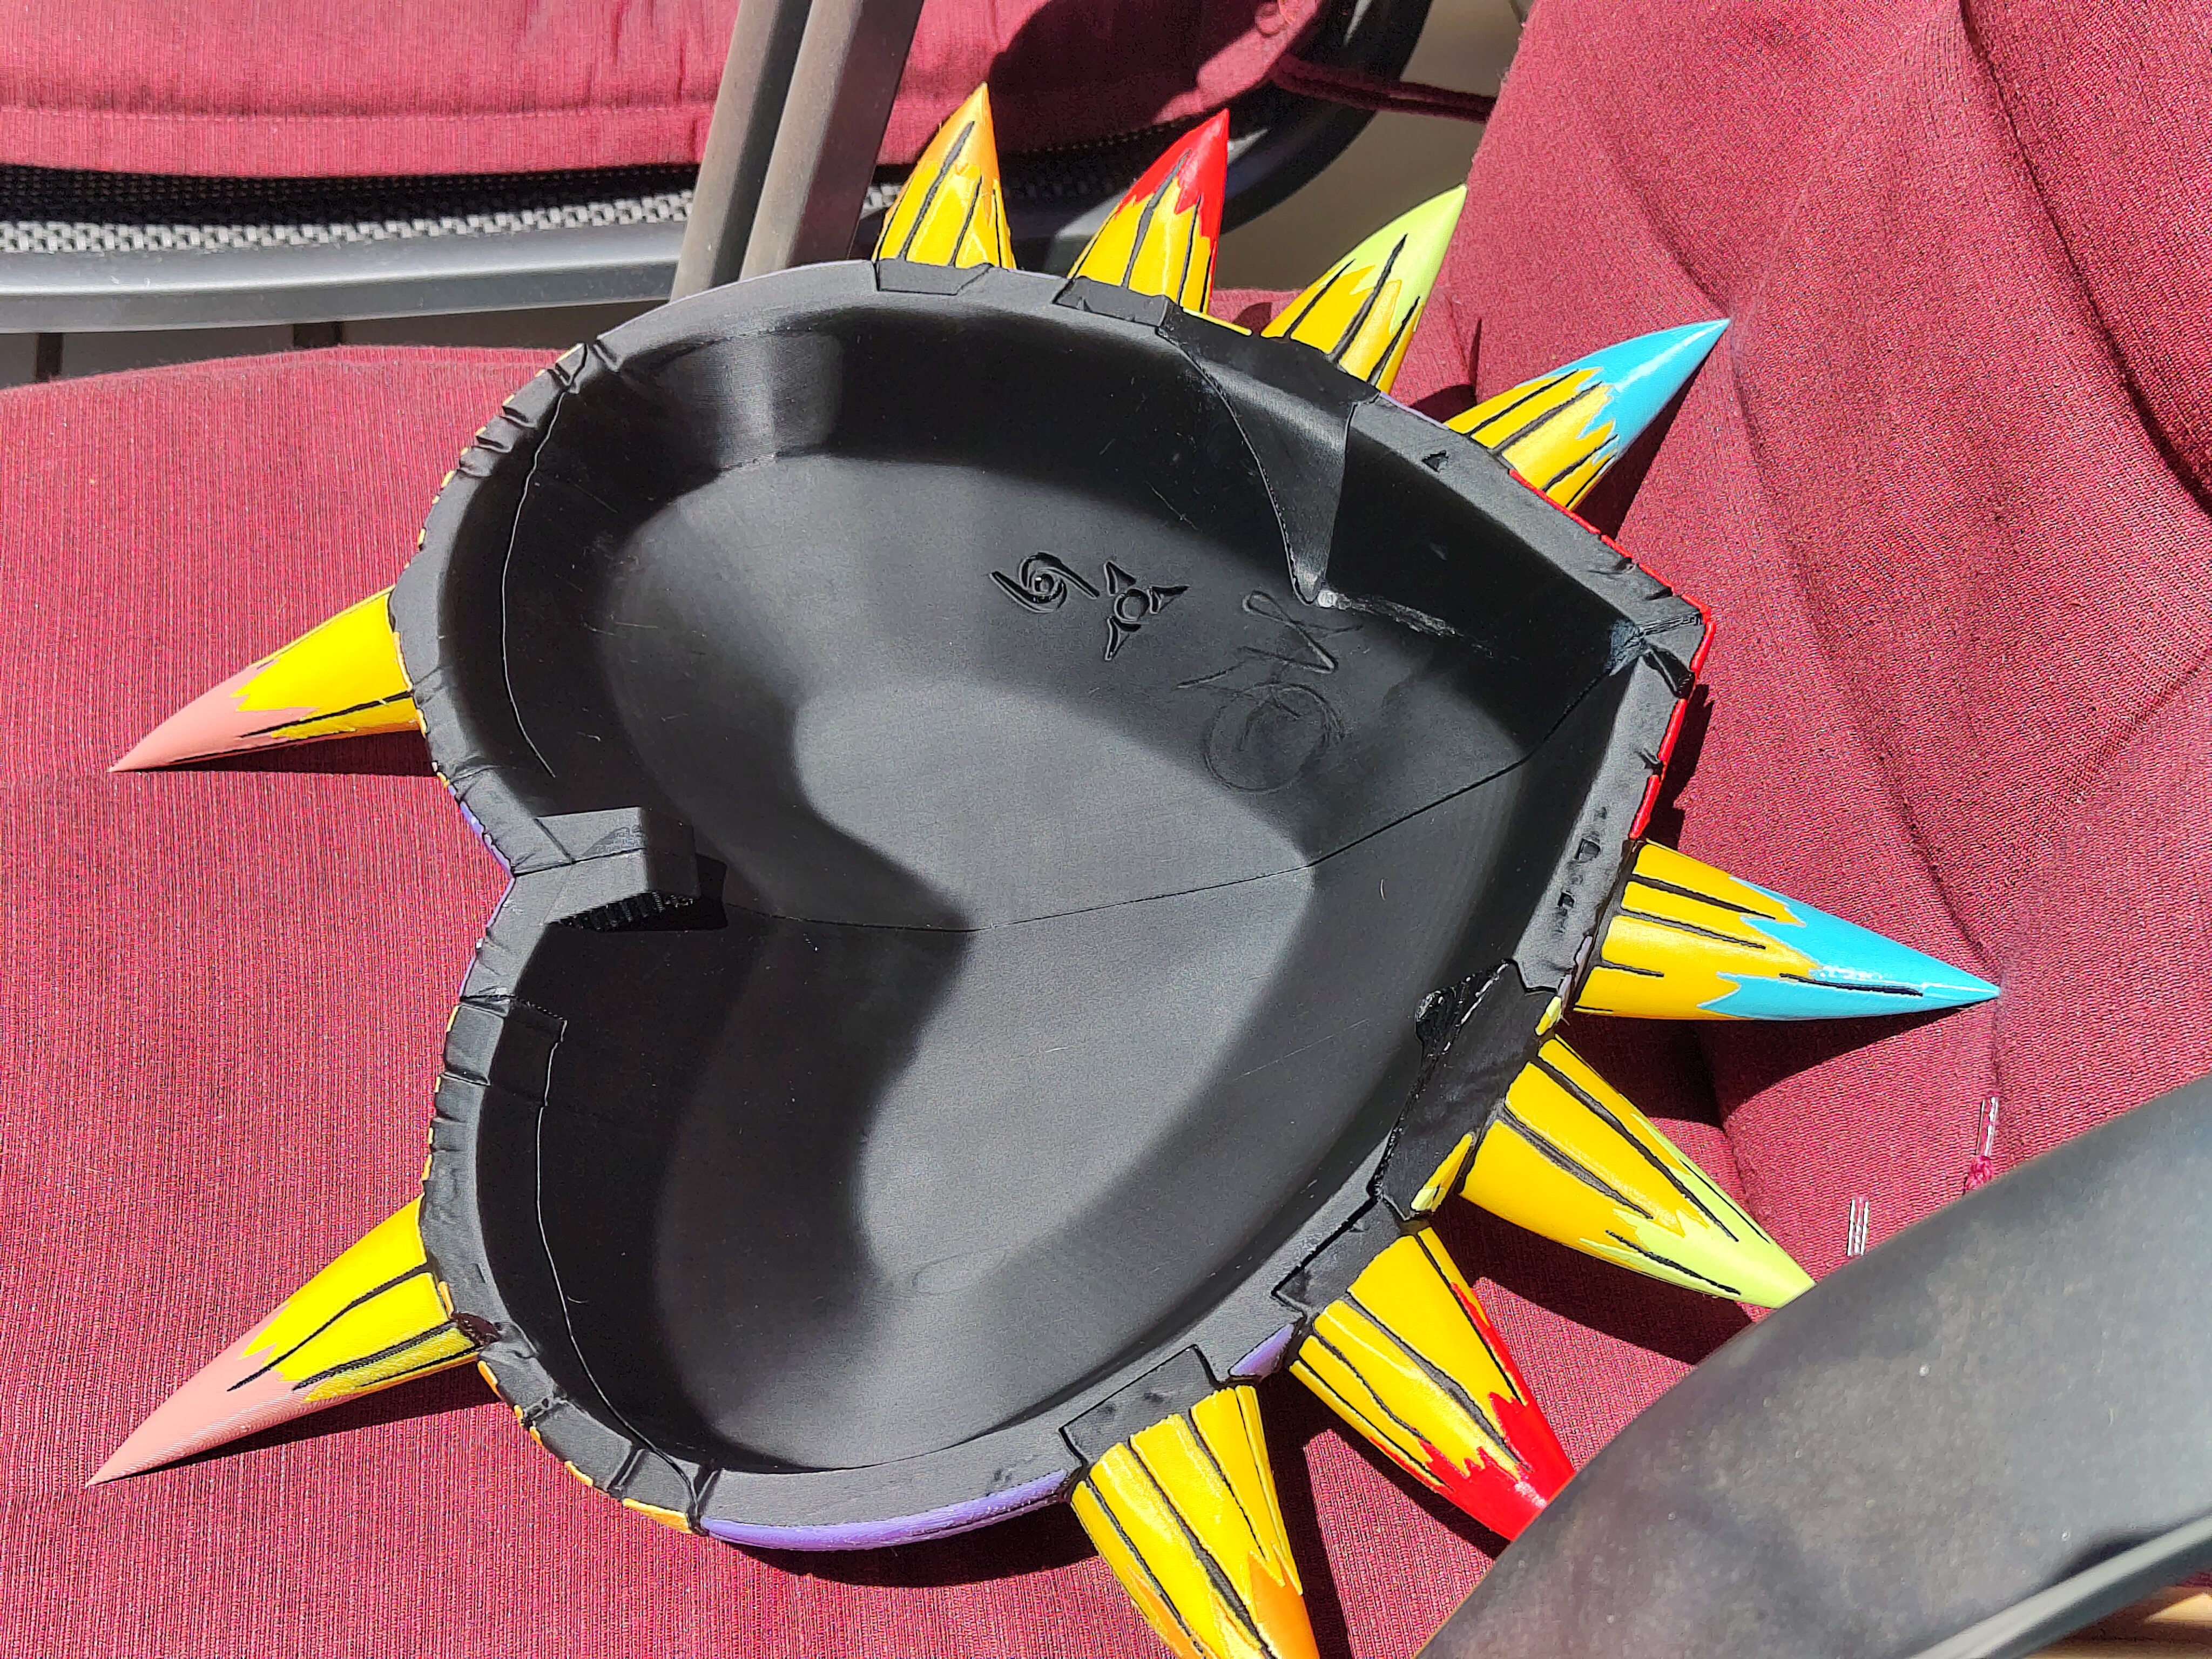
- Slimmer Design: Reduced wall thickness by 50% to save material and to better match the scale.
- Easier Assembly:
- Notches on most interfaces for precise alignment.
- Pegs for secure gluing of the two main halves.
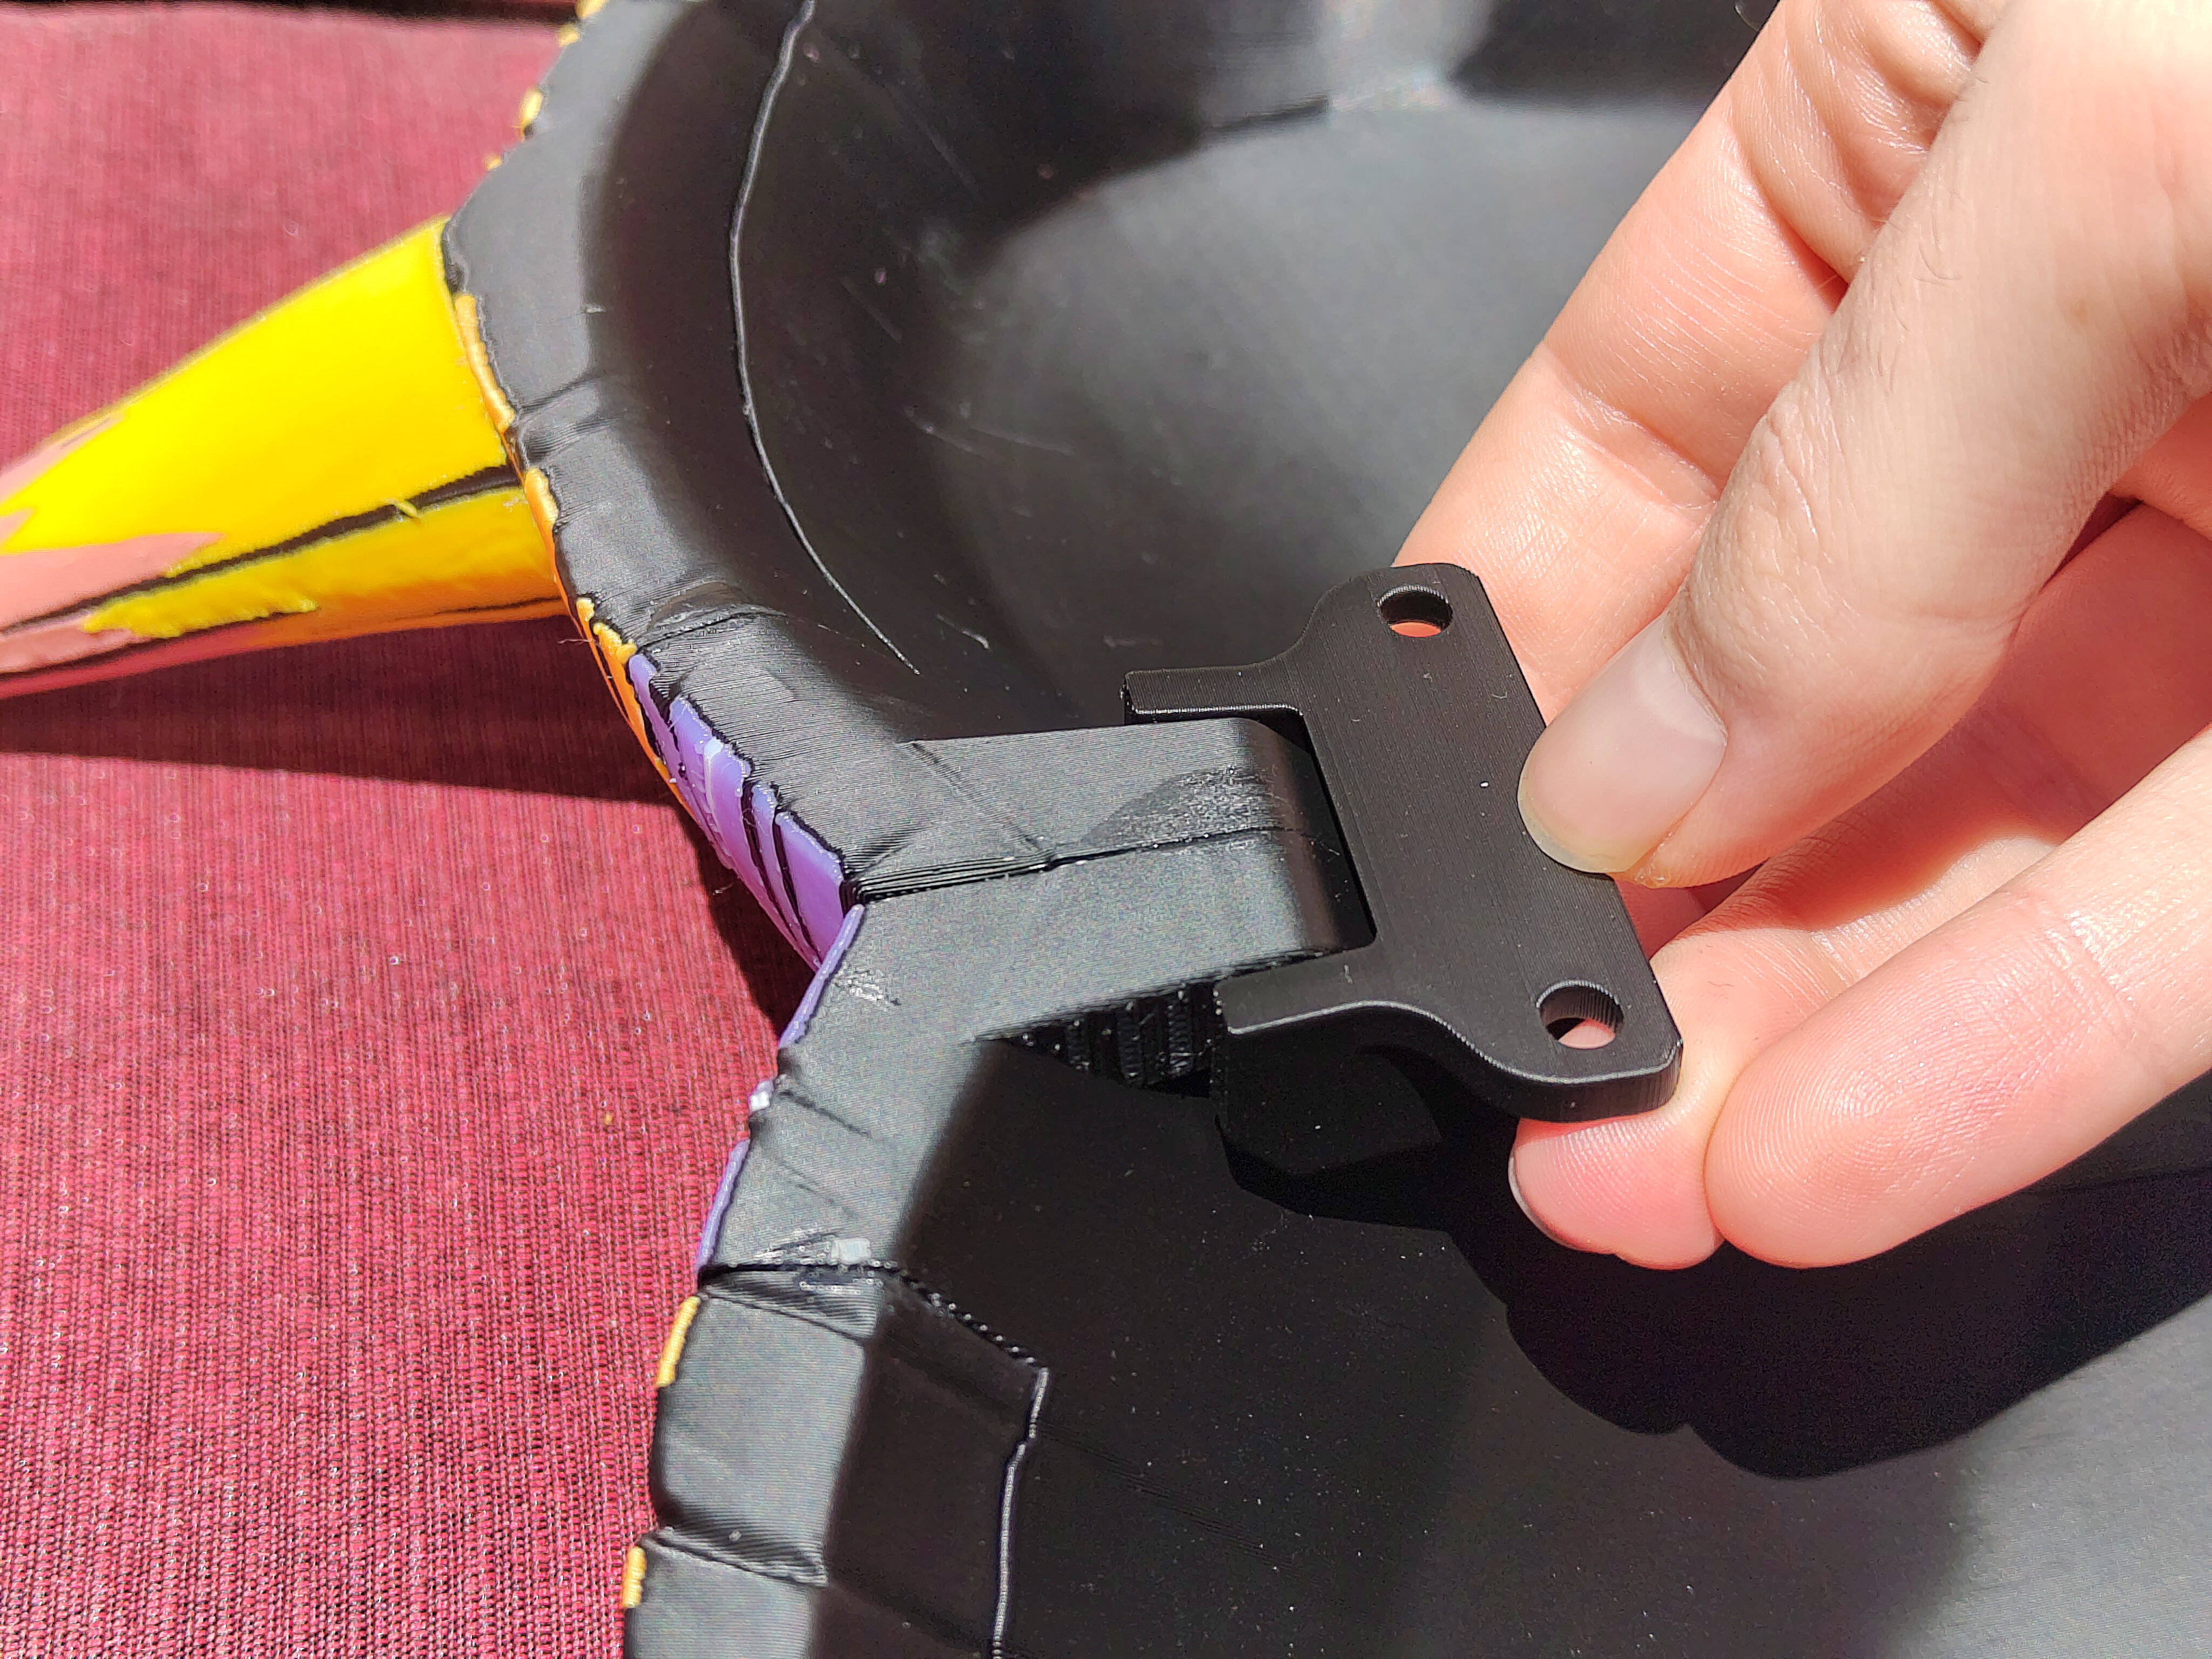
- Wall-Mount Ready: Hidden wall holder geometry and a matching wall mount (invisible from the front).
- Repainted: Entire model repainted due to geometry changes. This took a long time.
Filament required Color
Snapmaker U1
Bambulab A1
Black
790g
940g
Yellow
200g
570g
Red
170g
410g
Purple
150g
320g
Orange
100g
280g
White
65g
265g
Light Green
30g
60g
Light Blue
25g
70g
Tan
25g
70g
Total
1555g
2985g
Time
65h or 3d 1h
200h or 8d 8h
Calculated using OrcaSlicer and BambuStudio.
I can only confirm the U1 data.
Printing Use the provided .3mf as only it has the paint information. In the .3mf there is a fully assembled 3d model outside of any plate. It is there as a reference, don't use it to print! I used it to start painting, but it is missing some painting that i could only add after copying and splitting it apart.
The wall holder is an additional part, that is precisely aligned with the mask halves.
There is a .3mf file for Snapmaker Orca and for BambuStudio availabe.
Assembly Step 1 - Print out each plate and assemble all the parts as shown in the picture above.
- If there is any stringing, use a lighter or heat gun to remove it.
- Have superglue on hand.
Step 2 - Press the pupil into the eye. No glue is required.
- Test the fit of the eyes to ensure you have the correct side and orientation.
- Apply superglue to the socket and press the eye into it.
- Repeat for the other side.
Step 3 - Make sure you have all the yellow triangles and that they are in the correct sockets.
- Push the triangles into their sockets. No glue is required.
Step 4 - Place the mask half onto its side.
- Glue the upper horn (tan colour) into place.
- Glue the green horn into place.
- Glue the red horn into place.
- Finally, glue the orange and blue horns into their respective places.
- Repeat for the other side.
Step 5 - Let the halves sit for a while to let the glue dry.
Step 6 - Place the mask halves on their backs.
- Add glue to all ten peg indents on one half.
- Insert all the pegs into their indents.
- Add glue to all ten peg indents on the other half.
- Add glue to the entire interface of the other half.
- Align the two halves using the pegs and press them together.
Attribution - Uses original wood grain model as starting point
- Inspired by the MakerWorld 4-color AMS model .
License

Files
Model files
Download all files
majorasmask_4colour_per_plate_bambulab.3mf
majorasmask_4colour_per_plate_snapmaker.3mf
wall-holder-screws.stl
wall-holder-tape.stl
eye-left.stl
eye-pupil-left.stl
eye-pupil-right.stl
eye-right.stl
horn-keft-2.stl
horn-left-1.stl
horn-left-3.stl
horn-left-4.stl
horn-left-5.stl
horn-right-1.stl
horn-right-2.stl
horn-right-3.stl
horn-right-4.stl
horn-right-5.stl
mask-holder-left.stl
mask-holder-right.stl
mask-left.stl
mask-right.stl
peg-inner001.stl
triangle-left-1.stl
triangle-left-2.stl
triangle-left-3.stl
triangle-right-1.stl
triangle-right-2.stl
triangle-right-3.stl