
Model
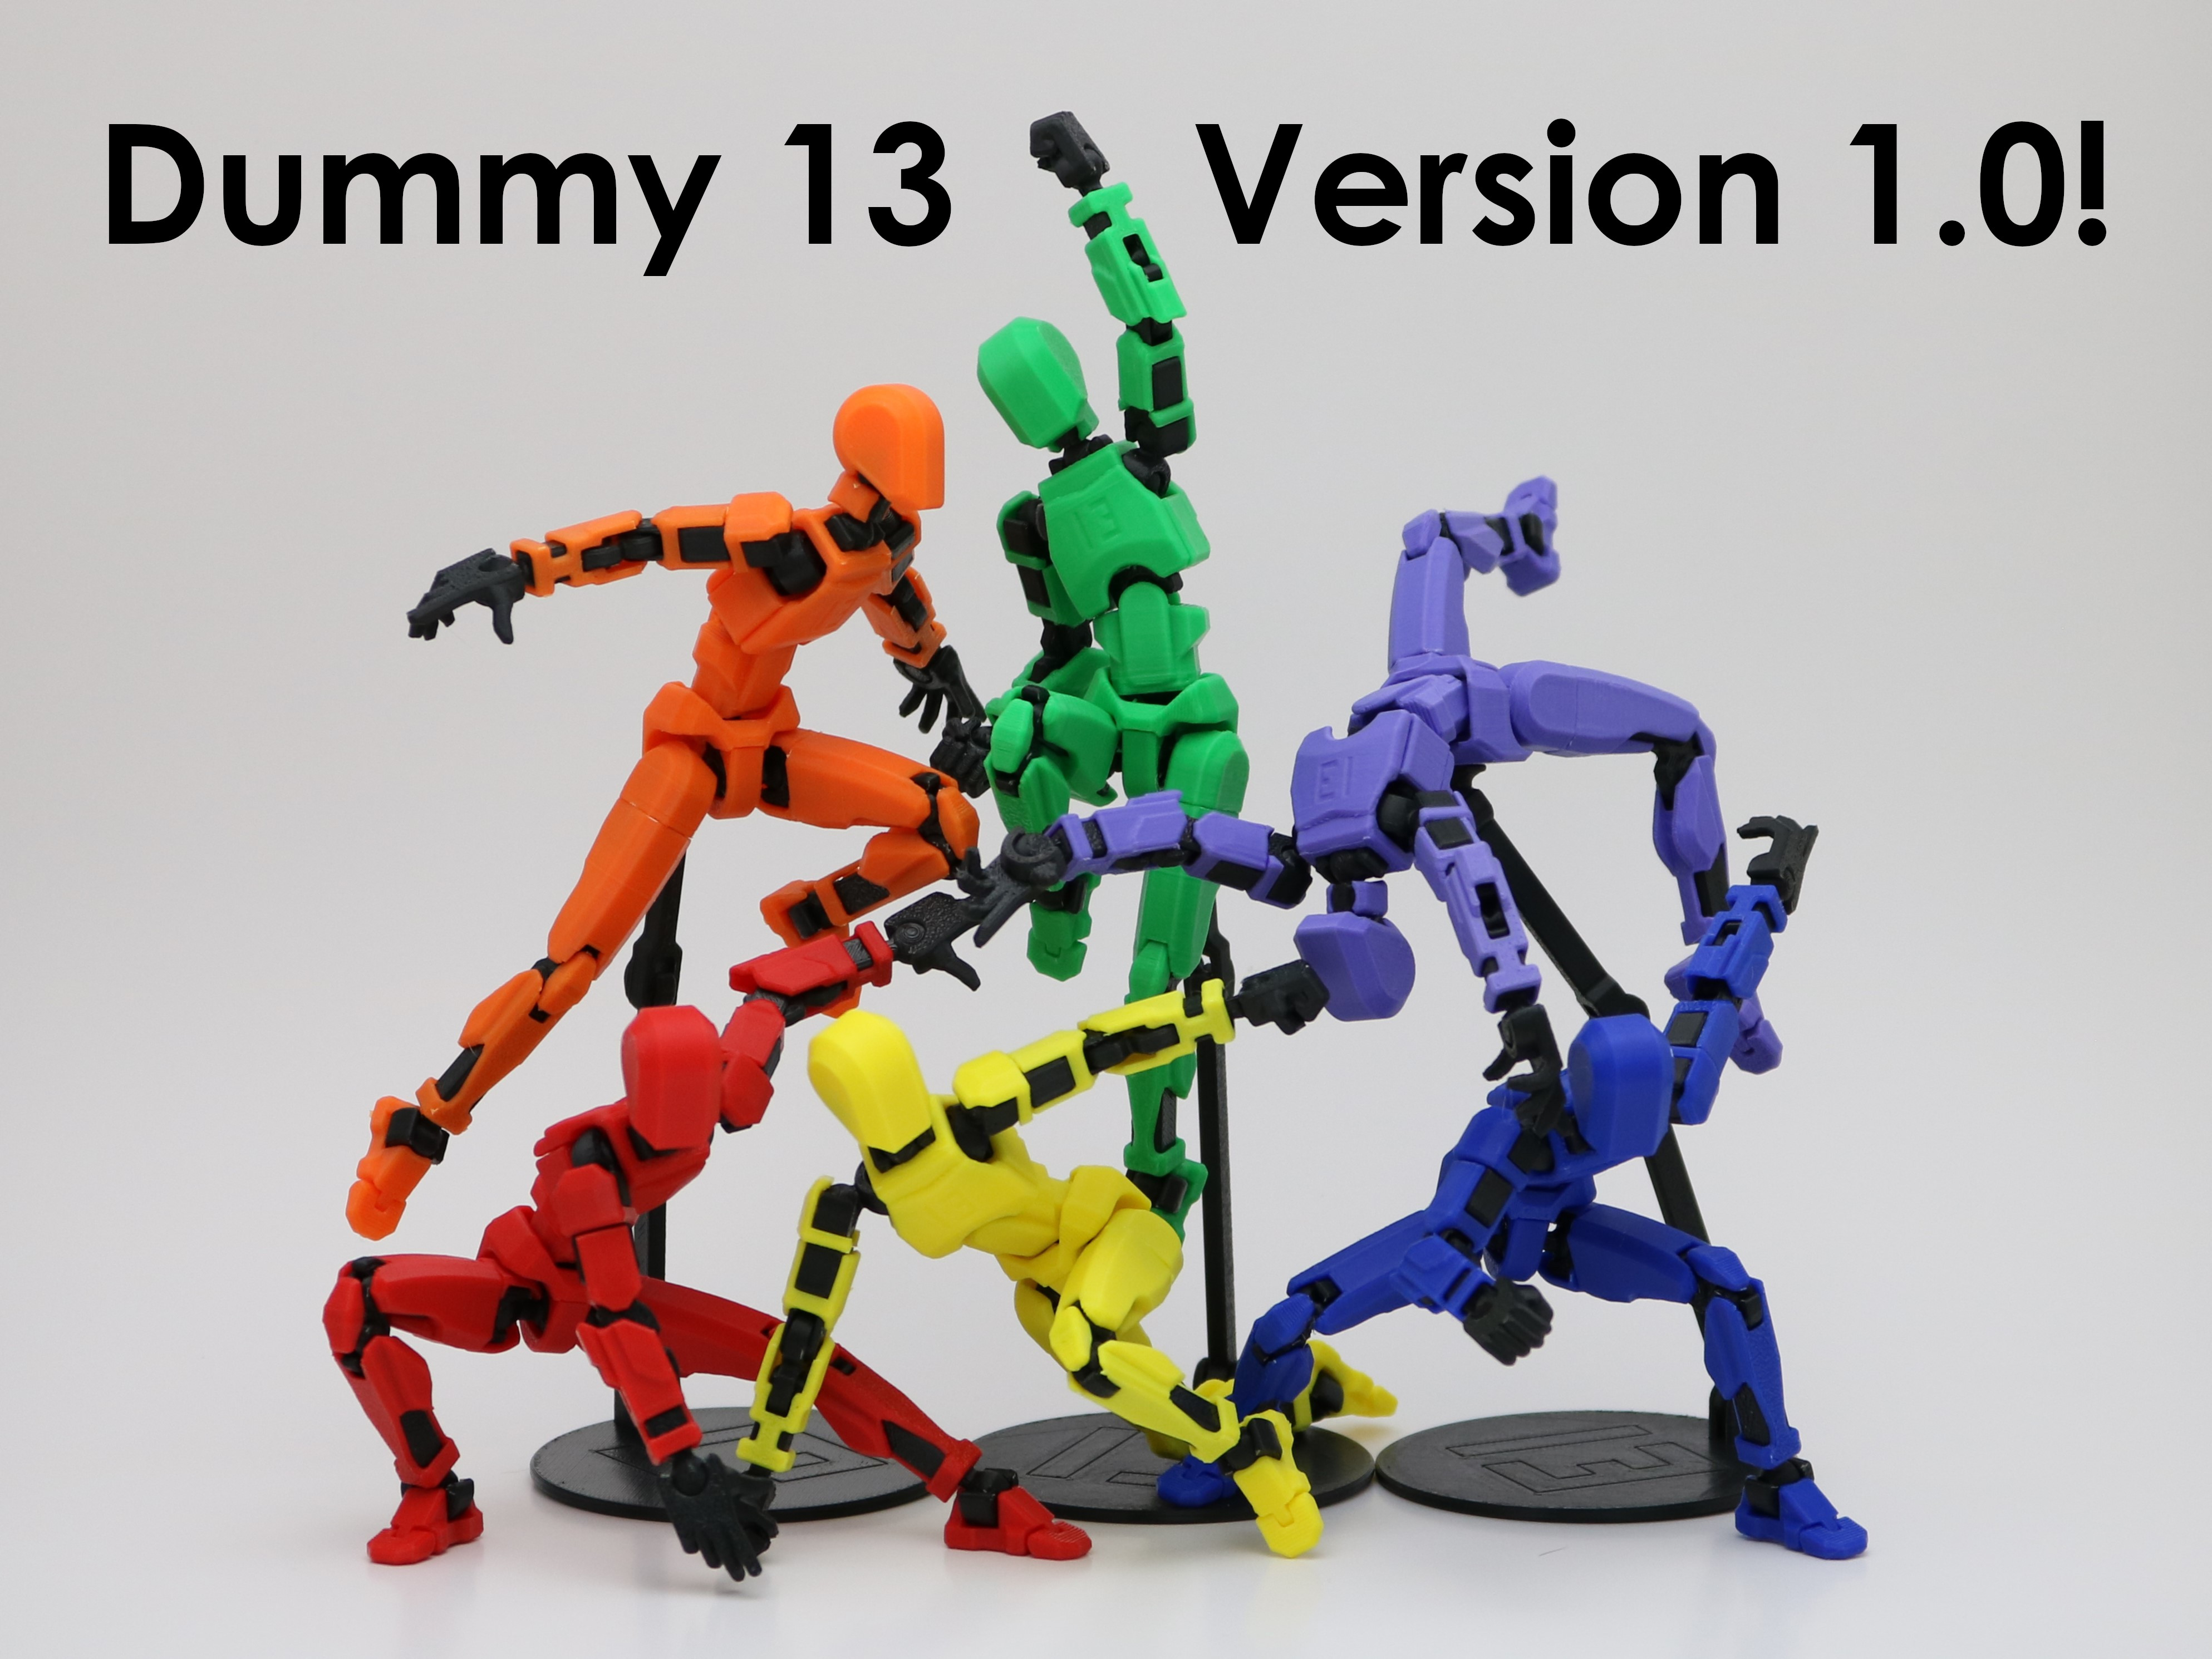

Dummy 13 - version 1.0!
Description
Dummy 13 has won 3D Model of the Year! Thank you so much to the judges and everyone who voted.
TL;DR - This is Dummy 13, a printable action figure.
- It was a work in progress for a while and now this is the finished product.
- It's still a tricky print, but I believe in you.
- Yes, you can sell it. Follow the CC-BY rules.
- If you like it, consider making a donation: [ PayPal | Stripe | BMaC ]
INTRODUCTION
Dummy 13 is a 3D printable action figure designed for super expressive articulation and infinite customization, accessible to anyone with a 3D printer.
Dummy 13 was originally released in beta form in October 2023. This Version 1.0 release incorporates much of the feedback collected over the past year. Nearly every piece of Dummy 13 has been revised for easier printing and assembly.
If you have printed the beta version before, you will find that the look of Dummy 13 is largely unchanged, but the experience of printing and assembling it is greatly improved.
If this is your first time printing Dummy 13, please be aware that this is a challenging print that requires you to be reasonably familiar with your printer and slicer. But I know you can do it!
I hope you will enjoy Dummy 13 as much as I have enjoyed creating it.
PRINTING
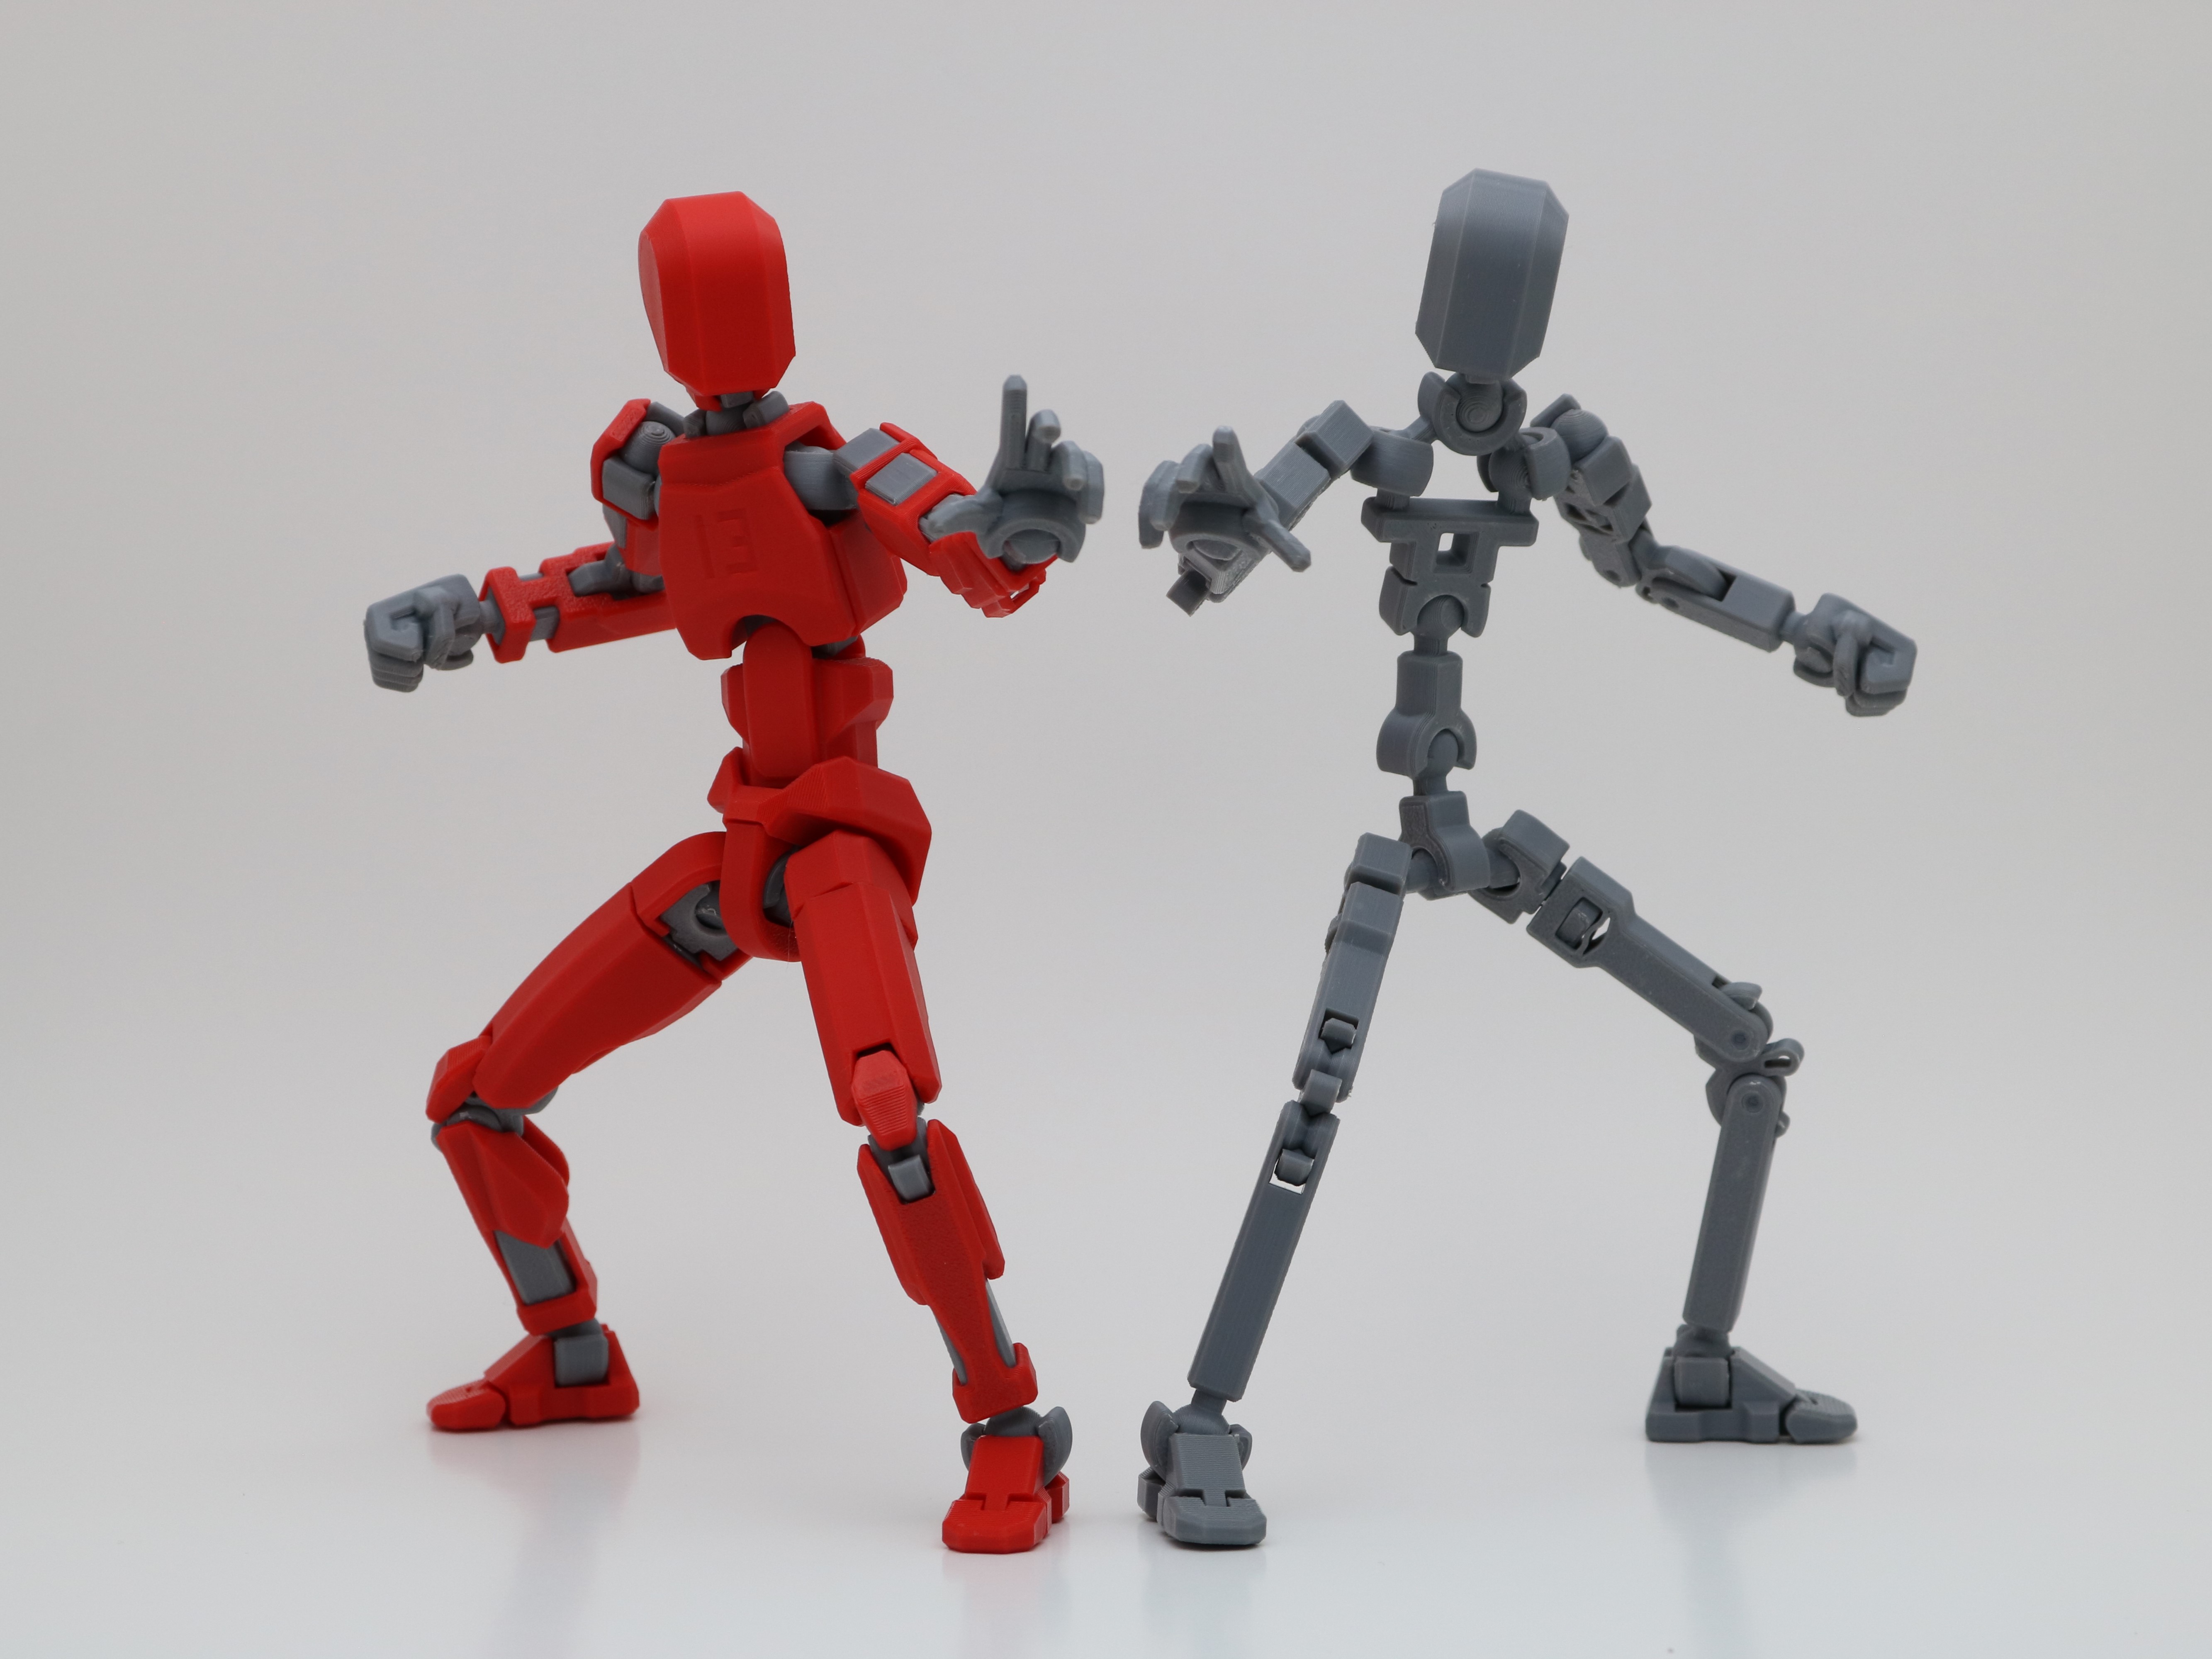
Files Dummy 13 is made up of an inner frame with an outer layer of armor . In the sample images, the frame parts are the ones printed in black or gray.
You can use whatever colors you like, of course, but I strongly recommend that you do not use PLA for the frame parts. (I explain why in the “filament” section later on).
The name of each file will indicate what layer it belongs to, followed by the body part, and the quantity if applicable.
The model files are available in three different formats: runners, pre-plated parts, and individual parts. Choose the format that works for you.
Runners This is the easiest way to print Dummy 13. All the parts are connected together, like a plastic model kit. There is one runner for the frame parts and one for the armor parts.
After printing, you will need to remove the parts from the runners. You should be able to snap the parts out by hand, and if needed you can clean up the “nubs” with a hobby knife.
The runners should help keep individual parts from losing adhesion during printing (although you should still keep your build plate clean!) They're also handy for packaging Dummy 13 as a model kit.
The downside of runners is the added plastic waste. At 100% scale, the runners will add about 9g of filament to your print - which doesn't sound like much, but consider that the parts themselves only weigh about 24 grams, so that's close to 40% more filament.
Pre-plated 3MF These files contain all of the individual parts of Dummy 13, pre-arranged into two plates (one for the frame and one for the armor). You can tweak the arrangement however you like.
If you use PrusaSlicer, you can select “open as project” when loading each file, and you will also have the recommended settings already applied.
When you print a lot of individual small parts, bed adhesion is super important! Make sure your print surface is clean, and consider applying glue for better adhesion.
Individual part files For the maximum control over your print arrangement, individual STL files of each part are also provided. You can use these to print replacement parts or as the base for remixes.
If a file name ends in “2x,” you should print two of that part for the full assembly. The same goes for “4x” parts.
Filament For the armor parts, you can use the filament of your choice. PLA, PETG, and ASA have all been tested with good results.
For the frame parts, you will get the best results with ABS/ASA, and PETG is also usable.
Why no PLA? PLA has three properties that make it a poor fit for the movable joints of Dummy 13's frame.
- PLA is stiff , so it can take a lot of force to snap the joints together.
- PLA is brittle , so the parts may break when subjected to that force.
- PLA will creep under stress, so the joints will become loose over time.
I understand that you may only have PLA handy. You can give it a try if you want. But you will get much better results if you invest in some PETG.
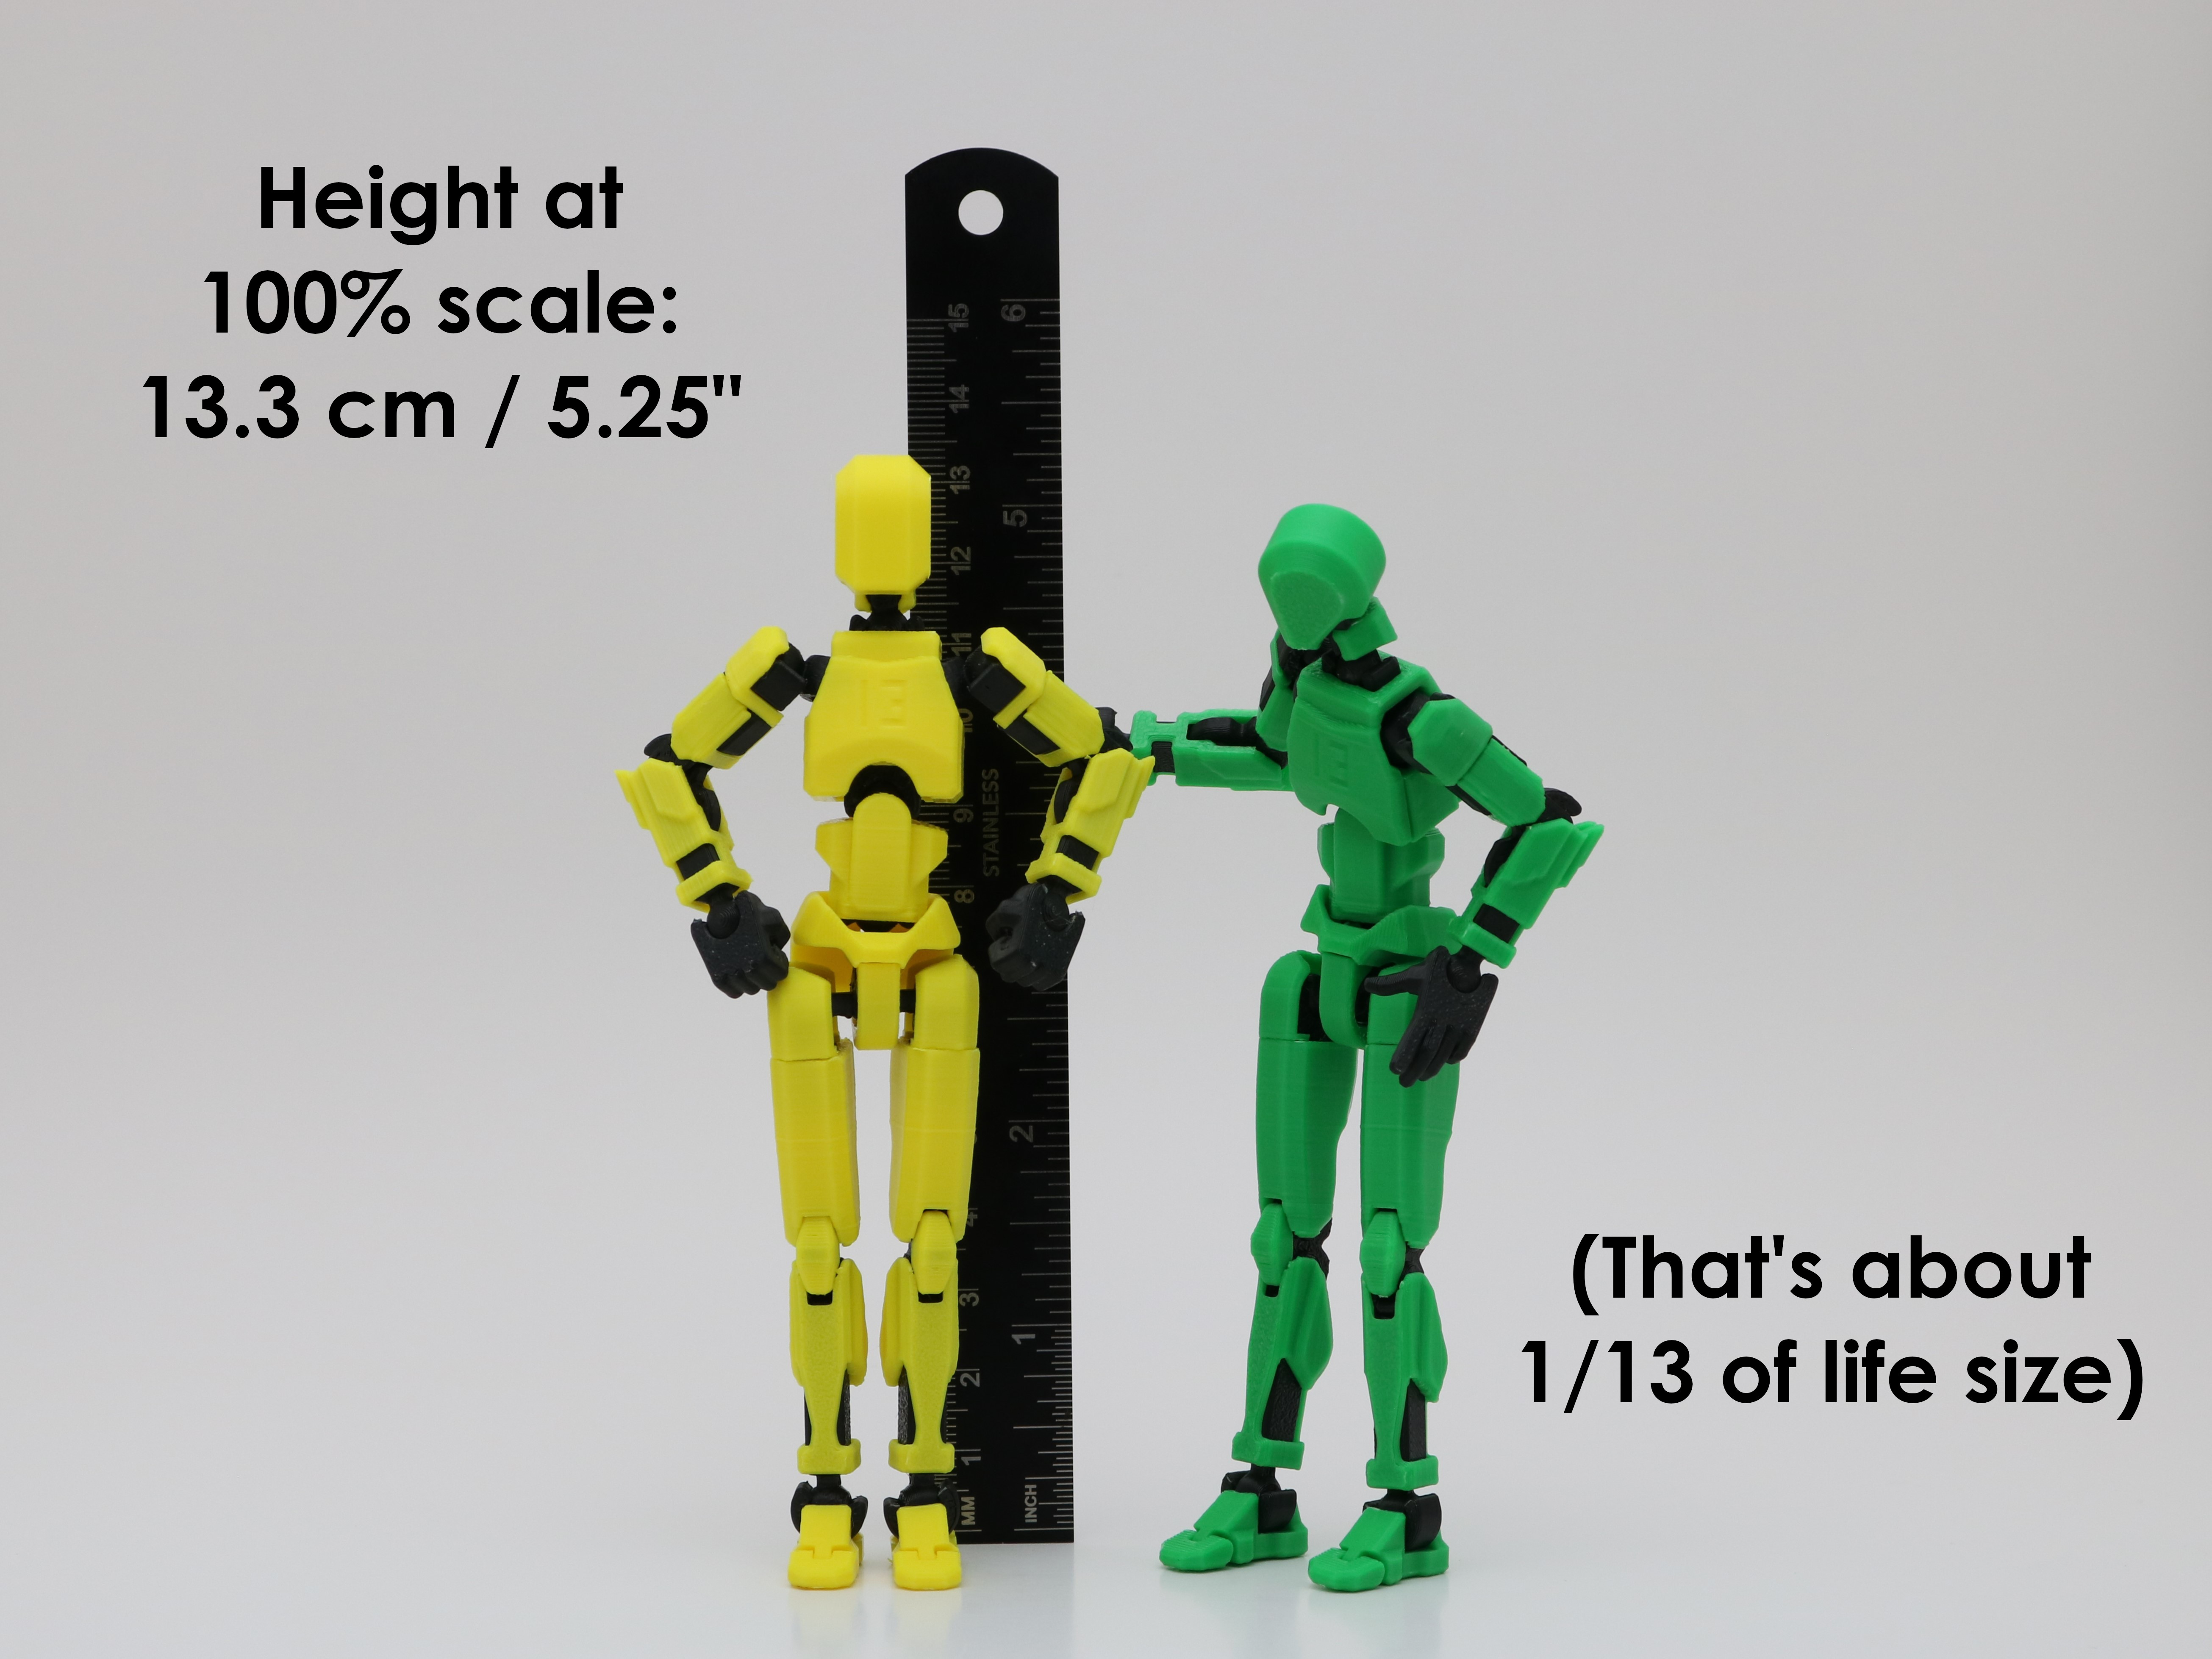
Print Settings Recommended settings (100% scale, 0.4mm nozzle)
Material Frame parts ABS, ASA, or PETG Armor parts Any Layer height First layer 0.2 mm Other layers 0.15 mm Number of perimeters 2 Infill 20%, rectilinear First layer speed 25% of default Elephant foot compensation 0.15 mm Supports None Brim As needed (depends on bed adhesion) Perimeter generator Arachne Additional settings ☑ Print external perimeters first OR
☑ Only one perimeter on first layer
These settings are not too different from the default medium-resolution profile on most slicers. Infill is set to rectilinear because grid infill has self-crossings that can knock parts loose. The first layer speed is reduced to promote bed adhesion, and upping the elephant foot compensation improves part fitment.
Using Arachne ensures that certain thin walls print correctly. Printing external perimeters first is optional but can help with dimensional accuracy, and sticking to one perimeter on the first layer will help with printing the parts on runners.
ASSEMBLY
Follow these steps to assemble Dummy 13. This assembly guide is also available in PDF form in the files section.
You can also follow the video assembly guide from the beta version:
BONUS CONTENT
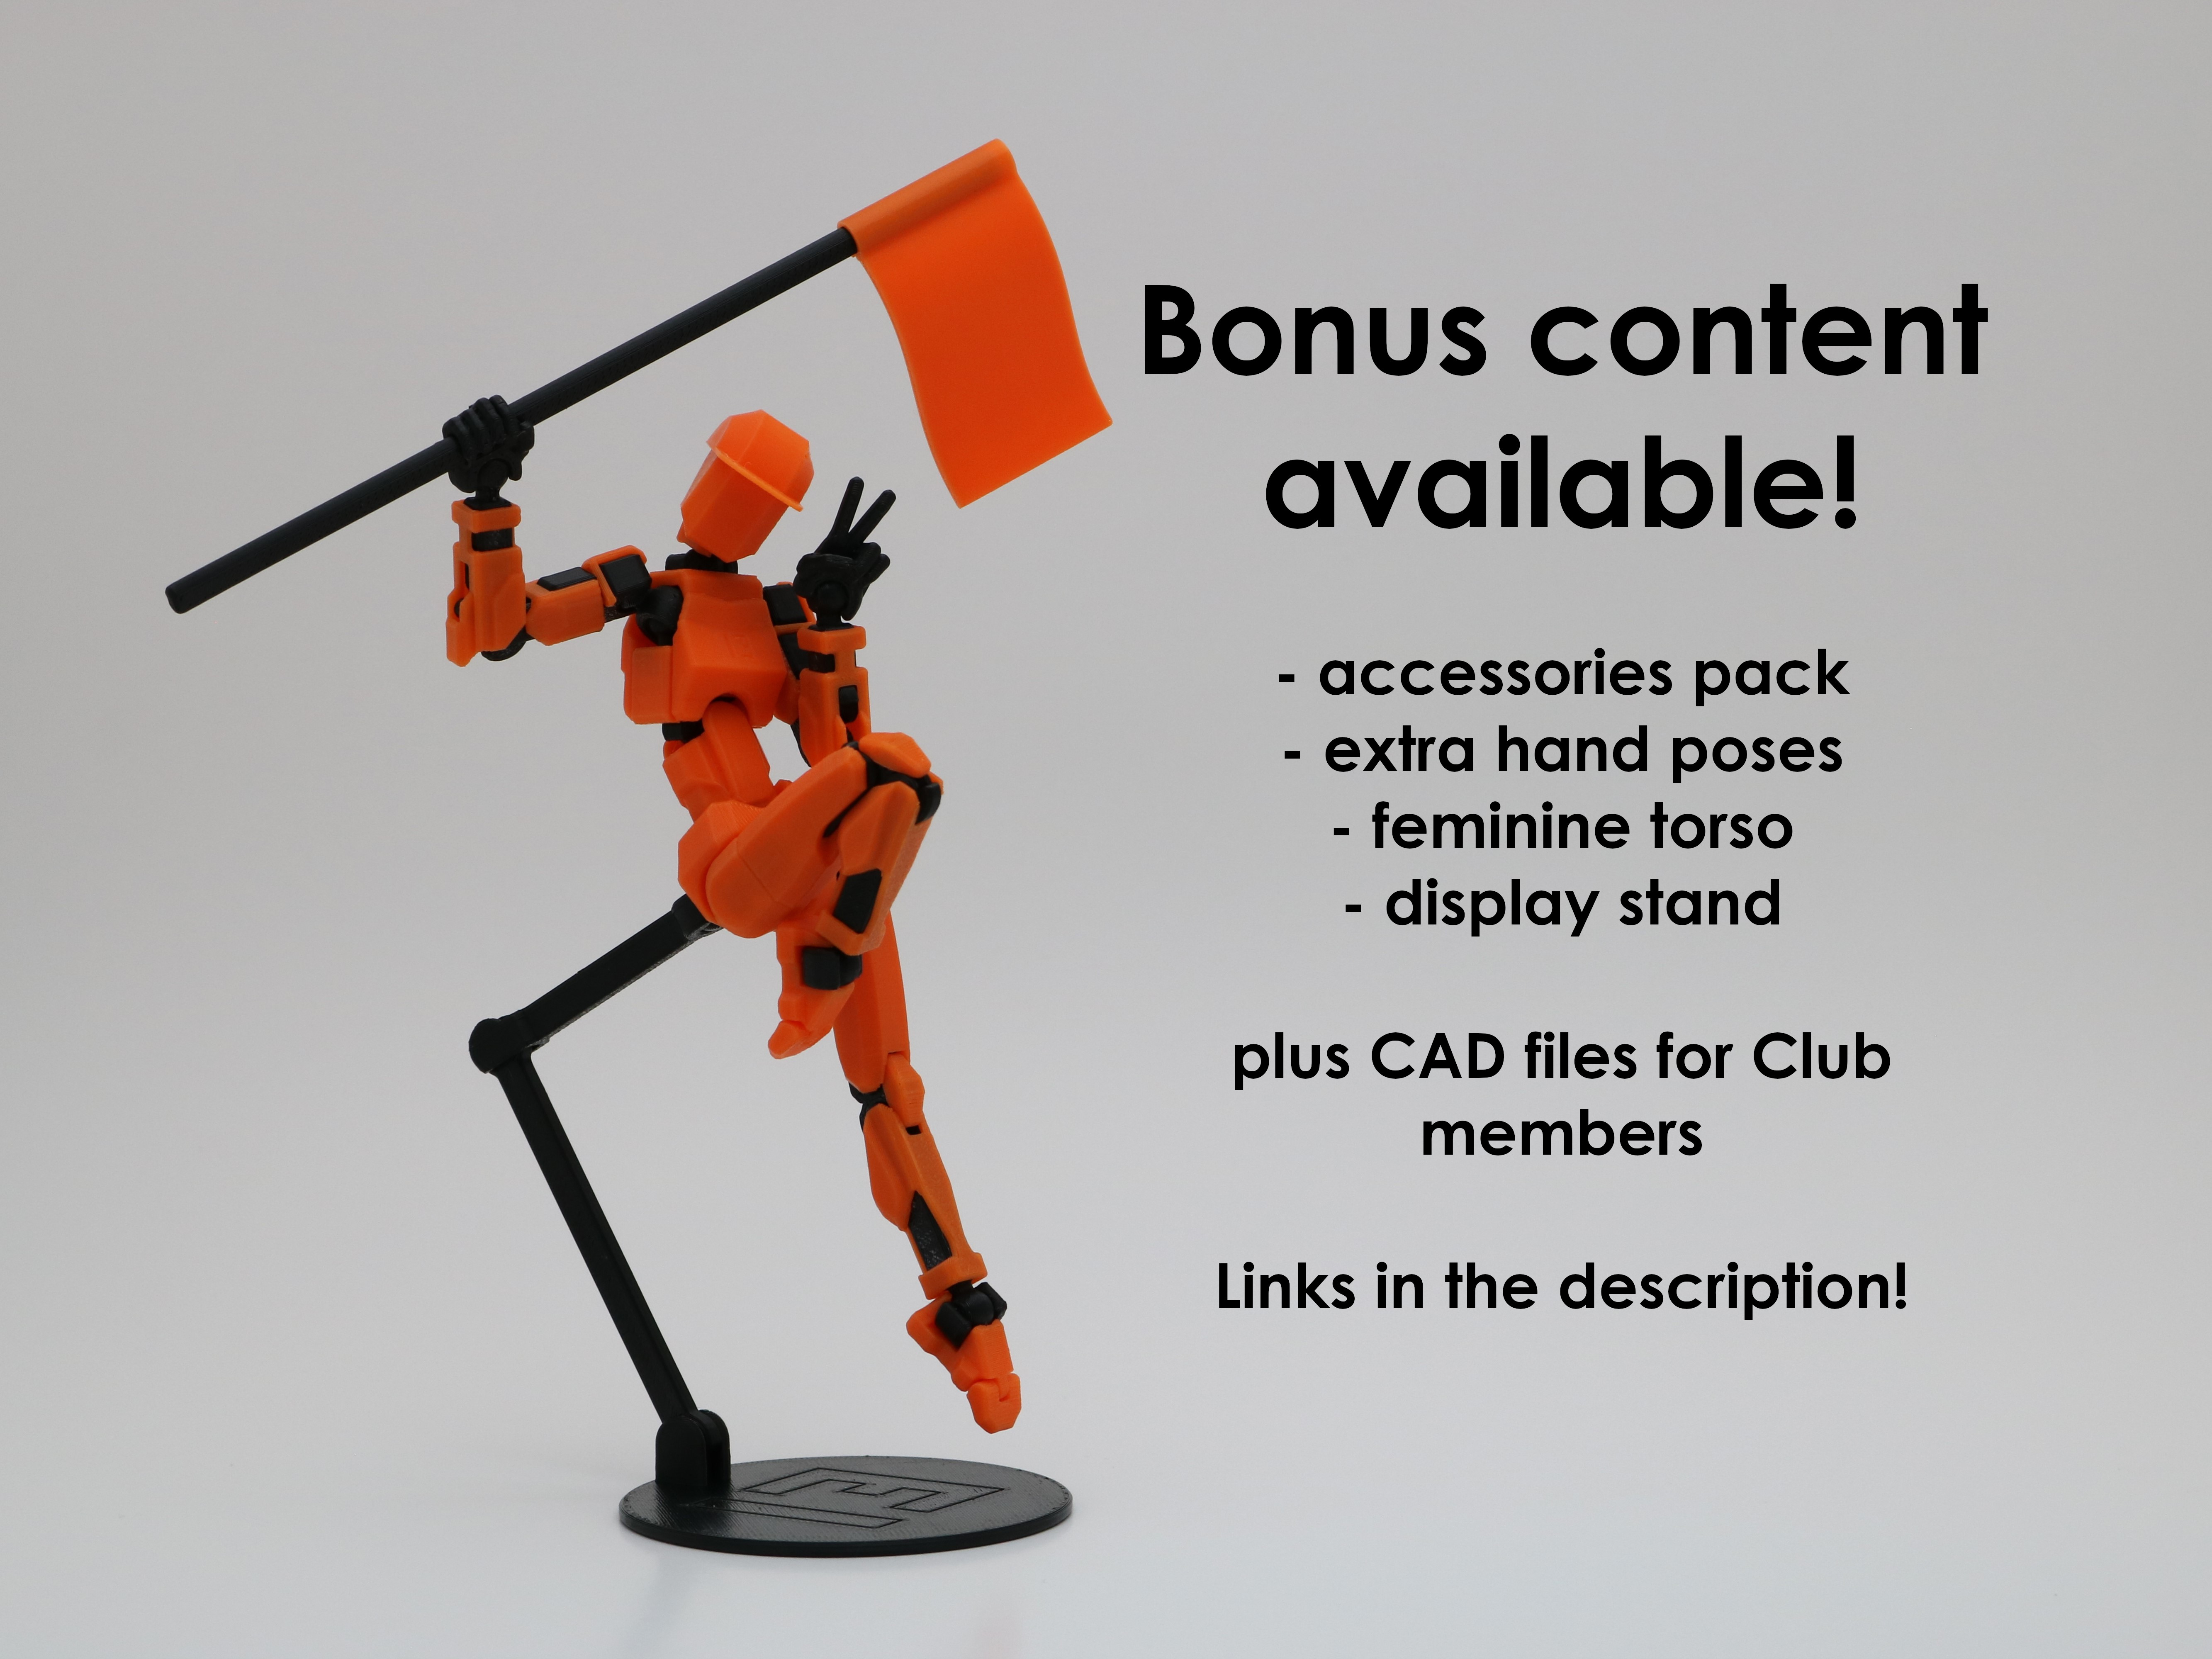
To celebrate the 1.0 release, I've also created some “first party” bonus content:
- Accessories starter pack
- Feminine torso
- Extra hand poses
- Simple display stand
These all use the same CC BY 4.0 license as Dummy 13 itself, so if you are selling Dummy 13, you can easily add this extra content to your store under the same attribution.
Additionally, the official CAD files for Dummy 13 are now available for my Club members as well as in the Printables Store. These are a great starting point for remixes, or you can just study and critique my design process :)
LICENSE
tl;dr for sellers:
- Yes, you can sell prints of this model.
- You do not have to buy a license or join my club.
- YOU MUST GIVE PROPER ATTRIBUTION.
Dummy 13 v1.0 is made available under a Creative Commons Attribution 4.0 license.
Under the CC BY 4.0 license, you are free to share and adapt this work, including for commercial purposes (such as selling prints), provided that you give proper attribution.
Following Creative Commons guidelines, proper attribution includes Title, Author, Source, and License.
- Title: The correct name of the design (Dummy 13)
- Author: Gabriel Rosiak (and/or) soozafone (and/or) Lucky 13 Toys
- Source: A link to this download page and/or to lucky13toys.com
- License: A notice that the work is licensed under CC BY 4.0
Example:
Dummy 13 Version 1.0 © 2024 by Gabriel Rosiak is licensed under CC BY 4.0 These are not difficult rules to follow. I am letting you sell a very popular product for free. Give me the basic courtesy of attaching my name to my own hard work.
An additional note to sellers: This license does not automatically allow you to sell other people's remixes of Dummy 13! You must obtain permission from the remix creator and follow their license terms.
RELEASE NOTES
Hotfixes - 9/15/24 added hands to plated parts
v1.0 - September 13, 2024
Summary We are finally out of beta! Nearly every single part of Dummy 13 has been updated for better printing, assembly, and aesthetics.
Body sculpt and range of motion In general, I have tried to keep the same proportions and sculpting of the beta model. The only place I have significantly changed the aesthetic design is on the front of the chest, which I felt was too flat before. Some minor changes have been made to improve range of motion and reduce gaps.
- Chest armor updated with new shaping.
- A more feminine chest sculpt is also available separately; see below in “additional content.”
- Toe joint modified to reduce gap and increase range of motion.
- Neck armor tweaked to slightly increase range of motion of neck and head.
Printability improvements Printing a large number of small parts will always be a challenge, but I have tried to address some of the most common complaints.
- Parts are now available on runners to improve bed adhesion through the power of teamwork.
- Hand parts no longer have multiple overlapping bodies, which caused issues in some slicers.
- Shin and forearm armor parts have increased clearance to allow bridges to form properly.
- The small cylindrical “neck” of each ball joint has been flattened slightly for better bridging performance.
- All hand parts have premade left and right versions so you don't have to mirror anything in your slicer.
Assembly improvements The majority of the work in bringing Dummy to a full release went into improving the connections between parts and ease of assembly.
- Wherever possible, press-fit connections have been replaced with snap-fit connections. Press fits are prone to being either too loose or too tight, while snap fits have more tolerance for dimensional variations. This has been implemented in the following connections: - Head frame to head armor
- Neck frame to neck armor
- Crotch armor into waist armor
- Knee frame to knee armor
- Ankle frame into foot armor
- Stand adapter into waist armor
- The “swivel joints,” connecting the shoulder to the arm and the hip to the thigh, now use a compliant mechanism to hold tension on the joint rather than relying on close tolerances. Again, this should help with the too-tight-too-loose problem.
- The lower ball joint socket in the chest frame has been relieved slightly. This joint was prone to cracking when printing at larger sizes.
- The longer abdomen frame piece has been differentiated more from the shorter waist frame piece. Previously it was possible to swap these pieces in the assembly, leading to issues assembling the torso. Each piece should now only fit in its proper place.
- The inner chest armor piece has been made symmetrical front-to-back so that the backpack hole cannot be blocked by accident.
- The tabs of the shoulder armor pieces have been thickened to reduce the chance of breaking while handling the piece.
- Step-by-step pictorial instructions for assembly are now available.
Additional free content Along with the main v1.0 release, I am putting out several “first party remixes.” Together, they make a great starter set for Dummy 13. The additional content is available for commercial use under the same CC BY 4.0 license as the main model.
- Basic accessory pack
- Extra hand poses pack
- Feminine torso mod
- Simple display base
CAD files - CAD files are available to members of my Printables Club as well as in the Printables Store. This includes the original Fusion 360 files and STEP files for easier remixing.
ONE MORE THING…
This free model is the product of hundreds of hours of work. If Dummy 13 brought you joy - or profit - please consider supporting me with a one-time donation.
Donate through PayPal Donate through Stripe Buy Me a Coffee
License

Files
Model files
Download all files
armor-abdomen.stl
armor-crotch.stl
armor-foot-2x.stl
armor-forearm-2x.stl
armor-head.stl
armor-hip-2x.stl
armor-inner-chest.stl
armor-knee-2x.stl
armor-neck.stl
armor-outer-chest.stl
armor-shin-2x.stl
armor-shoulder-2x.stl
armor-thigh-2x.stl
armor-toe-2x.stl
armor-upper-arm-2x.stl
armor-waist.stl
adapter-stand.stl
frame-abdomen.stl
frame-ankle-2x.stl
frame-chest.stl
frame-clavicle-2x.stl
frame-forearm-2x.stl
frame-head.stl
frame-hip-and-shoulder-4x.stl
frame-hips.stl
frame-knee-and-elbow-4x.stl
frame-neck.stl
frame-shin-2x.stl
frame-thigh-2x.stl
frame-upper-arm-2x.stl
frame-waist.stl
hand-fist-left.stl
hand-fist-right.stl
hand-grip-left.stl
hand-grip-right.stl
hand-open-left.stl
hand-open-right.stl
runner-armor.stl
runner-frame.stl
all-armor-parts.3mf
all-frame-parts.3mf