
Model
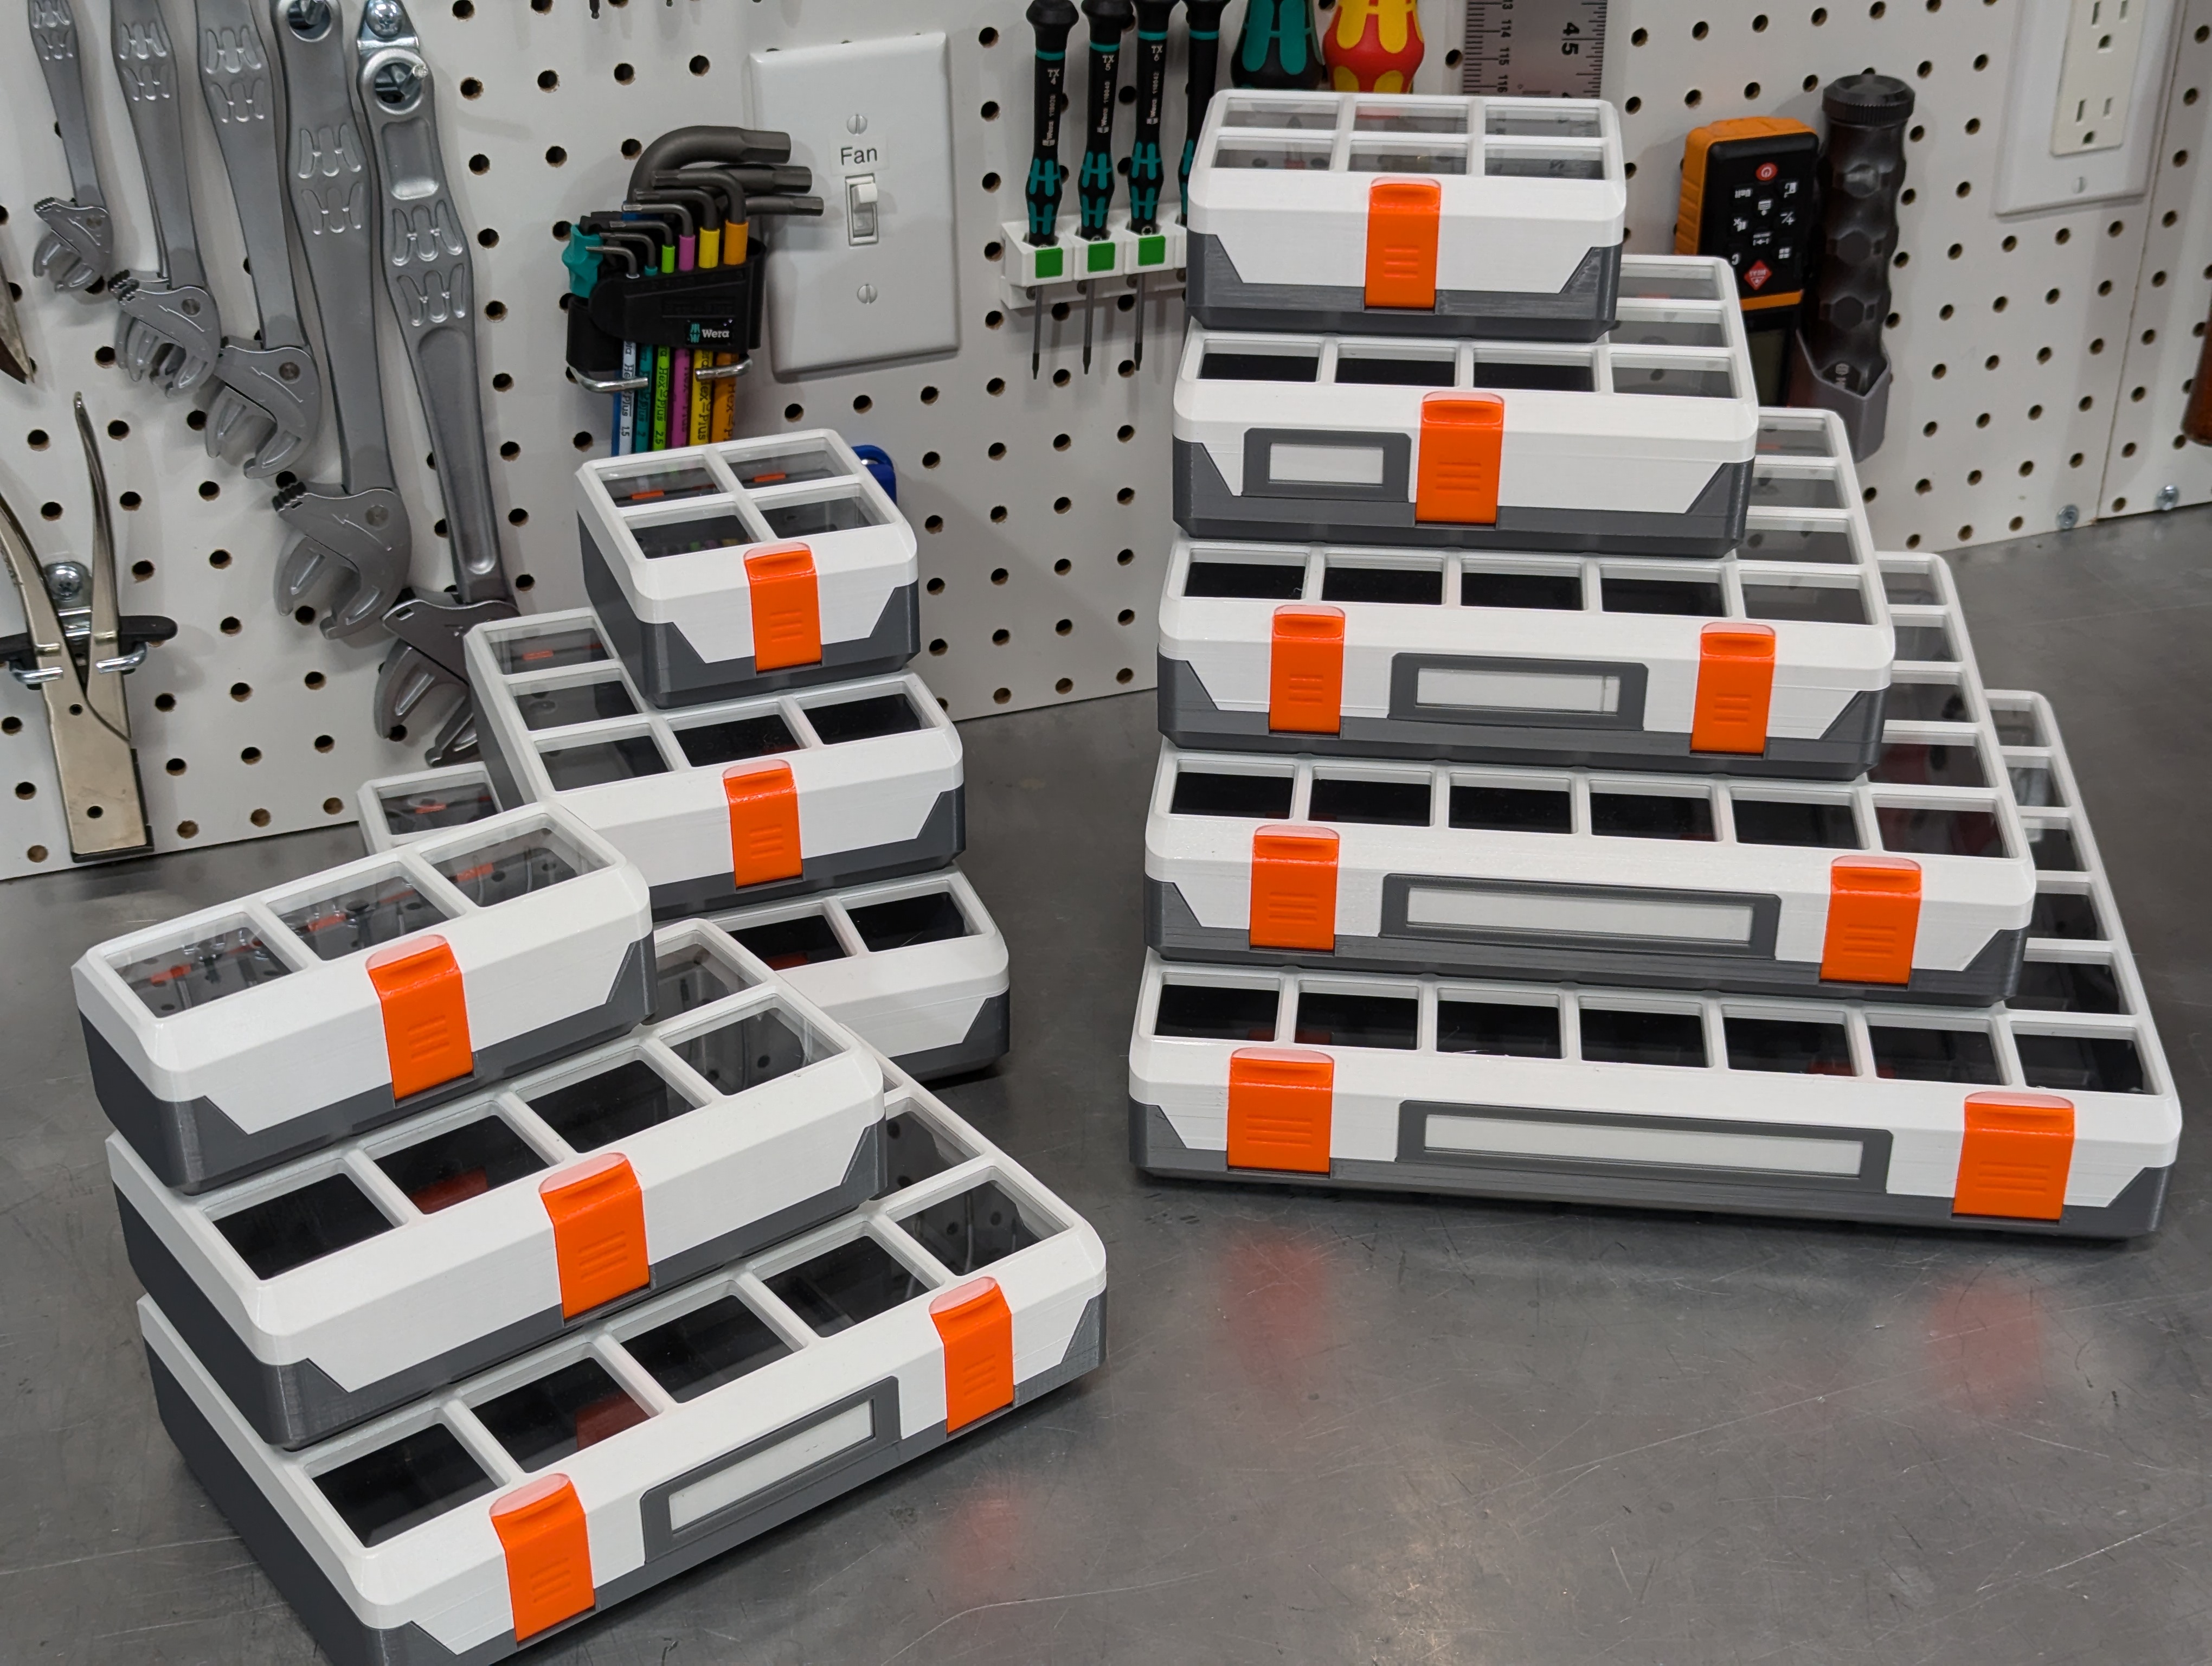
Modern Gridfinity Case
Description
This is my design for a case for holding Gridfinity bins. My design goals included:
- Clean design
- No Hardware
- Able to stand on ends and back
- Contents stay in place
- Easy to open and securely close
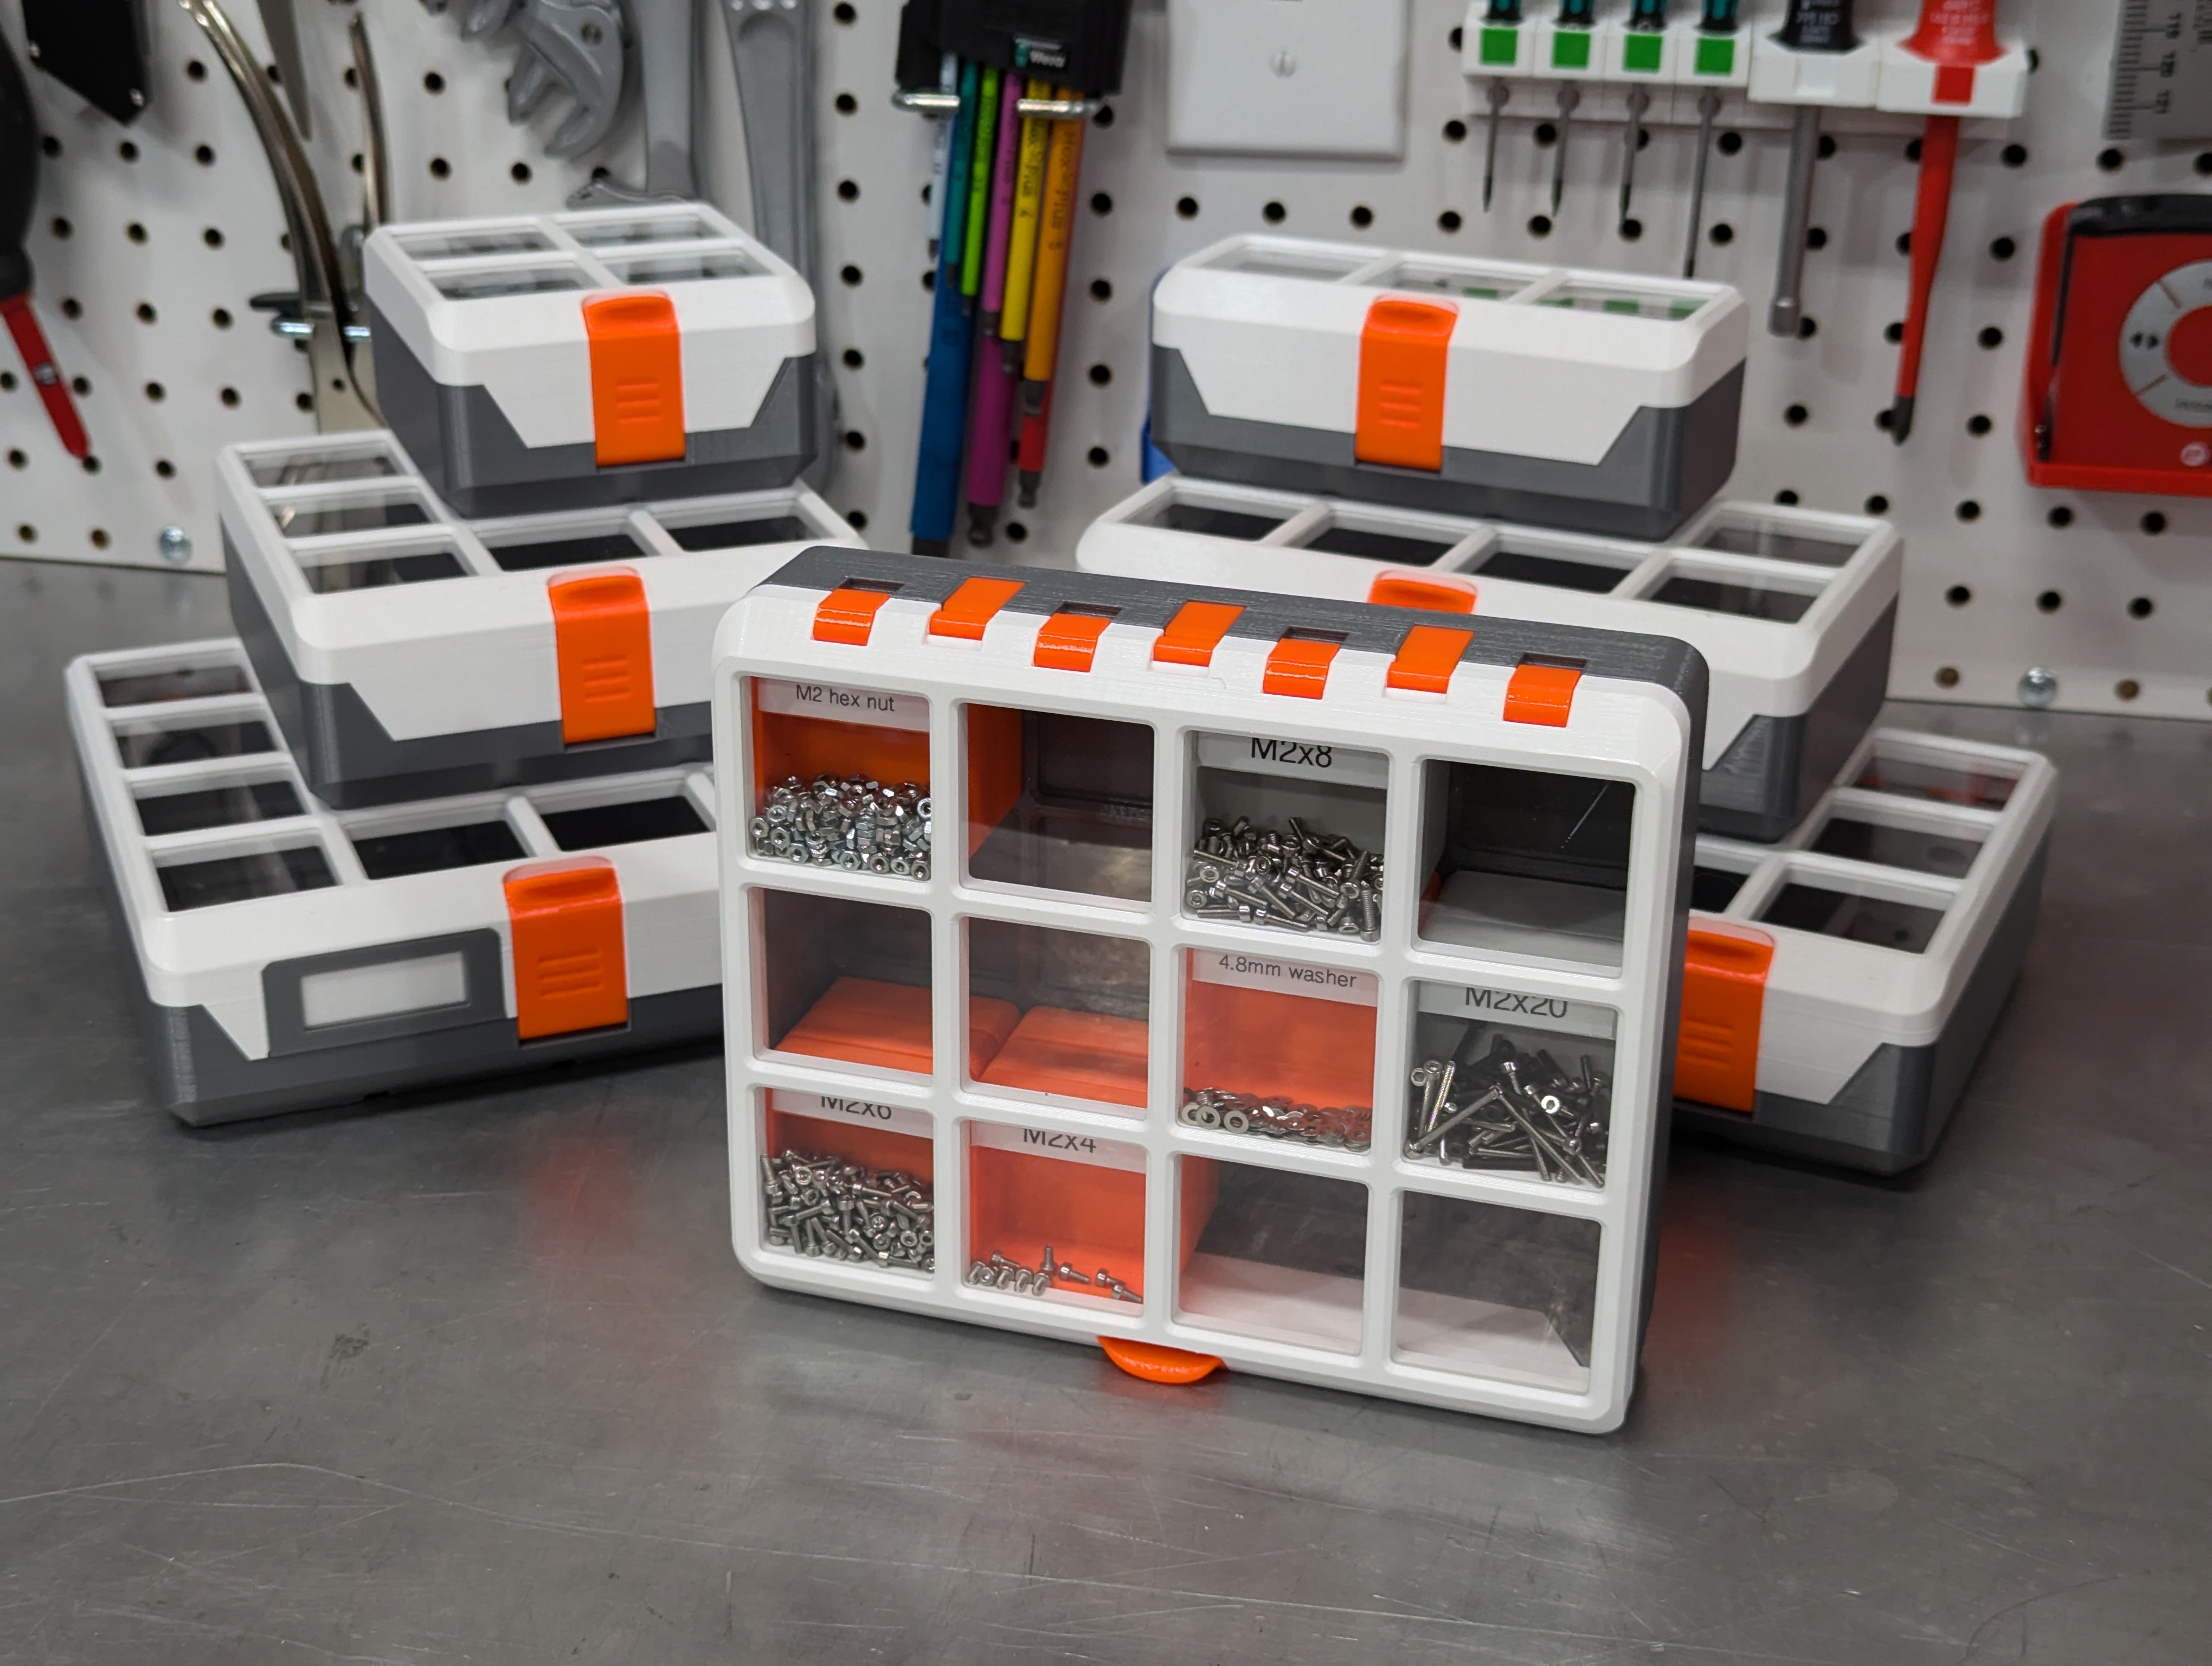
- Stackable
- Designed for 3D printing
While I appreciate the most excellent rugged boxes by Yanev and Whity (I've printed a few!) I wanted something that was tailored to gridfinity, and that leaned into what we can do with 3D printing without injection molding design language.
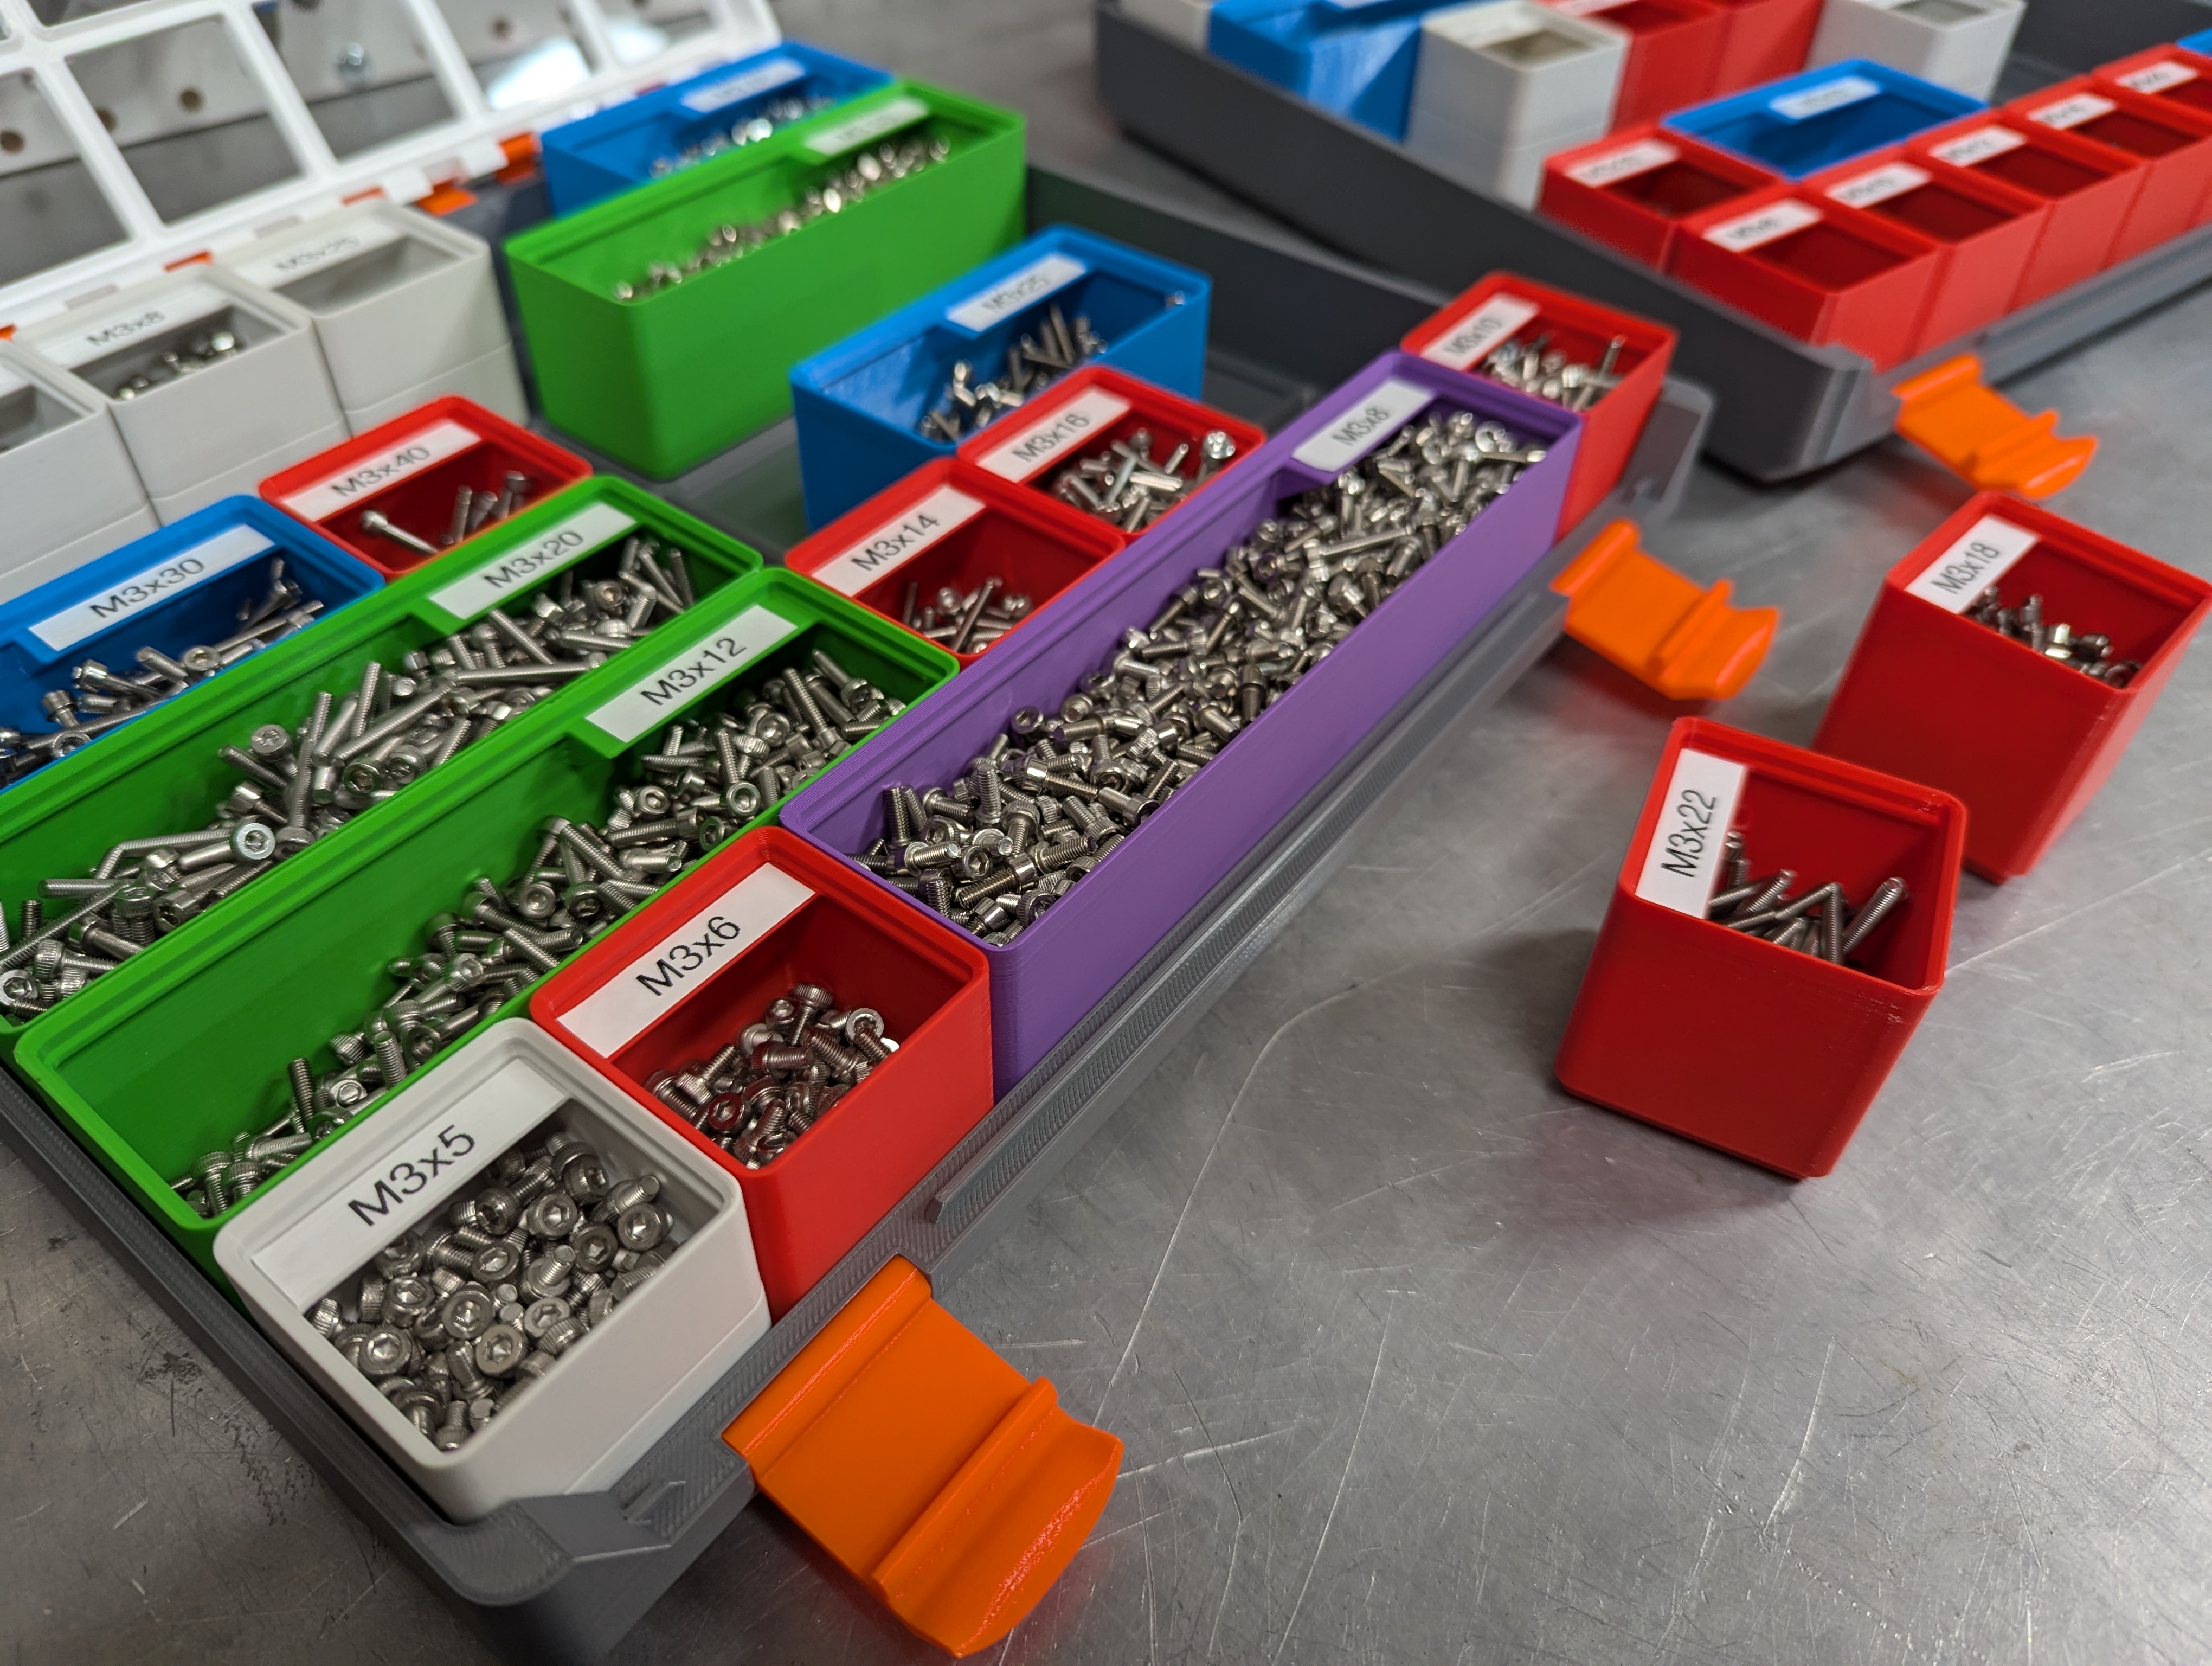
Accessories - The small bins in the pictures can be found here: Gridfinity Deep 1x1 Bins
- Andreas Mass designed a divider add-on to keep parts from mixing in divided bins.
- Louis set up a configurable label maker for 3D printed labels.
- There's an excellent online bin generator: https://gridfinity.perplexinglabs.com/
Important print the calibration part first. It will save you a lot of effort later!
The case was designed for 0.2mm layers and 0.4mm nozzle. A 0.6mm nozzle may work, but with Input Shaper the time savings are minimal. Layer heights other than 0.2mm may cause problems with fit as the design assumes 0.2mm. 0.1mm might work, but I don't have the patience to try it.
Change Log Rev1: - Initial release
Rev2: - 100% compatible with rev1 parts!
- Added support for magnets in the case
- Allowed for thinner sheet material
- Added “window” part for printing a solid color top without supports
- Opened up the upper short-link passage to make assembly easier
Updated name to “Modern Gridfinity Case” per feedback that it wasn't exactly minimalist.
Required materials - Filament of your choice, I tested PETG and PLA. You'll need extra filament for the hinge pins. The pictured examples are printed in Printed Solid Jessie PETG in white , gun metal grey and mystery orange .
- PET or acrylic sheet, between 0.75mm and 0.85mm thick. This can often be bought as picture/poster frame replacement ‘glass’. You can use up to 1.8mm sheet but will need to re-export the file from onshape with your material thickness specified. The material I purchased was listed as 1mm thick but is actually 0.8mm.
Variants I have included projects for 3 sizes, for the Prusa MINI+ the Prusa MK4 and the Prusa XL with and without a window. If you would like a different size or options you can export your own from onshape . An onshape account is required. You can get a free onshape account by signing up here .
Options - X units: Number of 42mm Gridfinity Units wide the case is. Valid values: 2-8
- Y units: Number of 42mm Gridfinity Units deep the case is. Valid values: 1-8
- Z Units: How many 7mm Gridfinity Units high is the interior of the case. Valid values: 6-24
- Window: Include a space for a window. For non-window designs this volume is filled with plastic. Supports recommended for these areas.
- Window thickness: Actual material thickness of the window material. Valid values are 0.55mm - 1.8mm
- Label: Add a removable label holder to the lid. (Doesn't work for X < 4)
- Vertical Pin: The amount to grow vertical 1.8mm bores to compensate for 3D printing tolerances (see: Cablibration) Valid values: +0mm - +0.6mm
- Horizontal Pin: The amount to grow horizontal 1.8mm bores to compensate for 3D printing tolerances (see: Cablibration) Valid values: +0mm - +0.6mm
Calibration Start by printing the calibration part using the same printer, material and settings that you intend to use for the case. Using the same filament test to see which horizontal and vertical holes the filament passes through. You want to pick the size that's the smallest that it can easily pass. If you aren't sure, go up a size.
If +0.3 for vertical and +0.1 for horizontal work on your calibration part then you can print the project files included here. Otherwise I strongly recommend you export custom models.
Slicing All parts use the following settings:
- 0.4mm nozzle
- 0.2mm layer height
- 15% grid infill
Latch : use 3 perimeters
Label with window: Add a pause for window insertion.
Cover:
- Supporting the latch bump is recommended
If you are printing with a window:
- Add a pause for window insertion. Note this pause height. This should be at you window thickness (rounded to 0.2mm) plus 2mm. Example: for 0.8mm sheet it is at 2.8mm. For 1.55mm sheet the pause should land at 3.6mm.
- Add a height modifier spanning the pause height: bridge infill direction 45 or 135 degrees so it is opposite the next layer direction.
- Add a sacrificial pillar as tall as the pause height. Move it before the cover in the parts list to ensure it prints first. This gives the extruder time to prime the nozzle after the filament change.
If you are not printing with a window, I recommend supporting the "window" openings. You also have the option to print a solid “window” part to insert, which means no supports and a very smooth surface!
Case: The rotation of the case compared to the cover is intentional. This ensures that any small skew in your printer doesn't cause a warp in the case.
Note: If you are using Bambu Studio and have trouble with the small holes, try disabling "Auto circle contour-hole compensation"
Printing Bed adhesion is of critical importance in these parts. If the case top or bottom lifts during printing then you will have gaps at the parting line or bins won't fit in the corner spots. For this reason I have provided custom brims, I recommend using them. Even with them you may have a small amount of lift in the corners, and this is usually ok.
If you are printing PLA I recommend a smooth bed over satin, it has better adhesion. For PETG I recommend a satin bed over a textured bed.
Inserting the window The window dimensions are included in the file name. For instance for the MK3/MK4 sized cover the window dimensions are 208mm x 166mm. There is a +/- 0.5mm tolerance on these dimensions so you can get away cutting the sheet by hand with a hobby knife, or even using scissors.
If you are printing with the window, you will need to insert it when the printer pauses. Because of the heat of the bed the thin sheet will want to warp upwards in the corners as the bottom of the sheet expands. There are small hold downs in the corners that you must slip the corners of the sheet under.
To ease the insertion of the sheet, lay a ruler front to back across the part. Place the sheet over the ruler and insert the sheet under the tie downs on one side. Then while holding the other side of the sheet, twist the ruler to bow the sheet up in the middle. Then tuck the sheet under the remaining tie downs and flatten the ruler again.
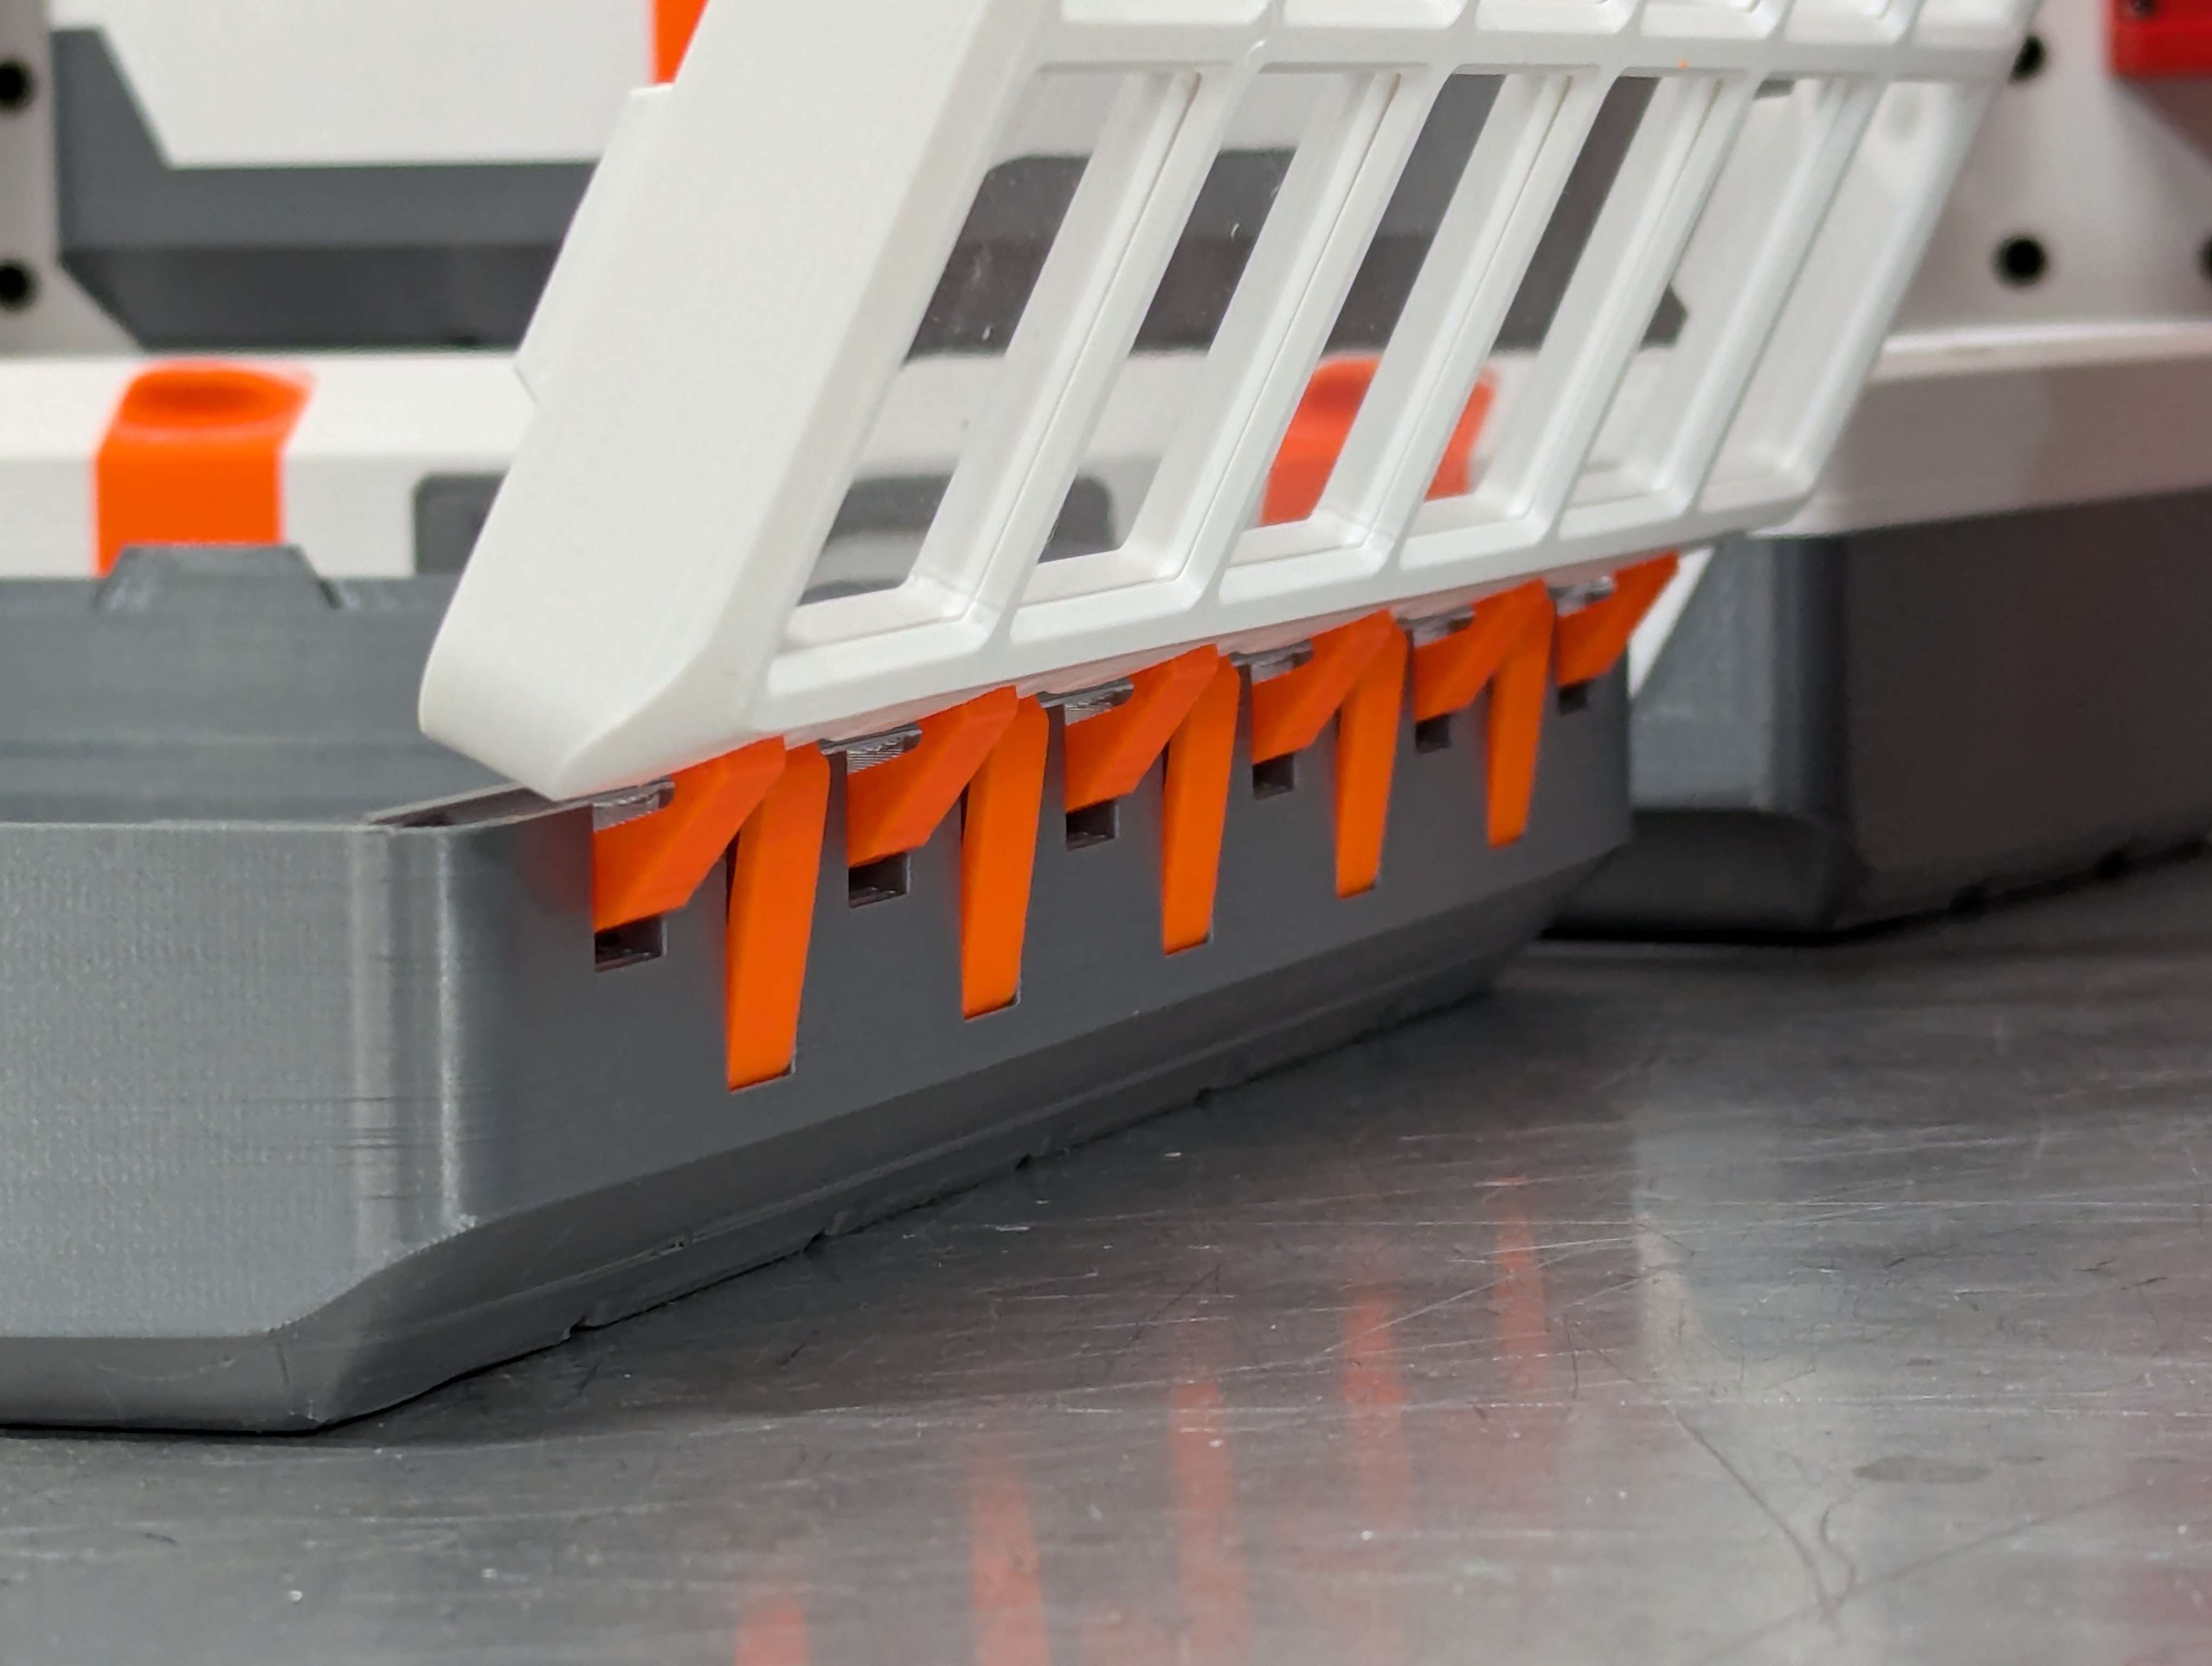
Assembly Before assembling, make sure that you can push filament through the holes in the hinge and latch parts. Occasionally these will be tight due to a stray bit of polymer in the passage. It's really important that the filament pass through the links easily.
Refer to the image below to see how the links fit into the case. Note that the groove in the long link faces outwards and is closer to the cover.
Place a short link in one of the openings at the end and start pushing filament through. Continue til the filament exists the other side. This is the hardest part! If you encounter too much friction try pushing the filament through without the links first to see if there's a tight spot.
You may need to guide the filament into the next hole as it crosses a gap. Once you reach the end, cut off the filament and let it drop into the hole.
Repeat with the long links. Remember that the groove in the long Link faces outwards .
If you have trouble inserting the filament hinge pins:
- Cut a point on the end of the filament
- Check that the end isn't mushroomed out, cutting can do that.
- Try sanding the length of the filament a little, this especially helps with rough filaments.
Now place the cover onto the case in the open position. Align the hinge links and insert the two filaments the same as before.
Repeat this process with the latch(es)
Insert the label holder and you are done!
Source You can view, export or copy the original design here: https://cad.onshape.com/documents/d20cadaa1c3b0edd42f01e06
License These files are licensed under the MIT license just like the core gridfinity designs. Printables currently doesn't have an option for this license.
License

Files
Model files
Download all files
case_2x2x6_rev2.3mf
case_magnets_2x2x6_rev2.3mf
cover_2x2_no_window_rev2.3mf
cover_2x2_window_82x82_rev2.3mf
latches_links_2x_rev2.3mf
window_82_82_rev2.3mf
case_3x1x6_rev2.3mf
case_magnets_3x1x6_rev2.3mf
cover_3x1_no_window_rev2.3mf
cover_3x1_window_124x40_rev2.3mf
latches_links_3x_rev2.3mf
window_124_40_rev2.3mf
case_3x2x6_rev2.3mf
case_magnets_3x2x6_rev2.3mf
cover_3x2_no_window_rev2.3mf
cover_3x2_window_124x82_rev2.3mf
latches_links_3x_rev2.3mf
window_124_82_rev2.3mf
case_3x3x6_rev2.3mf
case_magnets_3x3x6_rev2.3mf
cover_3x3_no_window_rev2.3mf
cover_3x3_window_124x124_rev2.3mf
latches_links_3x_rev2.3mf
window_124_124_rev2.3mf
case_4x3x12_rev2.3mf
case_4x3x6_rev2.3mf
case_magnets_4x3x12_rev2.3mf
case_magnets_4x3x6_rev2.3mf
cover_4x3_no_window_rev2.3mf
cover_4x3_window_166x124_rev2.3mf
label_4x_window_16x38_rev2.3mf
label_solid_4x_rev2.3mf
latches_links_4x_rev2.3mf
window_166_124_rev2.3mf
case_4x4x6_rev2.3mf
case_magnets_4x4x6_rev2.3mf
cover_4x4_no_window_rev2.3mf
cover_4x4_window_166x166_rev2.3mf
label_4x_window_16x38_rev2.3mf
label_solid_4x_rev2.3mf
latches_links_4x_rev2.3mf
window_166_166_rev2.3mf
case_5x3x6_rev2.3mf
case_magnets_5x3x6_rev2.3mf
cover_5x3_no_window_rev2.3mf
cover_5x3_window_208x124_rev2.3mf
label_5x_window_16x63_rev2.3mf
label_solid_5x_rev2.3mf
latches_links_5x_rev2.3mf
window_208_124_rev2.3mf
case_5x4x12_rev2.3mf
case_5x4x6_rev2.3mf
case_magnets_5x4x6_rev2.3mf
cover_5x4_no_window_rev2.3mf
cover_5x4_window_208x166_rev2.3mf
label_5x_window_16x63_rev2.3mf
label_solid_5x_rev2.3mf
latches_links_5x_rev2.3mf
window_208_166_rev2.3mf
case_5x5x6_rev2.3mf
case_magnets_5x5x6_rev2.3mf
cover_5x5_no_window_rev2.3mf
cover_5x5_window_208x208_rev2.3mf
label_5x_window_16x63_rev2.3mf
label_solid_5x_rev2.3mf
latches_links_5x_rev2.3mf
window_208_208_rev2.3mf
case_6x2x6_rev2.3mf
case_magnets_6x2x6_rev2.3mf
cover_6x2_no_window_rev2.3mf
cover_6x2_window_250x82_rev2.3mf
label_6x_window_16x103_rev2.3mf
label_solid_6x_rev2.3mf
latches_links_6x_rev2.3mf
window_250_82_rev2.3mf
case_7x6x6_rev2.3mf
case_magnets_7x6x6_rev2.3mf
cover_7x6_no_window_rev2.3mf
cover_7x6_window_292x250_rev2.3mf
label_7x_window_16x128_rev2.3mf
label_solid_7x_rev2.3mf
latches_links_7x_rev2.3mf
window_292_250_rev2.3mf
case_8x5x6_rev2.3mf
case_magnets_8x5x6_rev2.3mf
cover_8x5_no_window_rev2.3mf
cover_8x5_window_334x208_rev2.3mf
label_8x_window_16x128_rev2.3mf
label_solid_8x_rev2.3mf
latches_links_8x_rev2.3mf
window_334_208_rev2.3mf
calibration-part-rev1.3mf
latch_3x_rev2.3mf
latch_4x_rev2.3mf
latch_5x_rev2.3mf
latch_6x_rev2.3mf
latch_7x_rev2.3mf
latch_8x_rev2.3mf
long-link_rev2.3mf
short-link_rev2.3mf